
Menu Management for Grubhub
Choose which LithosPOS menus are published to Grubhub, send menu changes with Sync menu to Grubhub, check the import result, and hide sold-out items on Grubhub from the Price Book.
The Grubhub menu of a store is built from the LithosPOS menus you publish to Grubhub, with prices from the store's Grubhub aggregator. You manage it from the Grubhub store console.
Open the menus of a store
- Log in to the Back Office at my.lithospos.com.
- Open the Grubhub store console: Integrations → Grubhub → Manage per-store configuration, or the Grubhub tab in Online Orders → Settings.
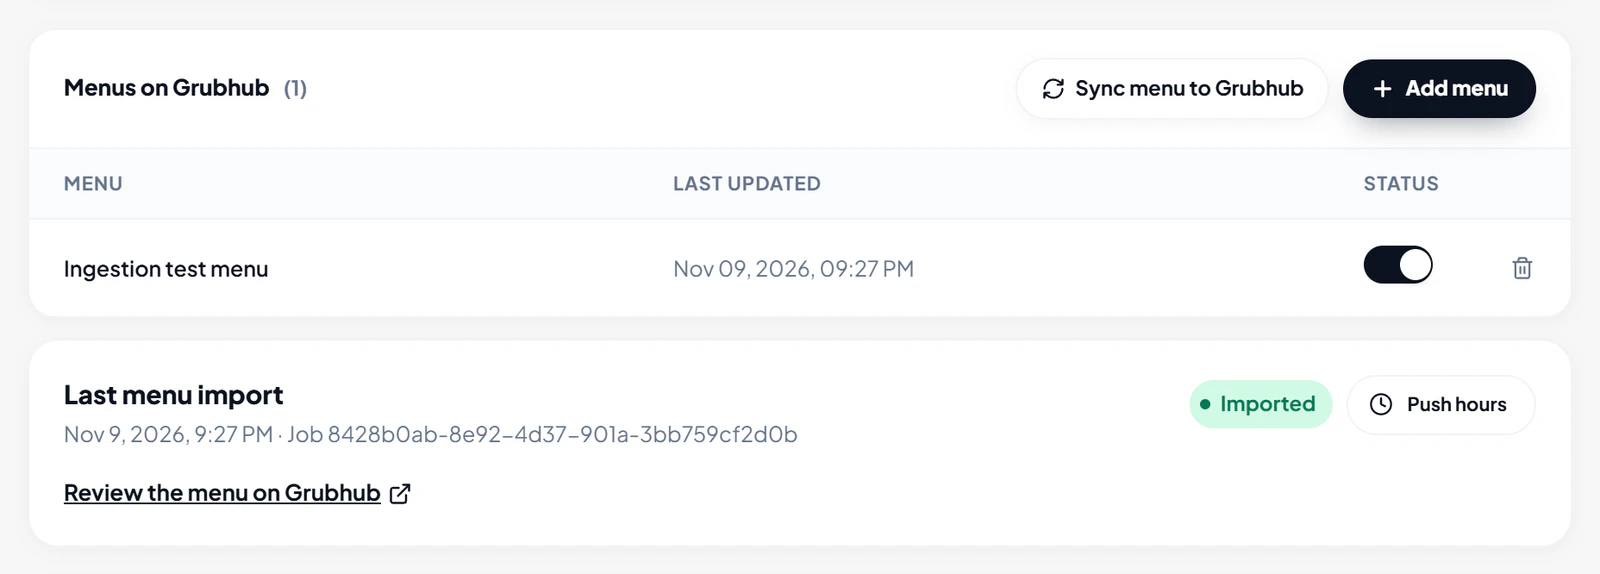
- Pick the store. Menus on Grubhub lists the menus published to Grubhub, and Last menu import shows the result of the latest send.
Add or remove menus
- Click + Add menu.
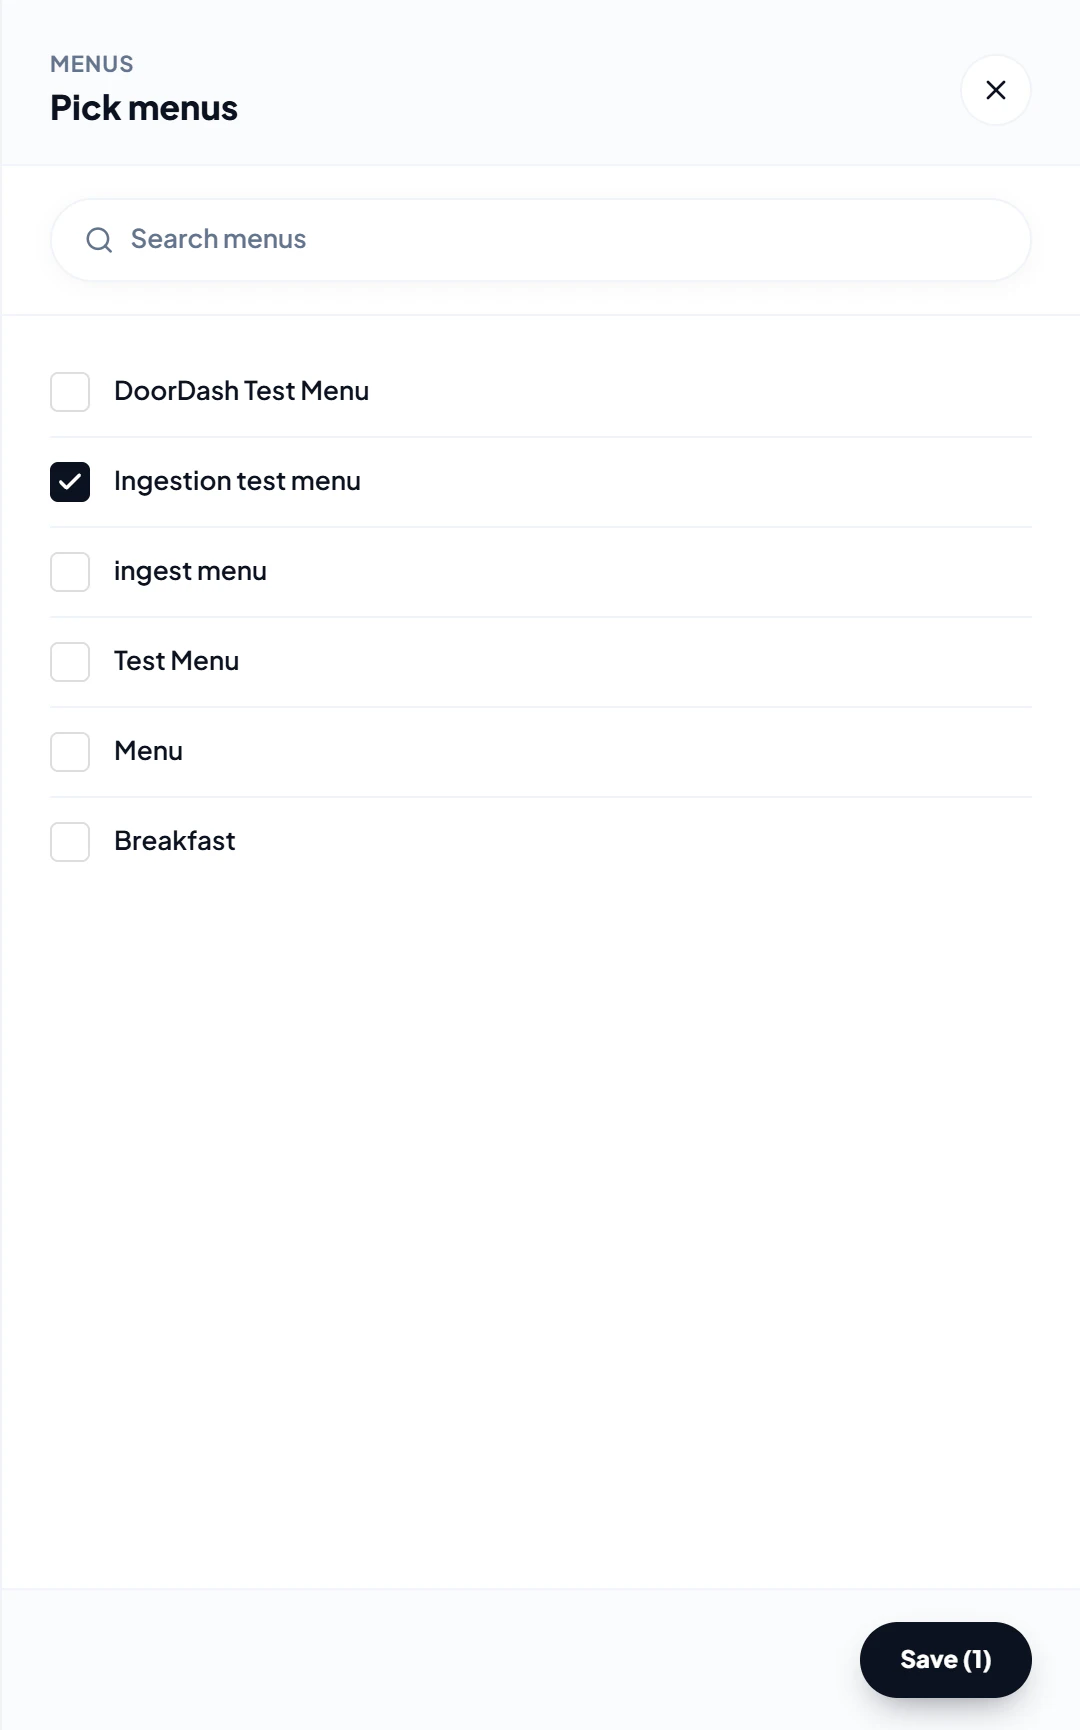
- In Pick menus, tick the menus to publish (use Search menus to find one) and click Save.
- To stop publishing a menu, switch its Status off or click the delete icon on its row.
- Click Save menus, or Cancel to undo your changes.
At least one menu must stay published. Saving changes the list only — the message "Menus saved. Sync the menu to send them to Grubhub." reminds you to send them.
Send menu changes to Grubhub
New items, price changes, category changes and newly published menus reach Grubhub when you sync:
- Click Sync menu to Grubhub.
- Grubhub imports the menu. Last menu import shows Importing, then Imported (or Failed), with the time and job number.
- Click Review the menu on Grubhub to check the result on Grubhub.
If Grubhub reports problems, they are listed under Grubhub reported problems with the menu. Fix them in LithosPOS and sync again.
Hide sold-out items on Grubhub
Item availability is sent to Grubhub automatically — you do not need to sync the menu.
- Go to Items → Price Book and choose the Grubhub-connected store.
- Turn off Aggregator Online for the item and click Save changes. LithosPOS hides it on Grubhub.
- When the item is available again, turn Aggregator Online back on and save. It reappears on Grubhub.
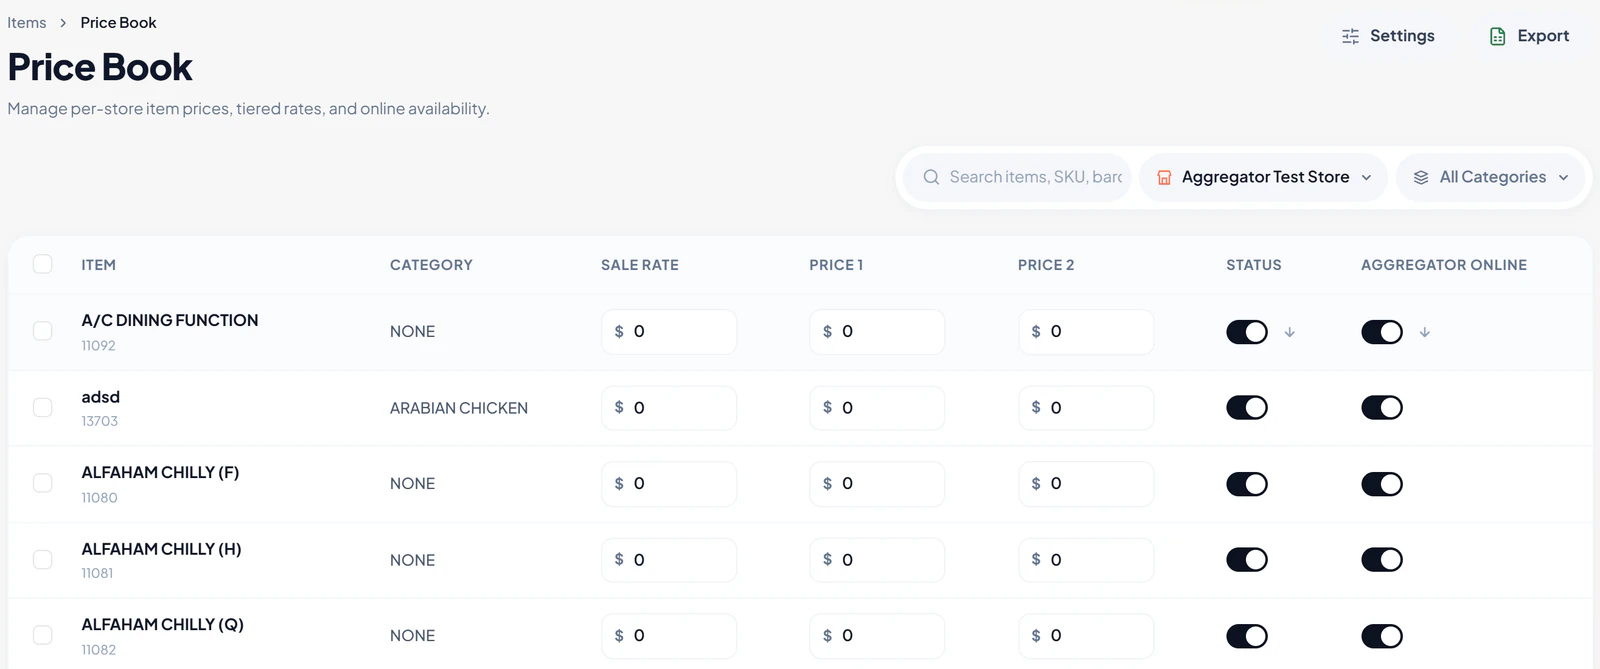
To change several items at once, tick them and use Disable All For Online or Enable All For Online. Each change is recorded in the store's Event log.
Connect with us to know more
To learn more about it feel free to book a meeting with our team
Was this article helpful?