
Receipt
Customize your receipts with your business logo, titles, and footer text to create a professional and branded customer experience.
Updated
This allows you to personalize how your receipts appear to your customers. You can adjust the text for titles and footers, and upload your business logo to ensure that each receipt reflects your brand's identity. Make sure to save your changes to ensure that they are applied to all future receipts.
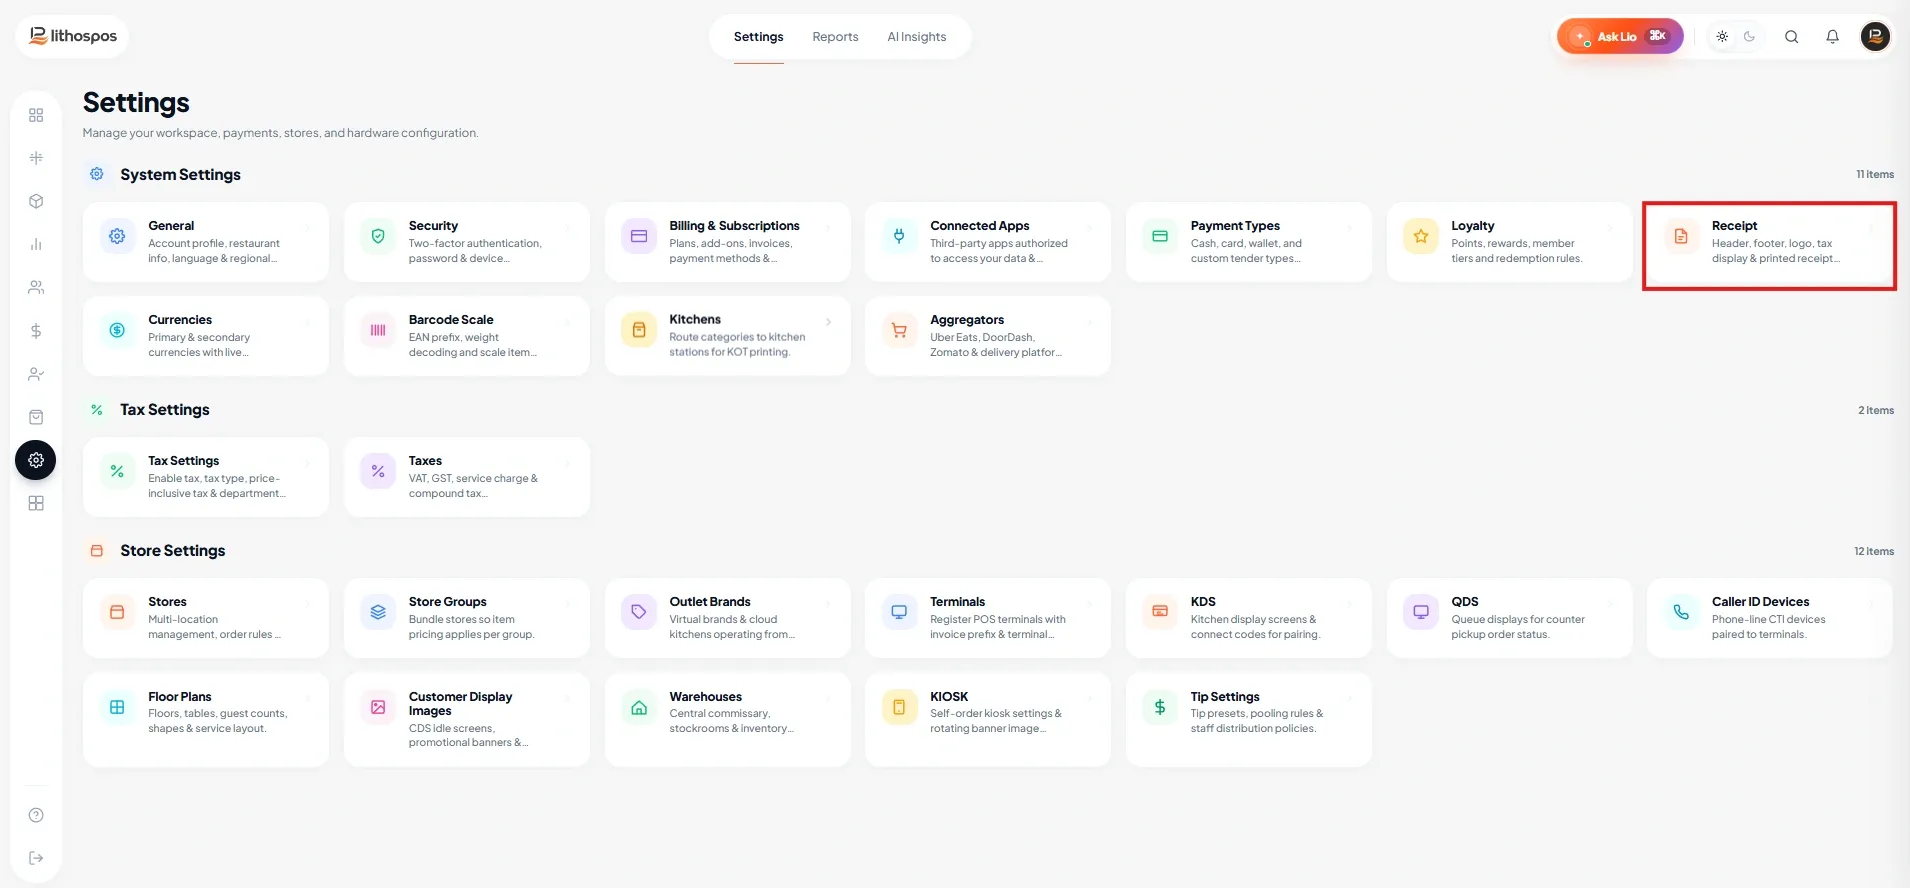
- Login to back office and go to ‘Settings’ and then choose ‘Receipt’ from the Side menu.
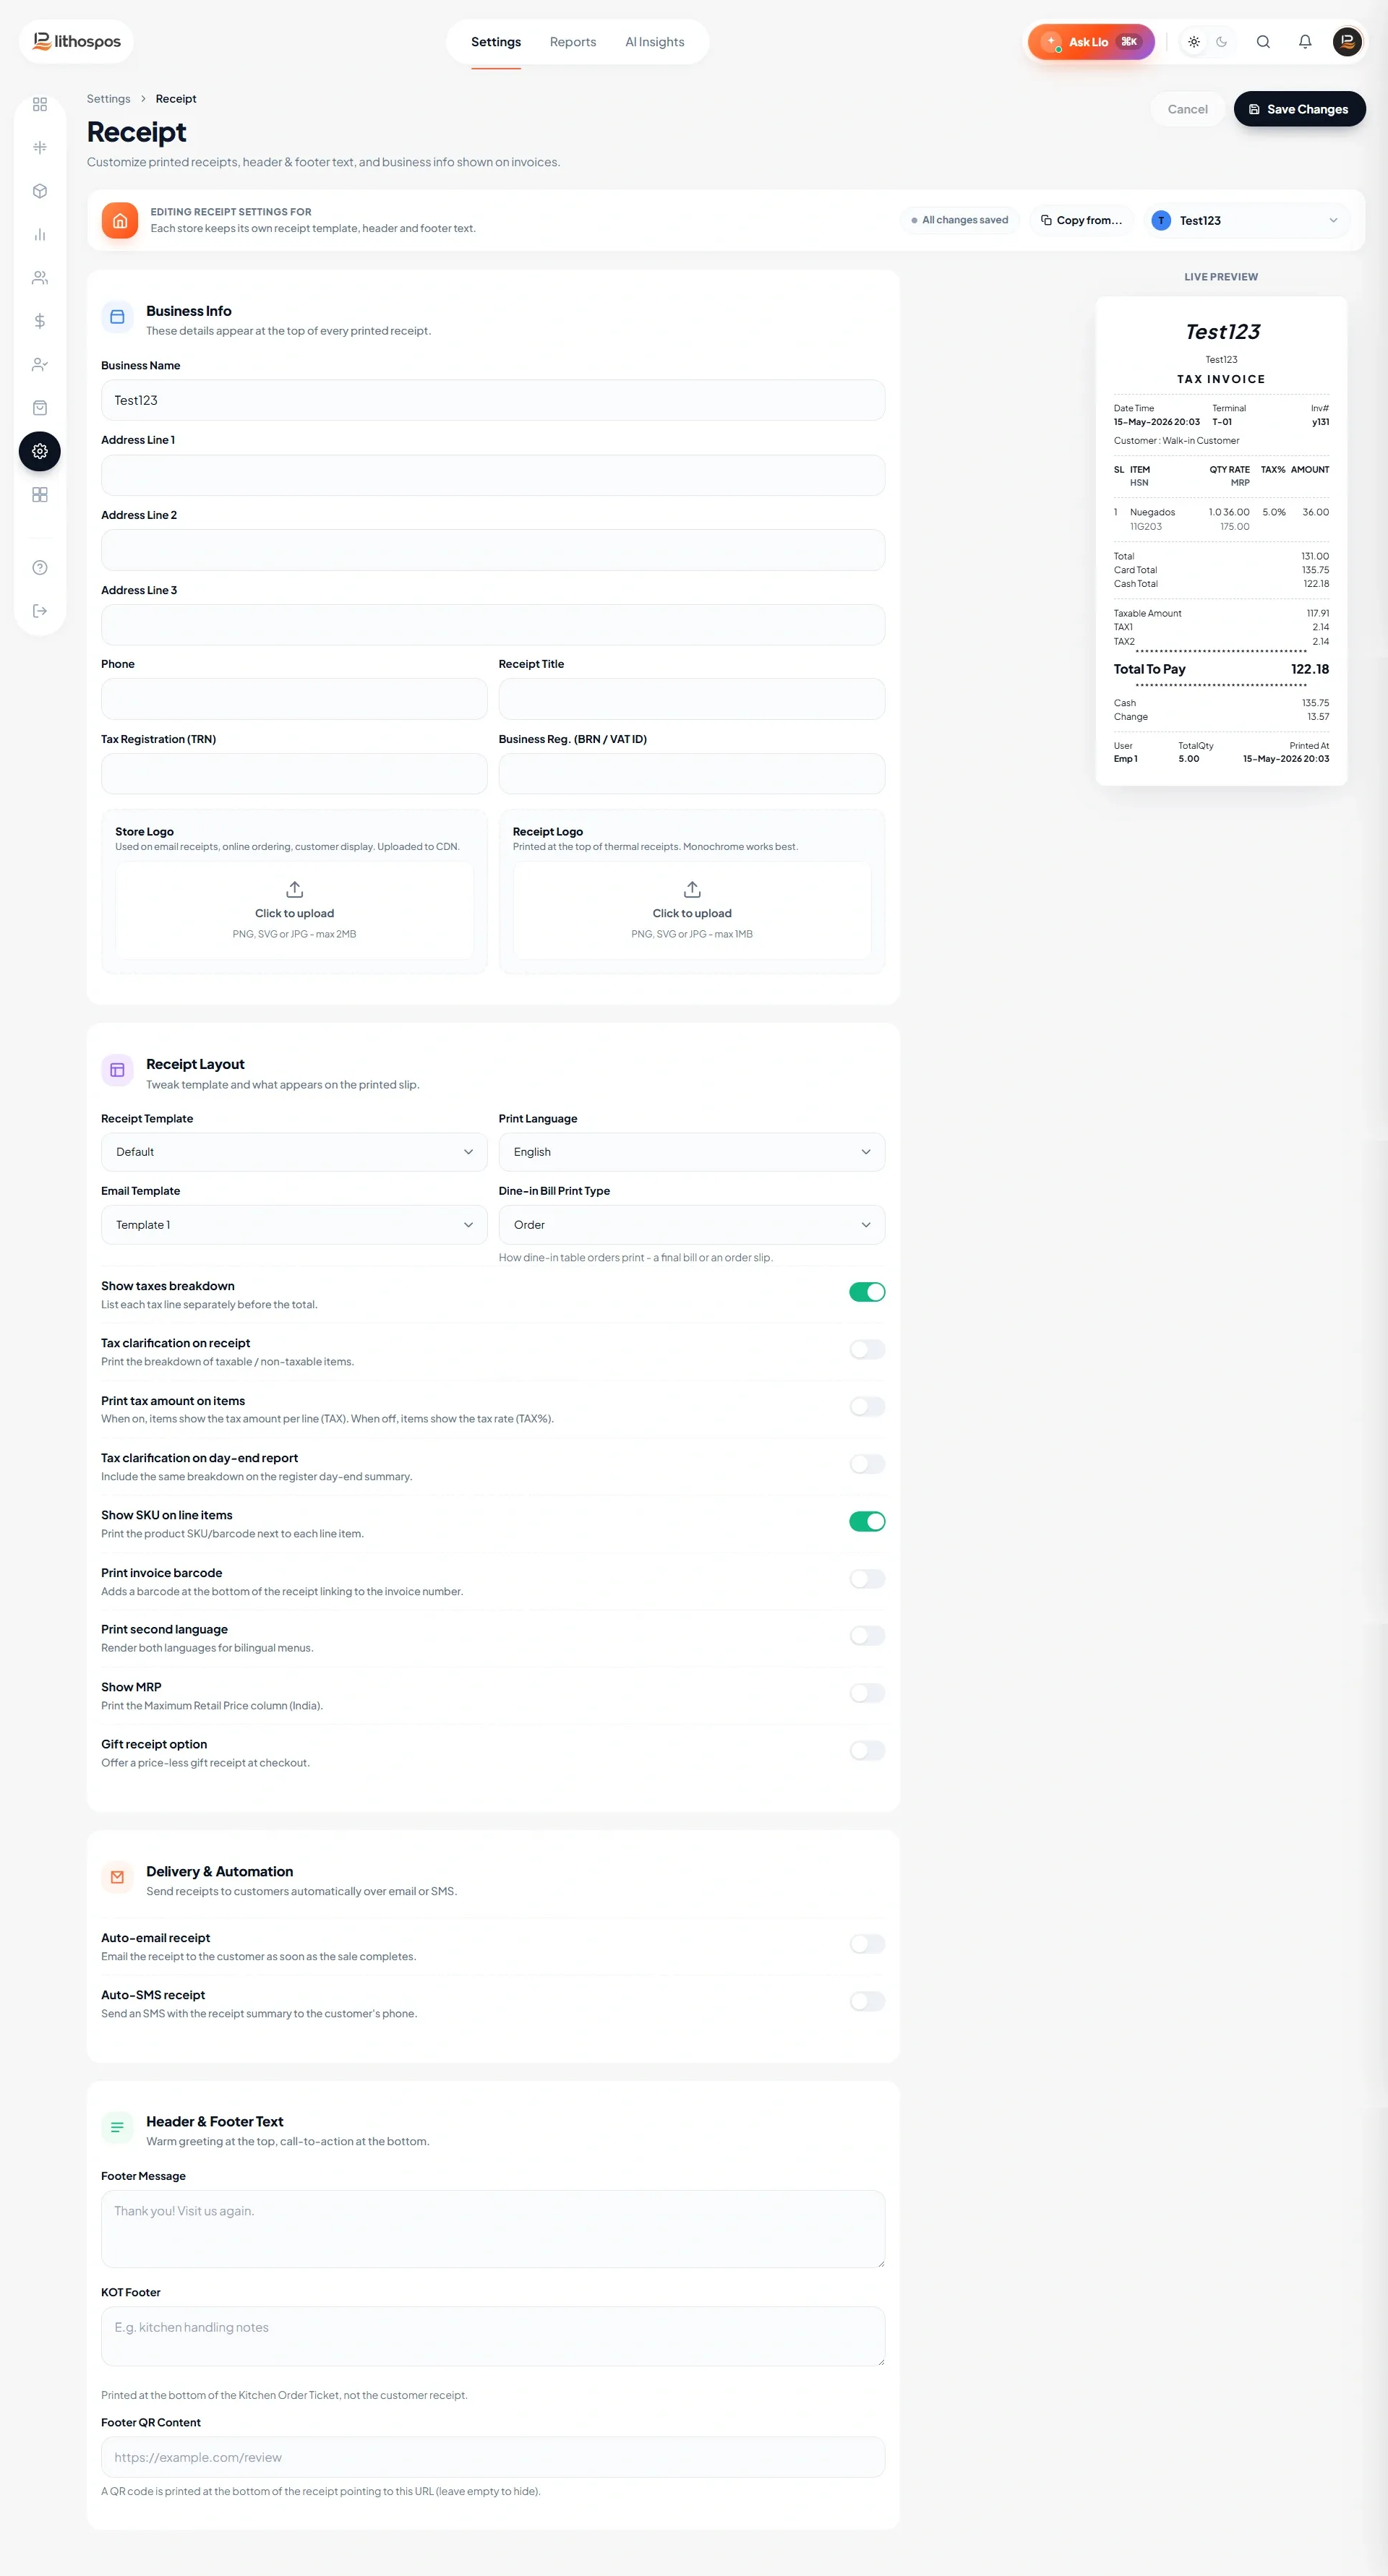
- If you've added multiple stores, choose which stores this receipt applies to
- Enter Business name, Address, Phone number, Tax Registration (TRN), Business Reg. (BRN / VAT ID).
- Enter a receipt title: The title given here will be printed on your Receipt and email. If you leave this column empty, the store name will be printed on your receipt.
- Upload the store logo: The maximum size allowed is 512x512 pixels, and the file size should not exceed 500KB. This logo will be displayed on the email receipt.
-
Then upload the receipt logo: with the same file size as the store logo (512x512, maximum
500KB). This logo will appear on the receipt. Use black and white images for a clear image view.
- Receipt Layout: Customize your receipt settings by selecting the receipt template, print language, email template, and dine-in bill print type.
Now configure the Toggle buttons
- Show taxes breakdown: Enable this option to display each tax separately before the total.
- Tax clarification on receipt: Enable this option to show a breakdown of taxable and non-taxable items on the receipt.
- Print tax amount on items: Enable this option to display the tax amount for each item. When disabled, the tax rate is displayed instead.
- Tax clarification on day-end report: Enable this option to include the taxable and non-taxable item breakdown in the register day-end report.
- Print second language: Enable this option to print the menu in both the primary and secondary languages.
- Print invoice barcode: Enable this option to print a barcode on the invoice for easy scanning and identification.
- Show payment QR on receipt: Enable this option to print a scannable pay-by-QR block so customers can settle from the receipt.
- Show SKU on line items: Enable this option to display the product SKU or barcode next to each item on the invoice.
- Show MRP in Receipt: Enable this to show the MRP on receipts. It is applicable only in specific
locations, such as India.
- Gift receipt option: Offer a price-free gift receipt at checkout.
- Auto Email: Activate this option to send the receipt via email to customers if their email is available in the customer data
- Auto SMS: Activate this option to send the receipt via SMS to customers if their Mobile number
is available in the customer data
- Enter a Receipt Footer Message: If you want to write in 2 lines enter a greater than (>) symbol
between the sentences.
- KOT Footer: Add custom notes or instructions that will appear in the footer of the Kitchen Order Ticket (KOT).
- Enter the Footer QR Content: Customers can scan it for additional information like promotional offers,
feedback forms, or your business website. Ensure the QR code is correctly linked and tested for a
seamless customer experience.
- Finally click submit to finish
Connect with us to know more
To learn more about it feel free to book a meeting with our team
Was this article helpful?