Razorpay POS Payment Integration in LithosPOS
LithosPOS supports integrated in-person payments through Razorpay POS, enabling you to process transactions swiftly and securely accepting debit cards and debit cards. This integration streamlines payments, reduces manual errors, and enhances overall business efficiency. For further assistance with Razorpay integration, feel free to contact our support team.
Configuring Razorpay POS Payment in LithosPOS Back Office
To add and configure Razorpay POS as a payment option in LithosPOS, follow these steps:
- Log in to the Back Office and select 'Settings' from the side menu.
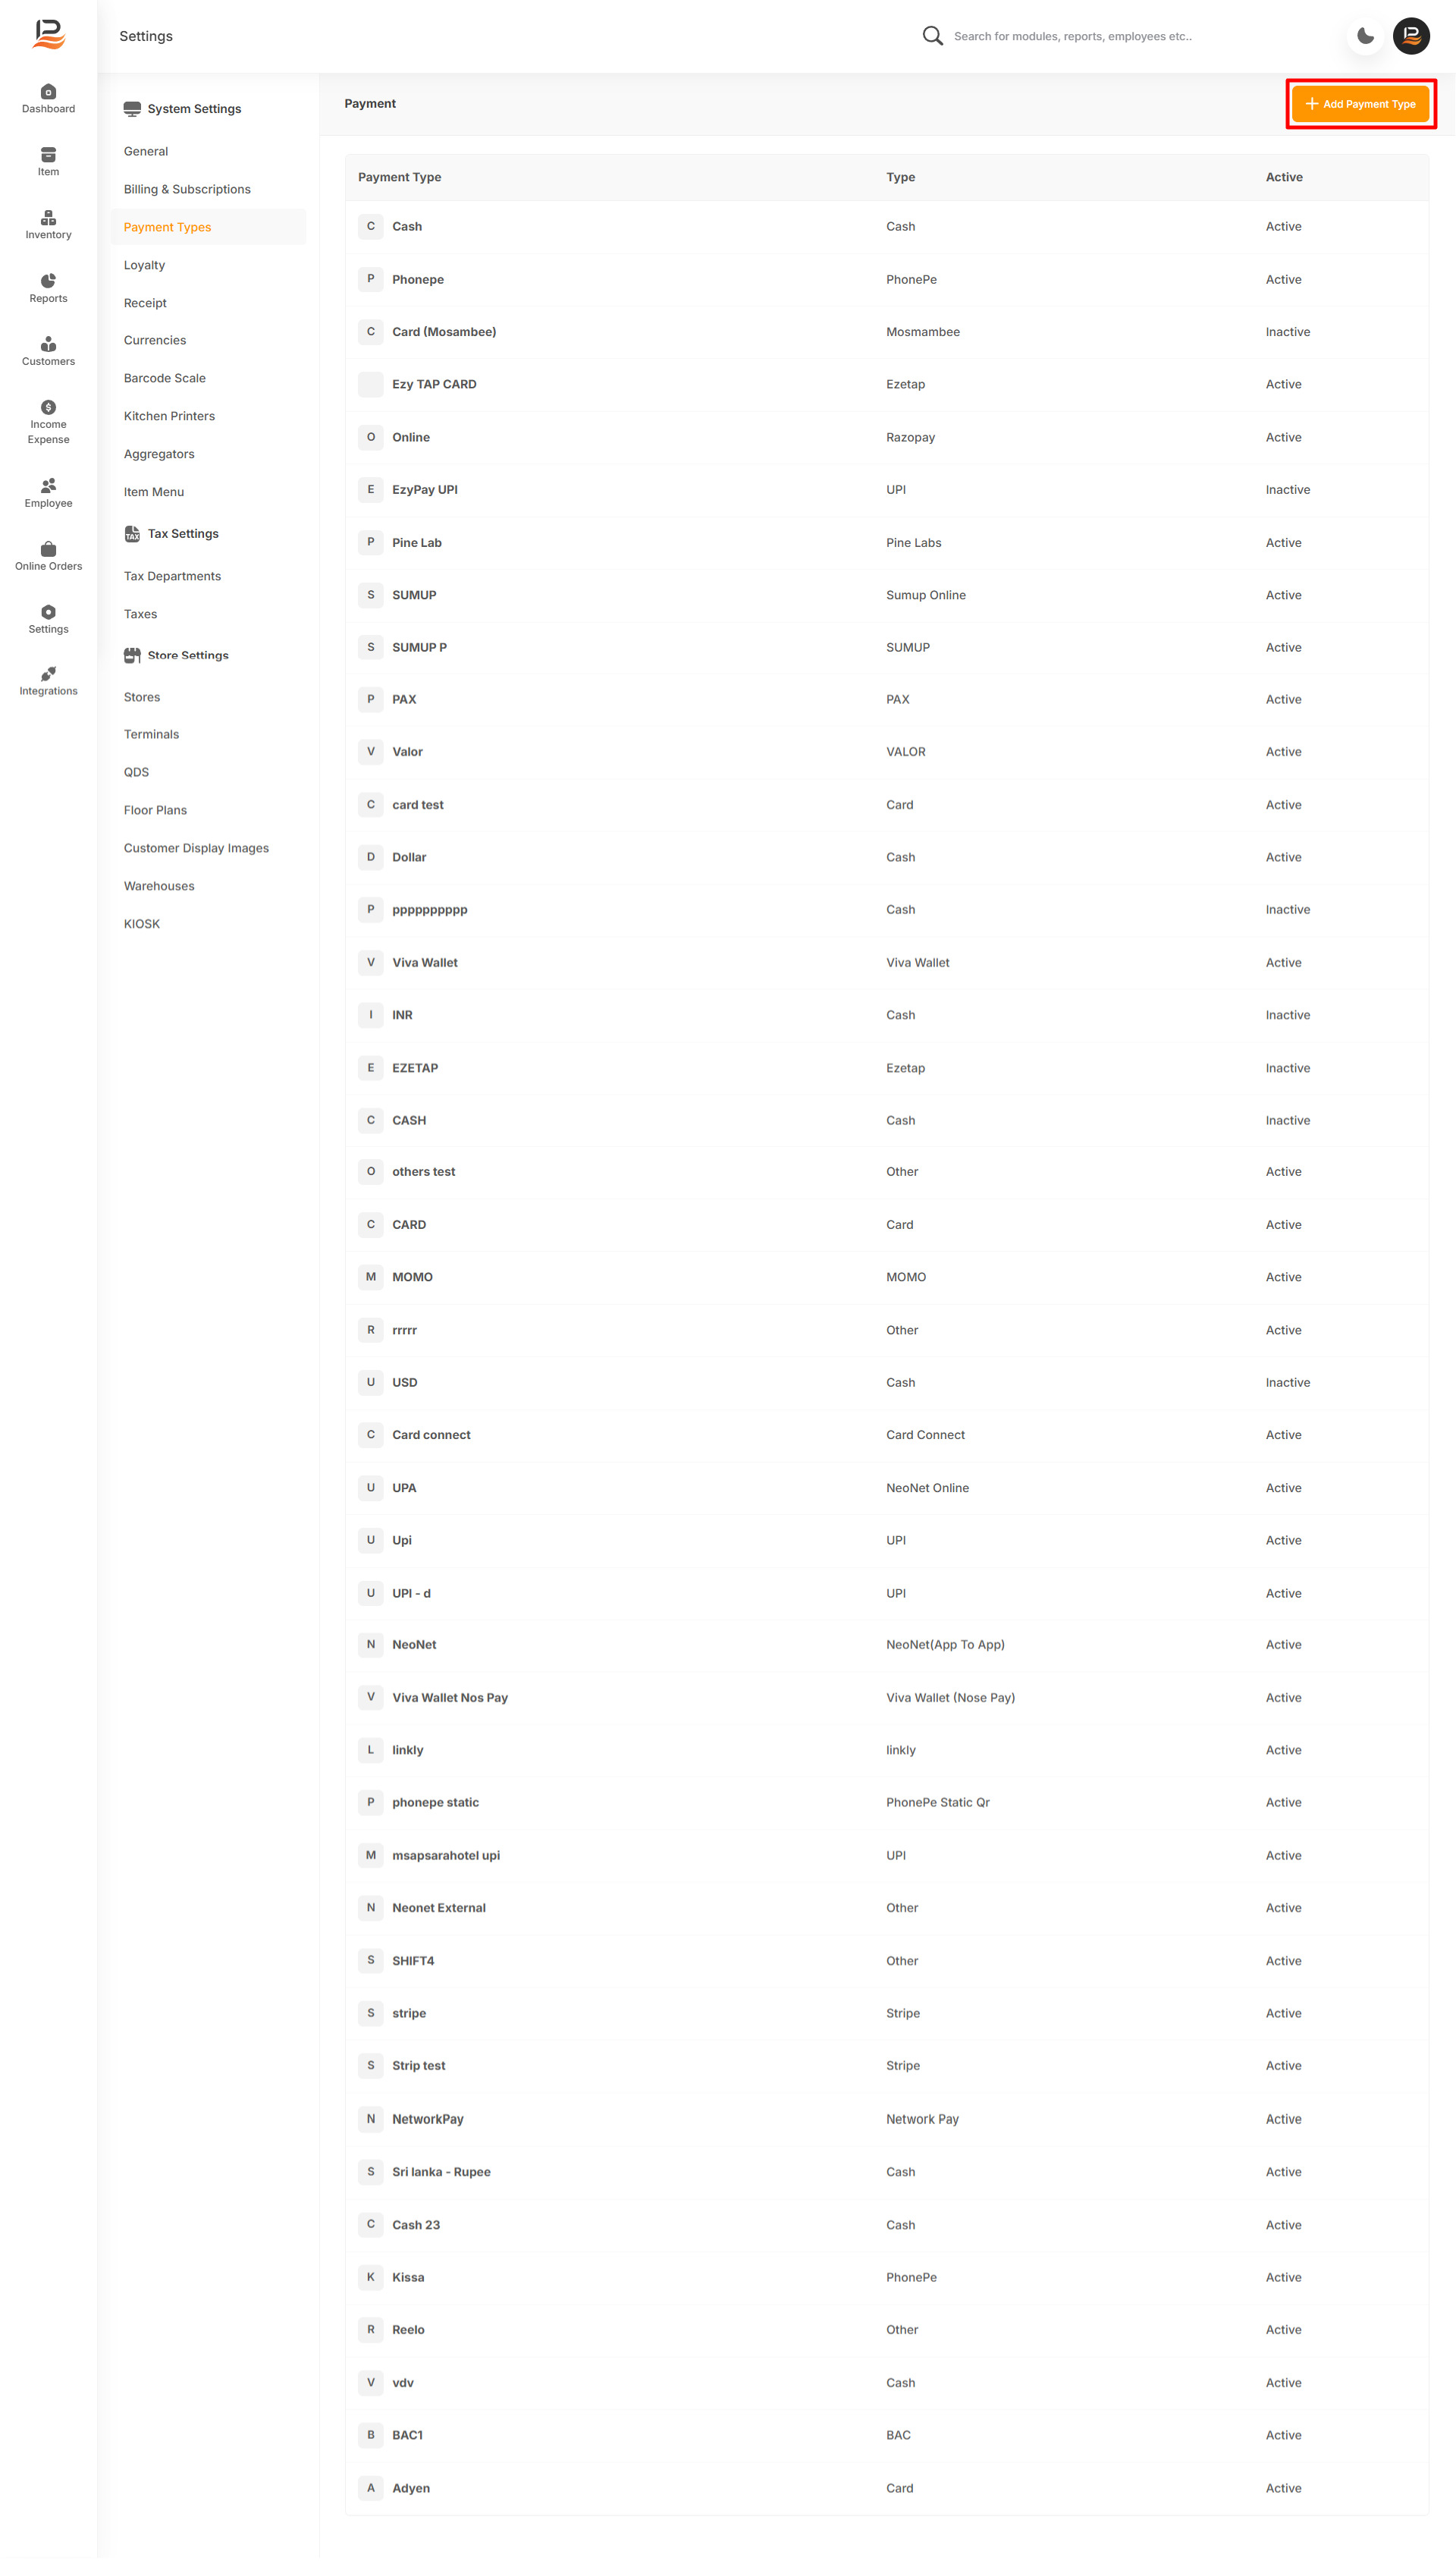
- Navigate to ‘Payment Types’.
- Click on ‘+ Add Payment Type’ at the top-right corner of the screen.
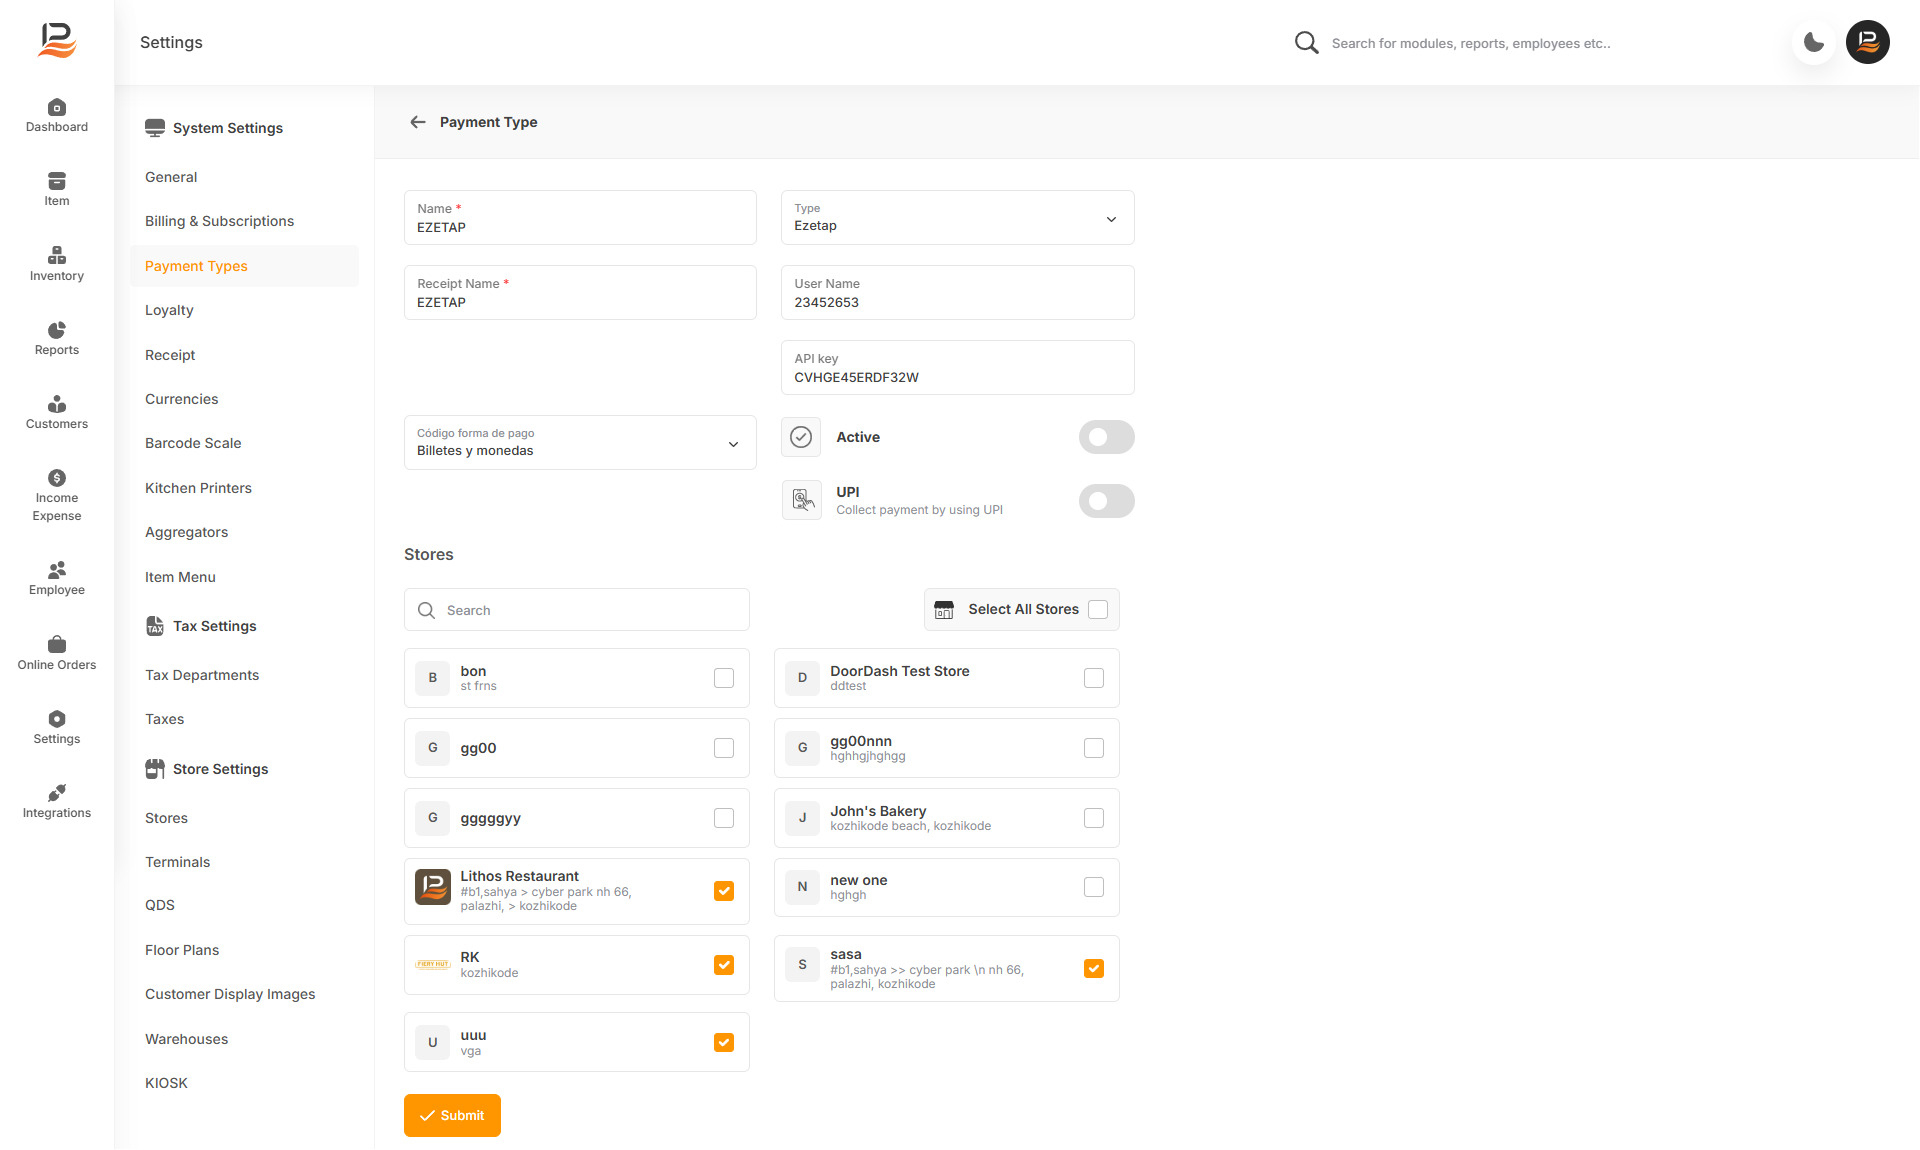
- In the Name field, enter 'Razorpay POS'—this will appear on the POS payment screen for easy identification.
- From the Type drop-down list, select Ezetap.
- In the Receipt Name field, type 'Razorpay POS' to define how it will appear on customer receipts.
- Enter the following details:
- Username
- API Key
- Toggle the UPI button to activate UPI payments using this integration.
- Toggle the Activate/Deactivate button to enable or disable this payment method.
- Under the Stores section, select the stores where you want Razorpay POS available.
- Click Submit to save the settings.
- After saving, sync your POS system to make the Razorpay POS payment option available during transactions.
Configuring Razorpay POS Settings in the POS System
To configure Razorpay settings directly on the POS:
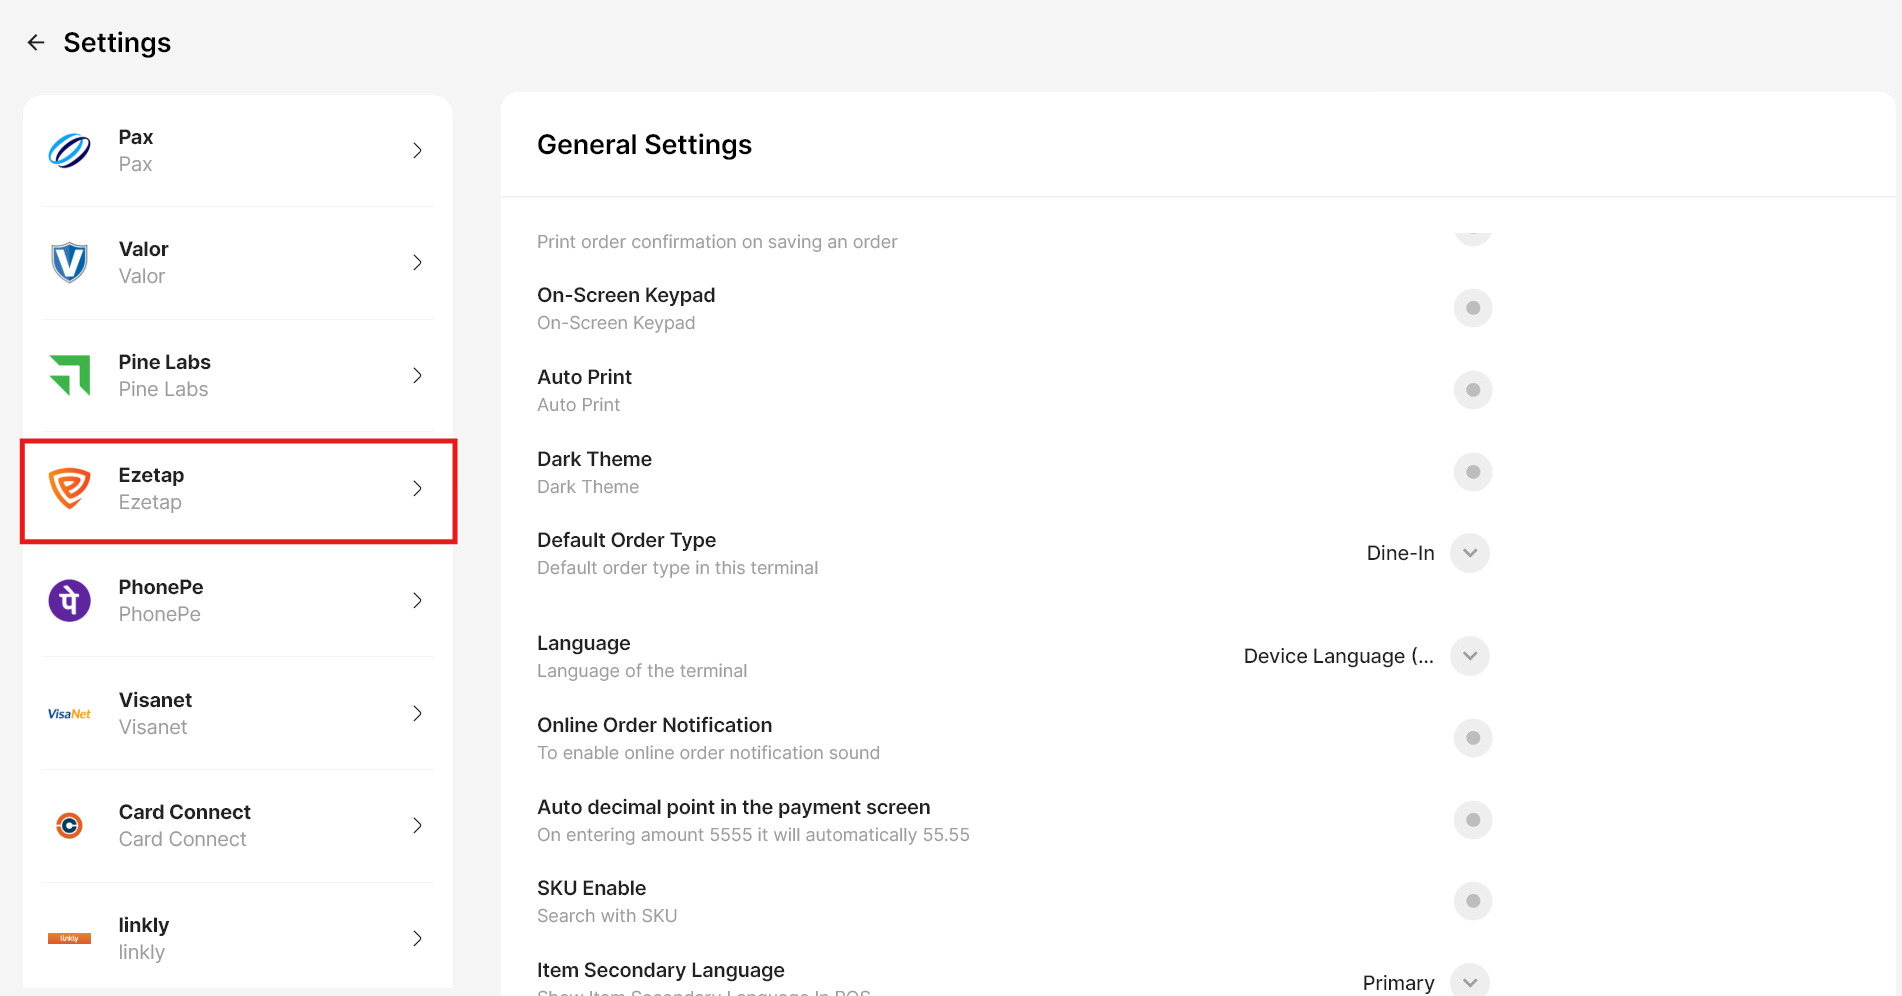
- Go to the POS billing screen, and click the four squares icon at the bottom left to access settings.
- Select Ezetap from the available options.
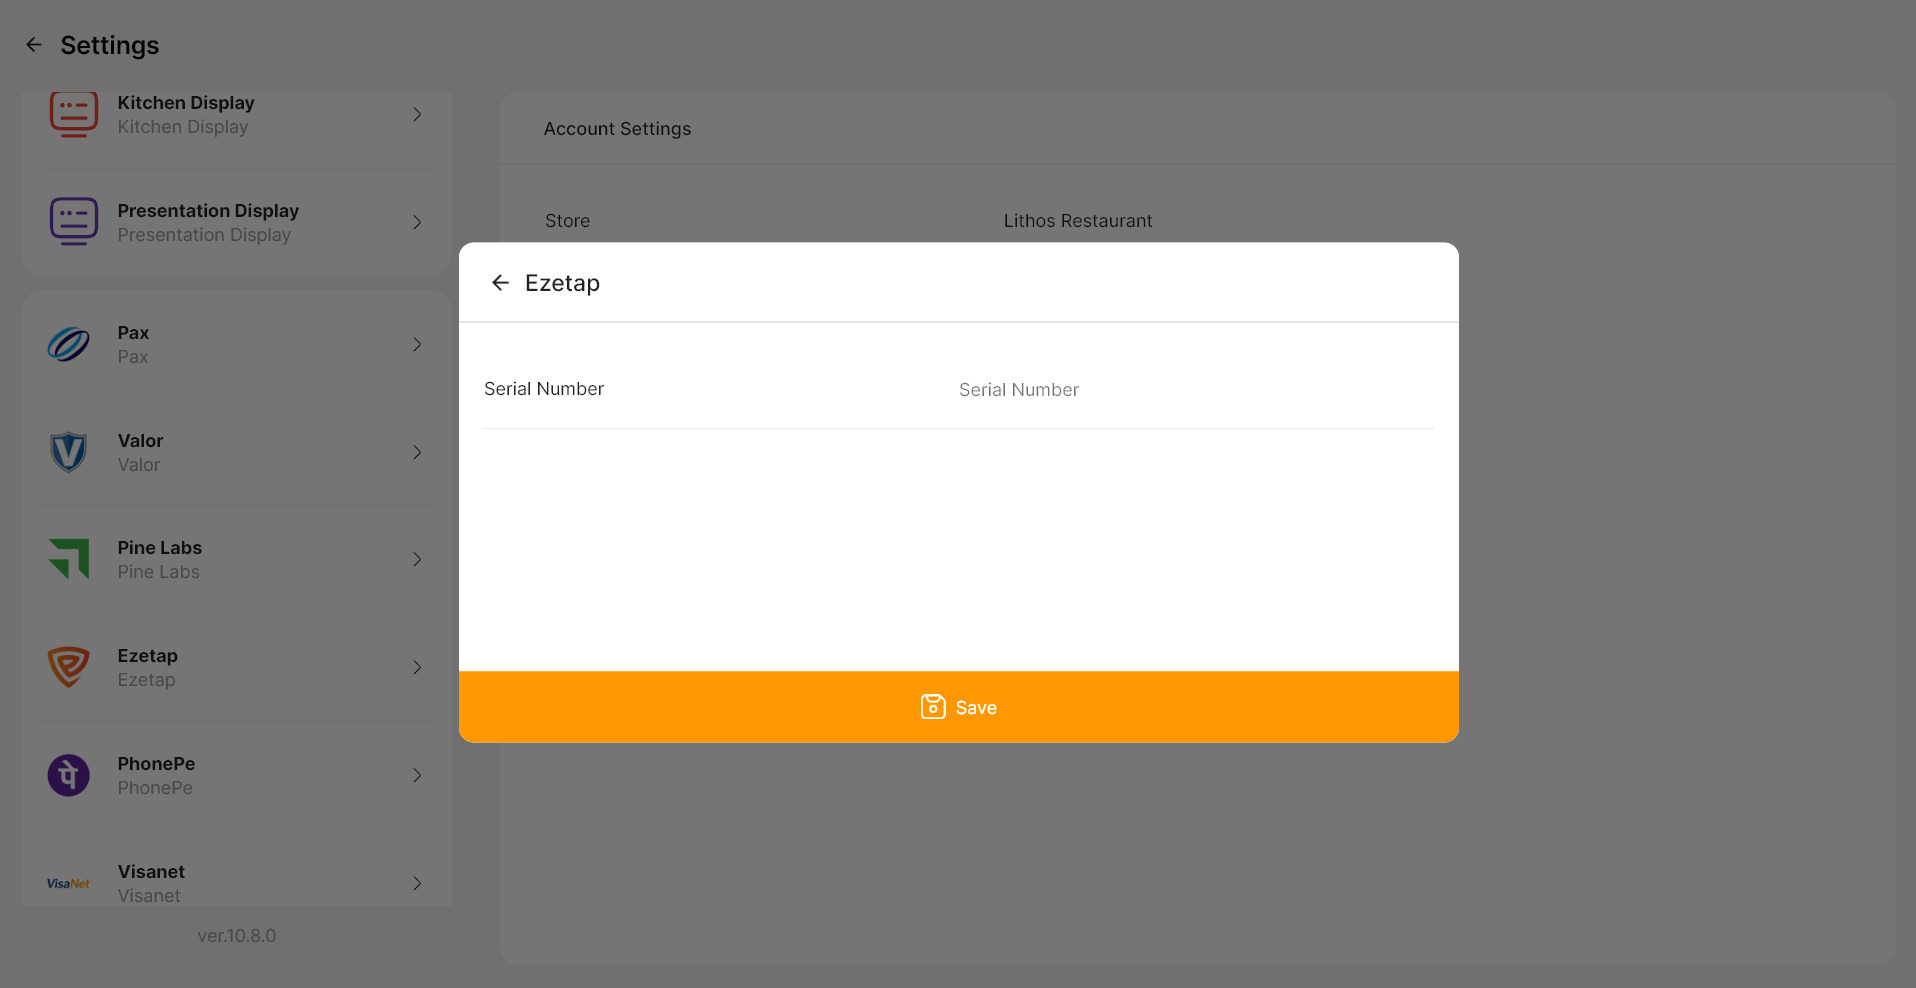
- Enter the Serial Number of the terminal.
- Click Save to apply the settings.
Connect with us to know more
To learn more about it feel free to book a meeting with our team


 LithosPOS


