POS Reports
The settings section of the POS app you can configure many hardware connections such as printers, scales, and many supporting apps ensuring smooth functionality. It allows you to quickly access sales and refund reports, shift history and more for better business insights. You can also view customer purchase history, manage integrated payment settings, and perform day-end and shift closures efficiently.
Navigate to POS Settings
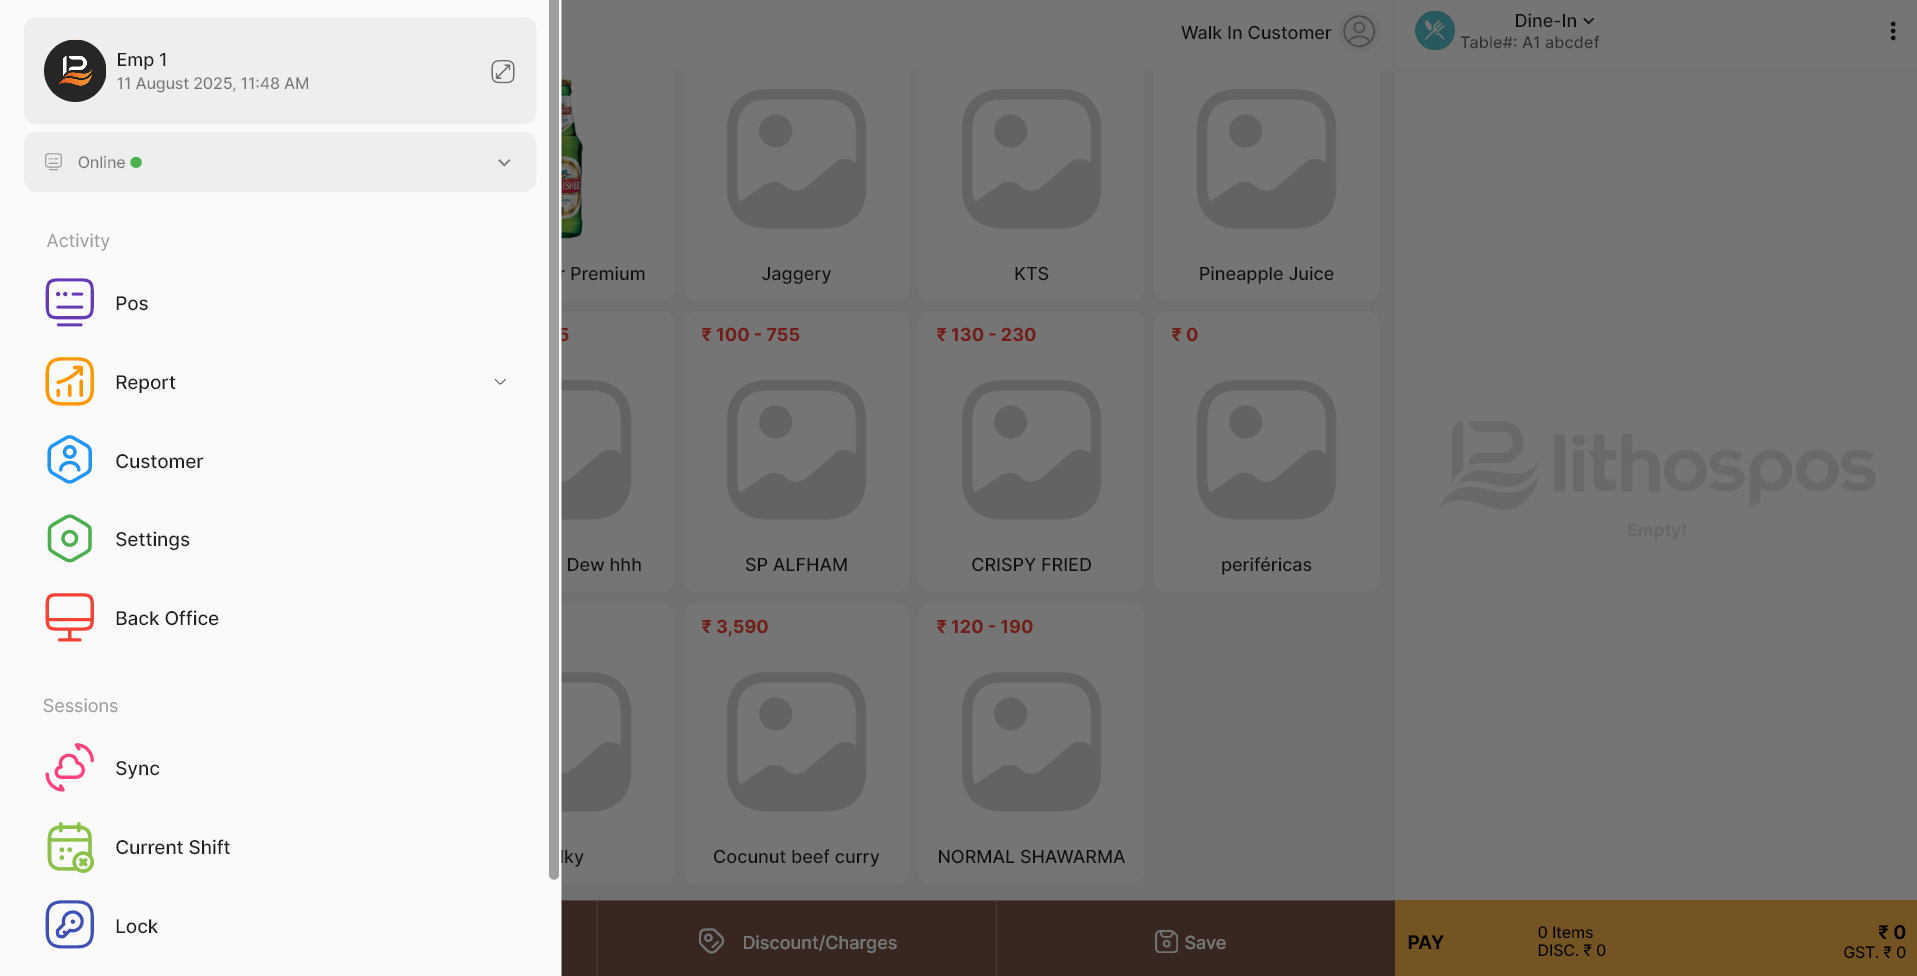
When you click on the square grid at the bottom left, a side window opens. The first tab in this window is POS, which will take you back to the POS billing screen.
Reports
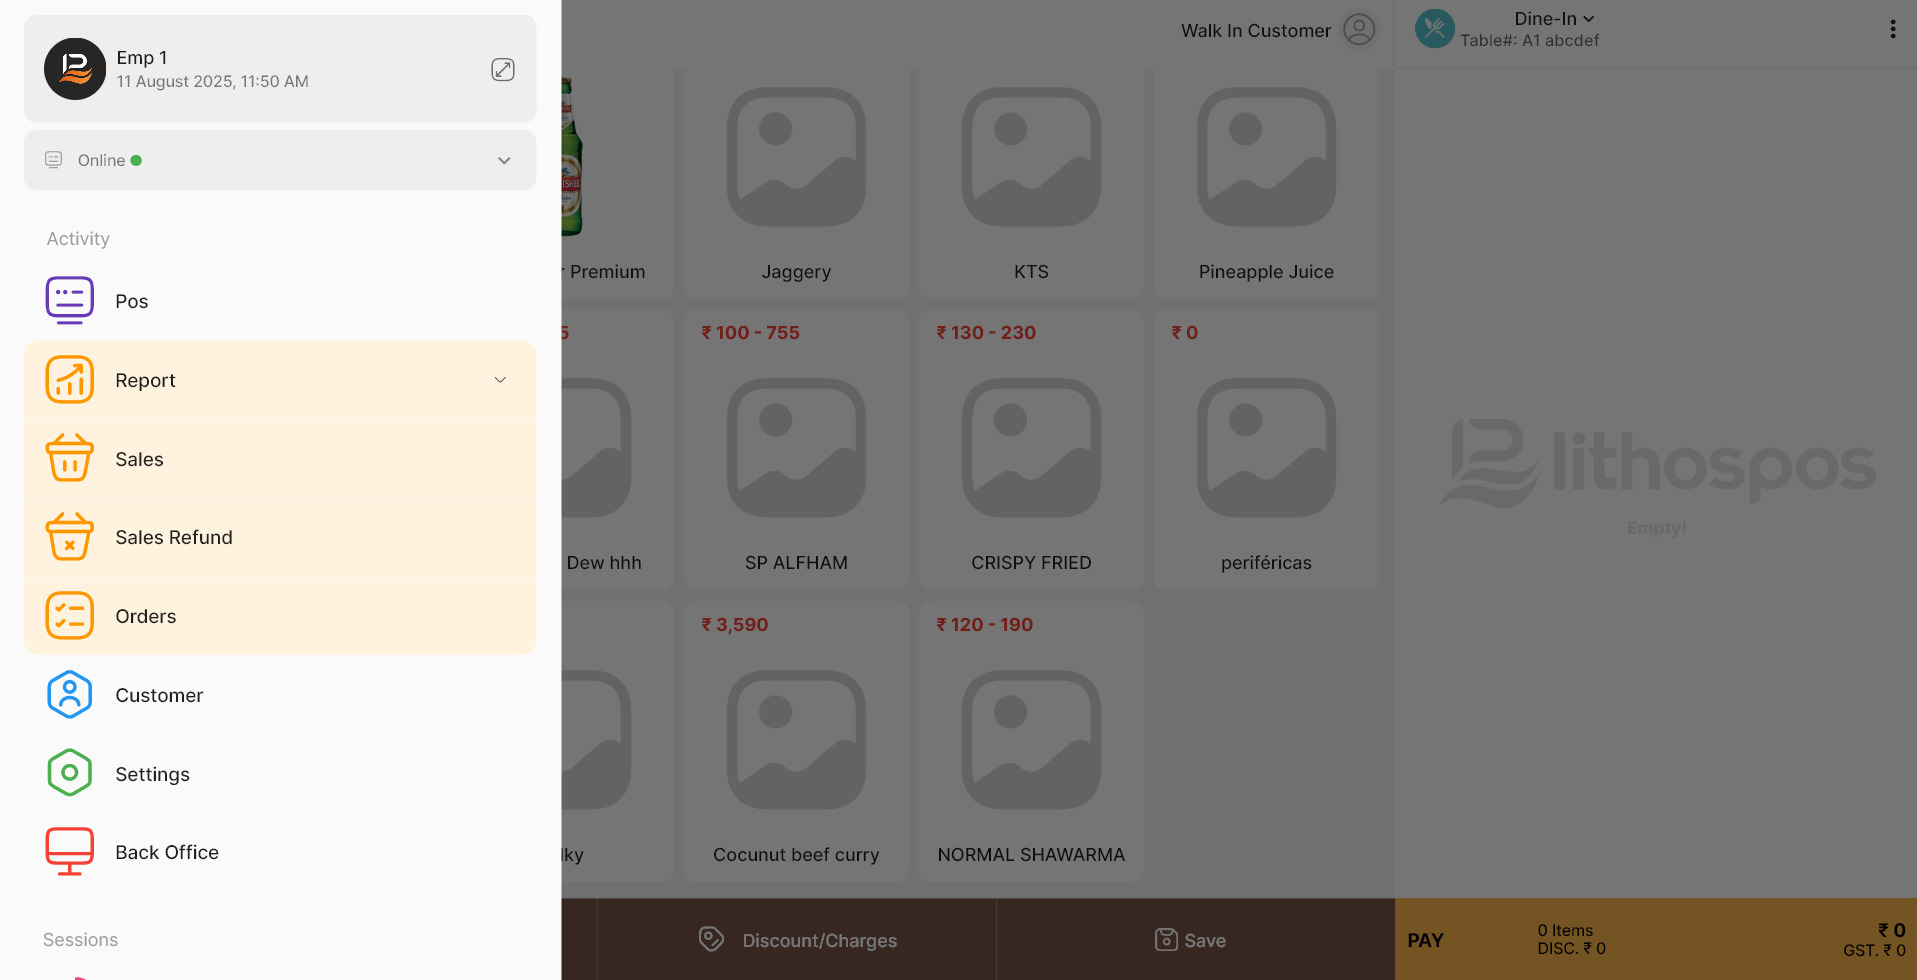
The next menu is 'Reports', which provides quick access to essential business data. Clicking on it will open three sub-menus:
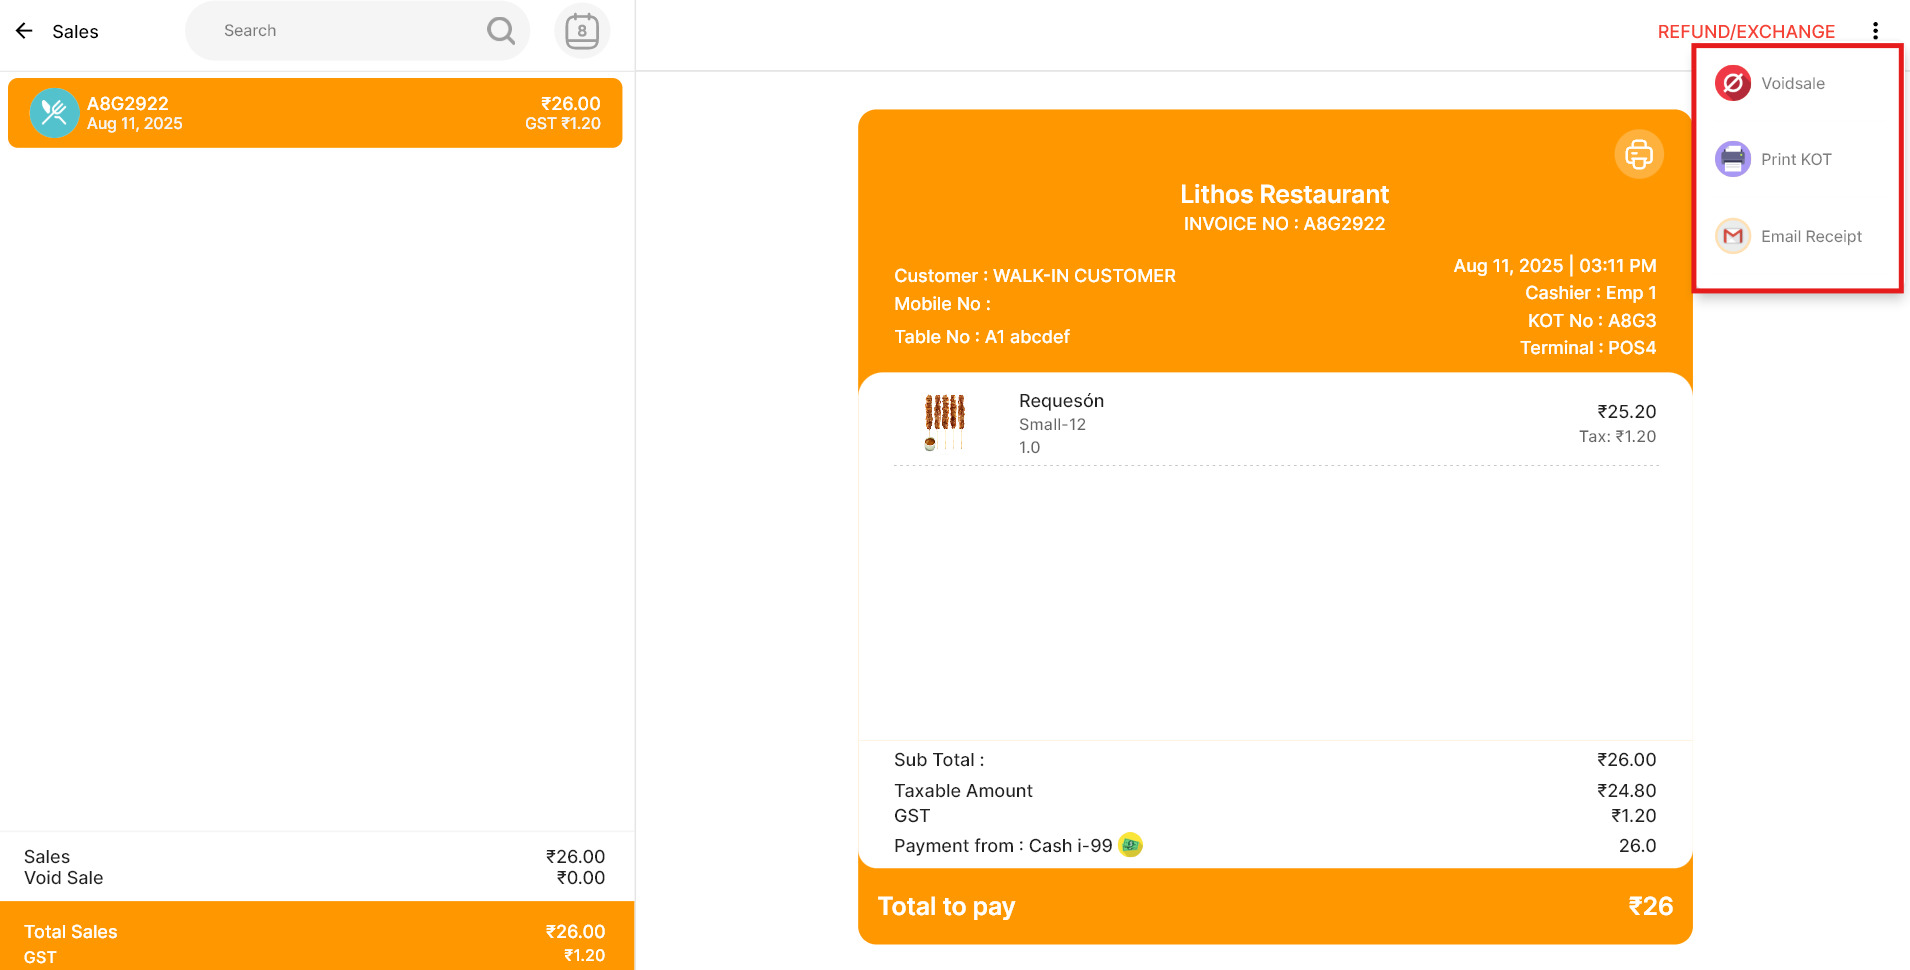
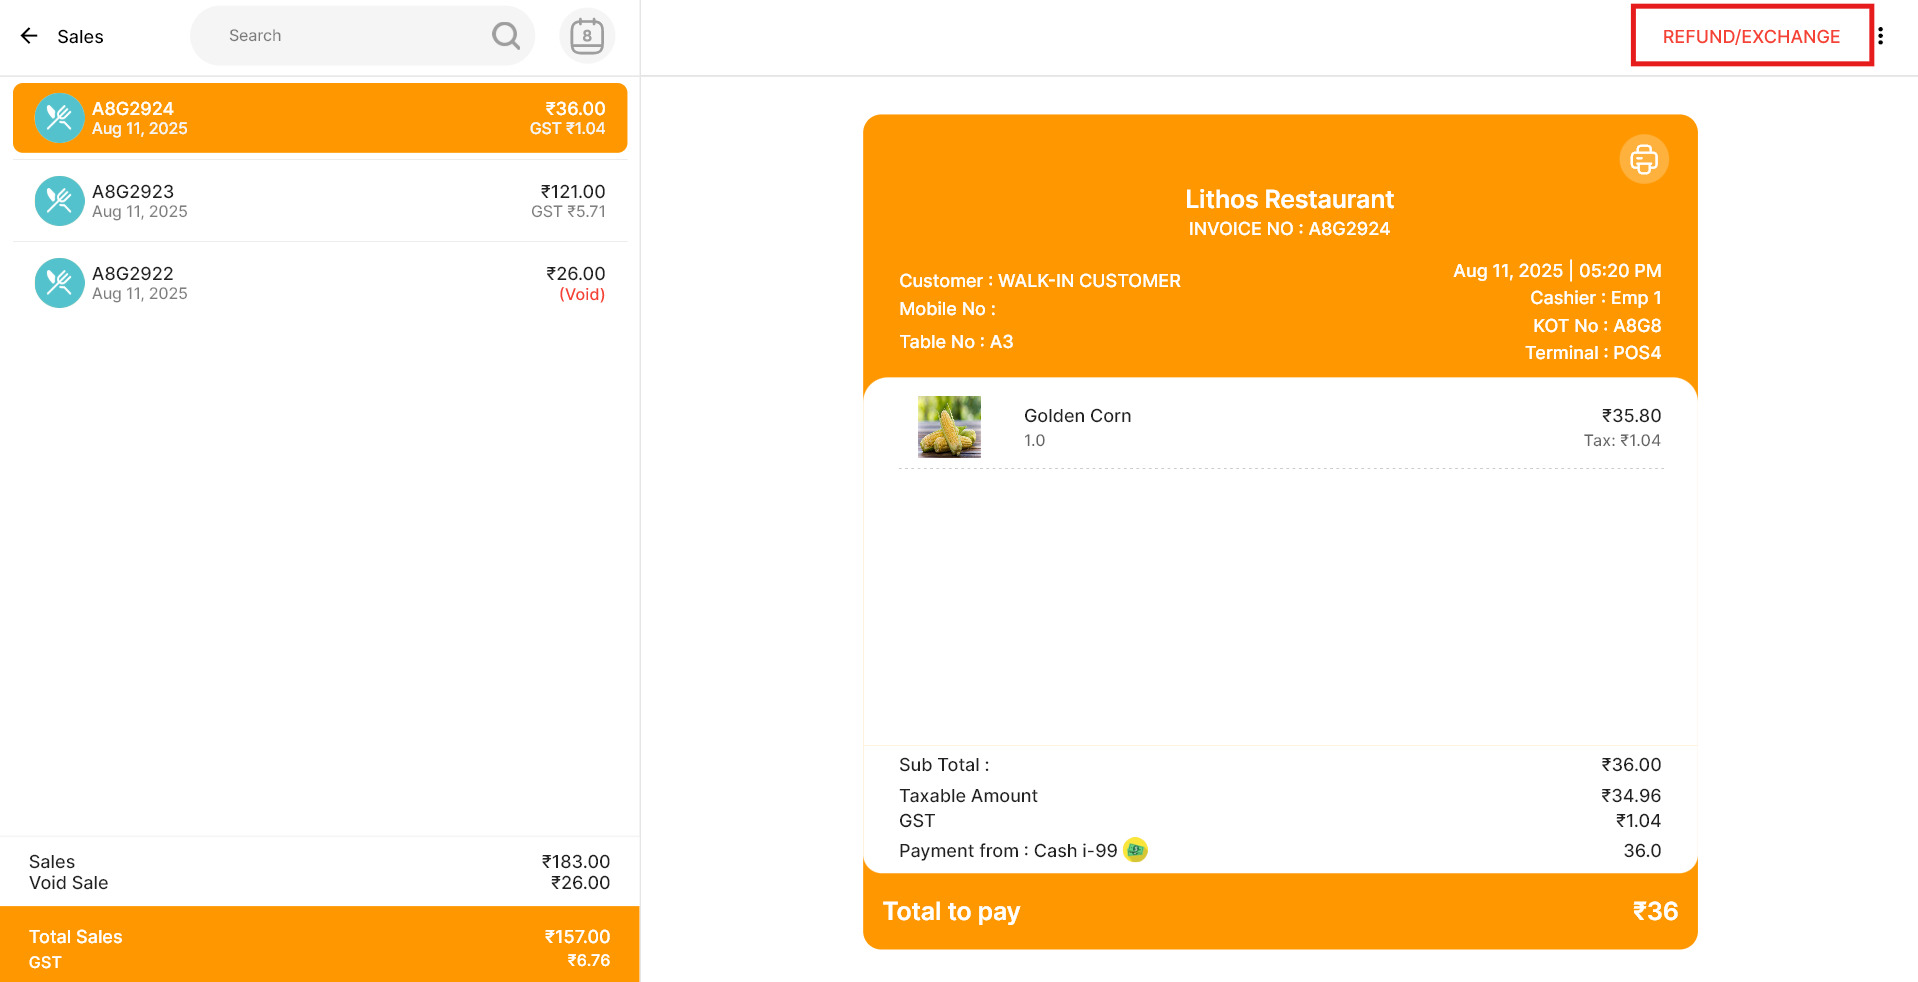
Upon opening the Sales Report all sales transactions are listed on the left, and the details of the selected transaction will be displayed on the right. You can search for a sales invoice using the customer's name, and invoice number, or filter transactions by date ranges. To print an invoice, click the printer icon on the invoice.
In the sales invoice section, at the top, you’ll find your store’s name, invoice number, date, time, terminal
ID, and cashier details.
Below that, there’s a detailed list of items sold in the transaction. The system automatically
calculates the total tax and taxable amount.
On the bottom-left corner of the screen, you’ll see a summary of the day’s total sales and taxes
collected, offering a quick overview of your daily performance.
-
Three-Dot Menu
- Void Sale: void a sales where its payment transaction is recorded
- Print KOT: Print a KOT for specific items directly from this menu.
- Email Receipt: Send a receipt directly to the customer’s email
-
Voiding A Sale:
If the payment transaction is already completed, you cannot cancel the sale—you can only void it.
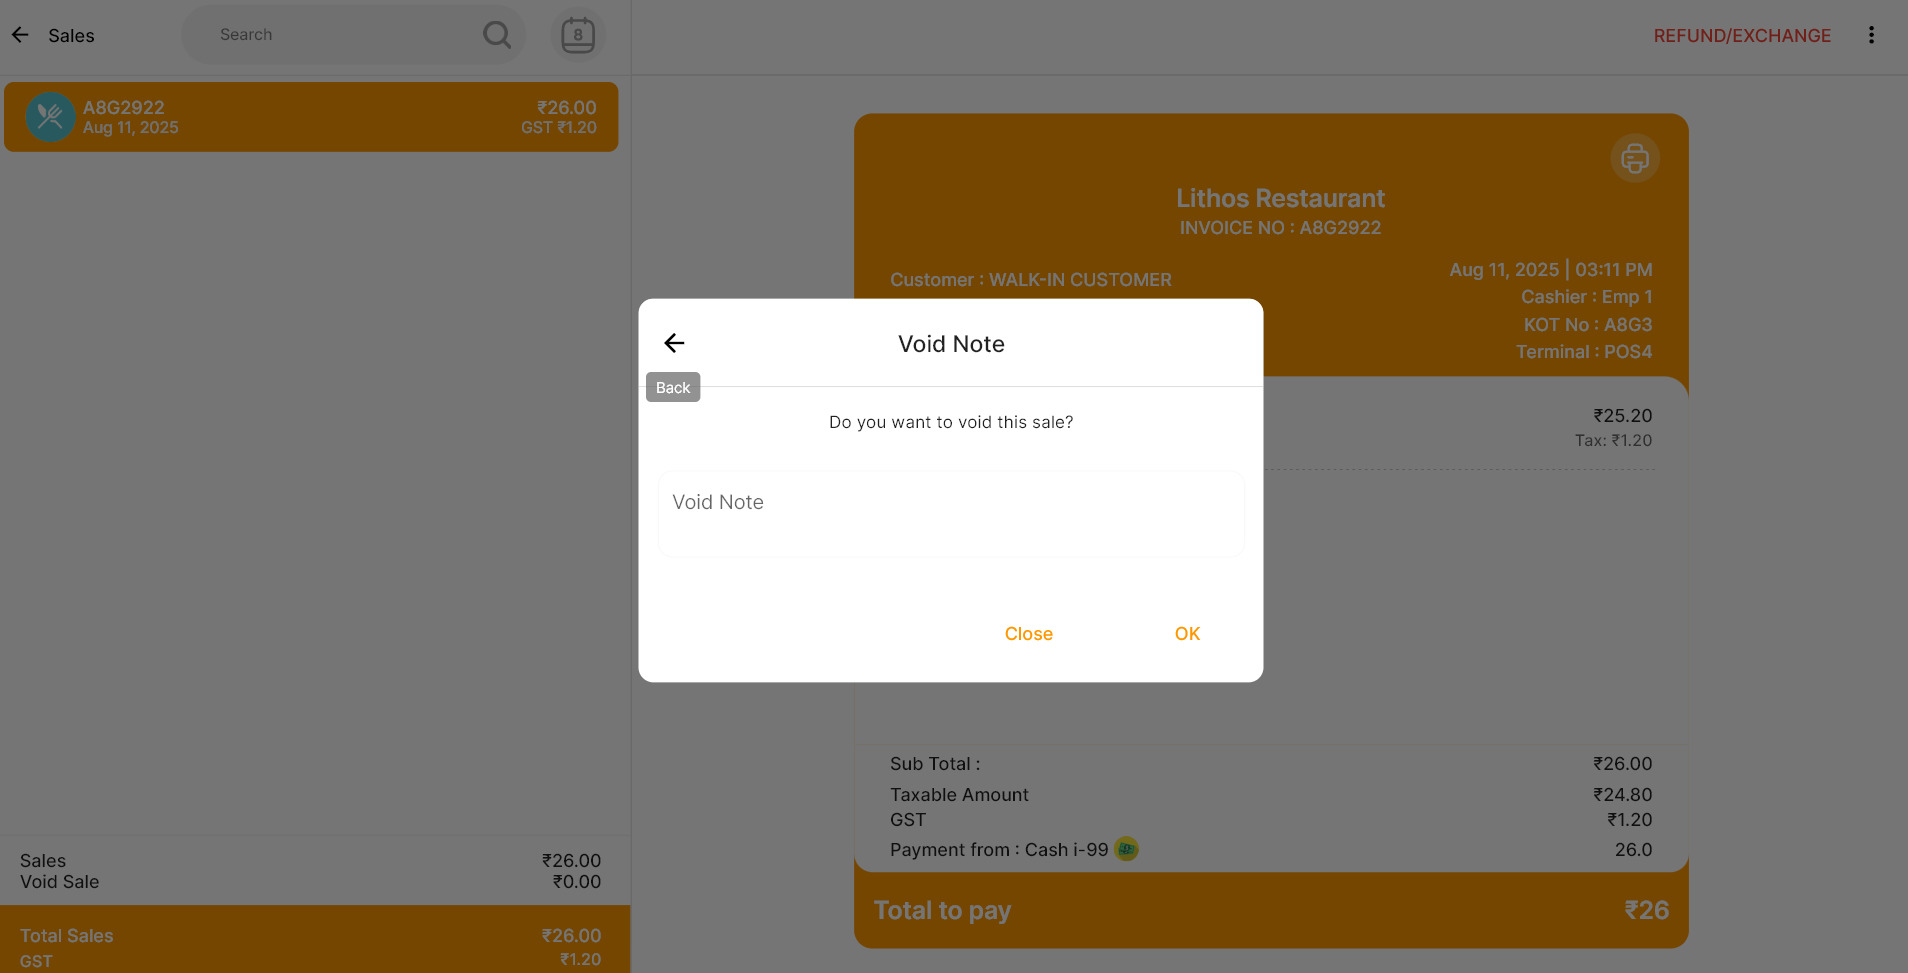
- To void a sale, click the three dots at the top right, then select Void.
- Enter a void note and click OK.
- If you want to print a void receipt, click Yes; if not, click No. The sale will now be voided.
-
Refund
For returns or exchanges, click the Refund/Exchange button. The system redirects you to the cart, displaying the specific order.
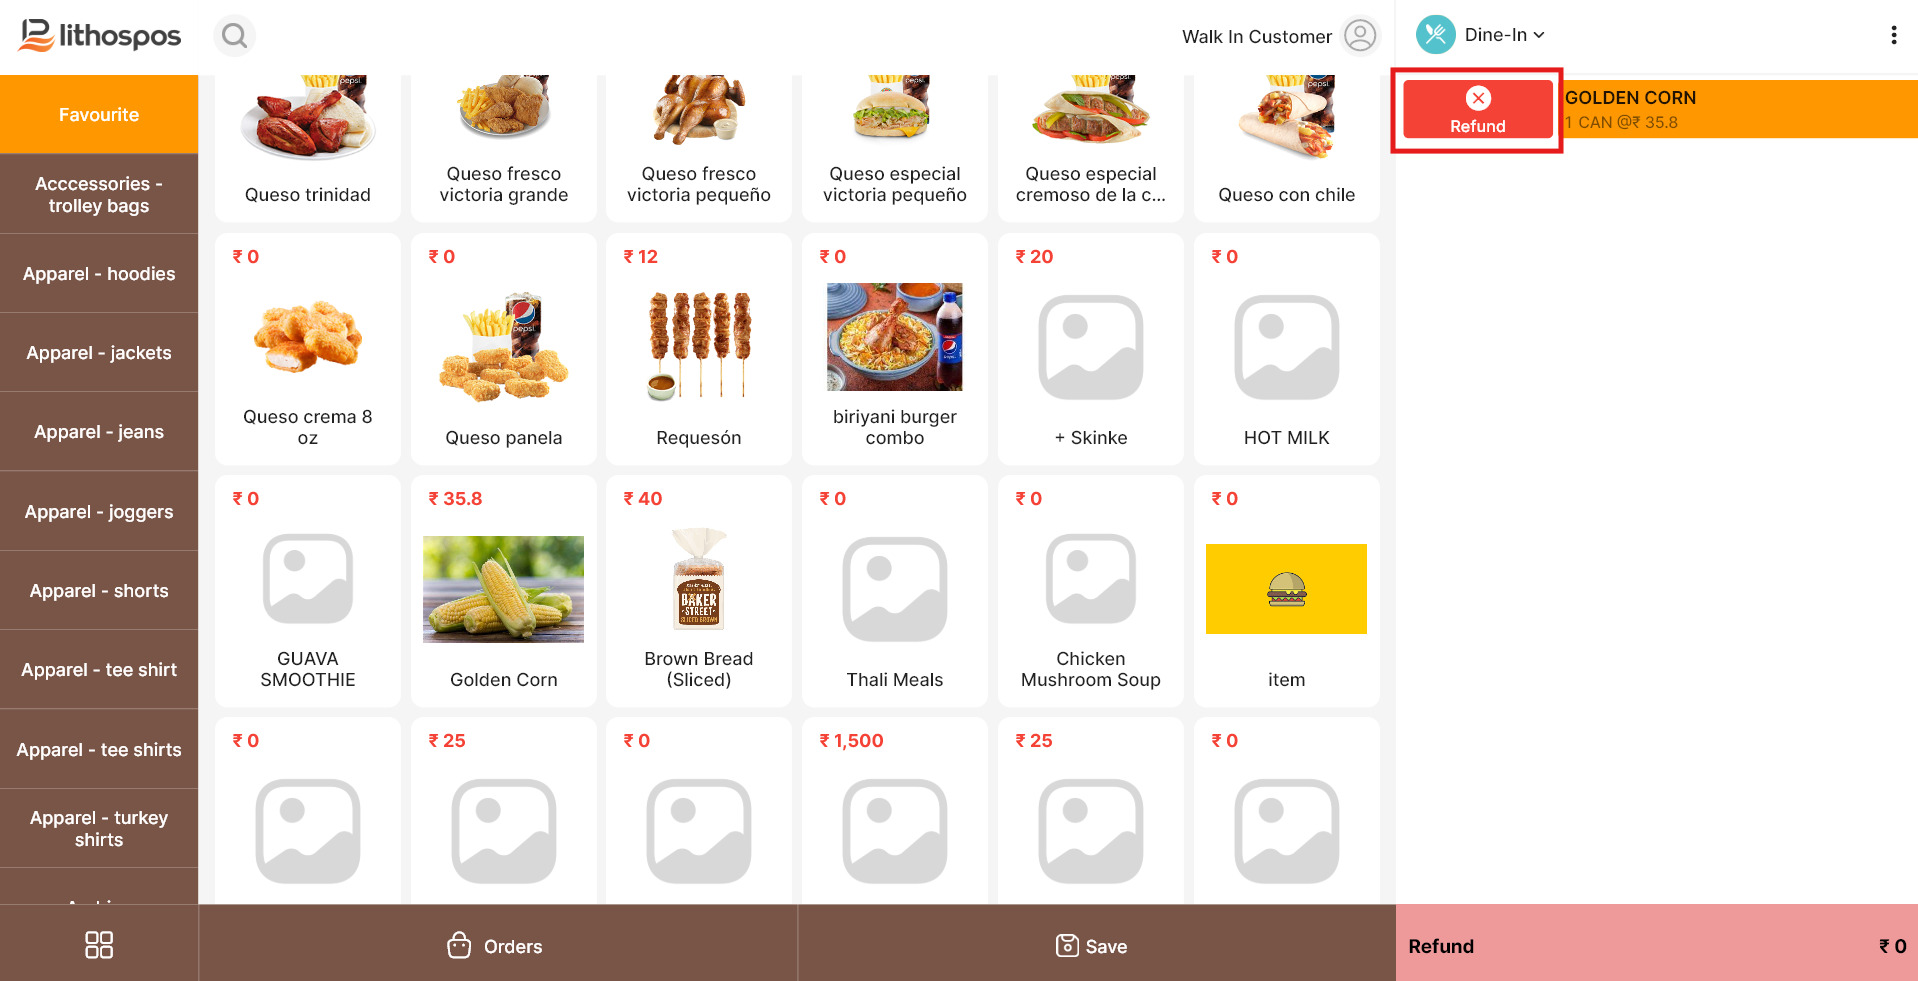
- Swipe any item to the right to mark it for the refund.
- Click Refund below, which will take you to the payment window.
- Select the refund mode and proceed to pay the customer.
-
Exchange
For returns or exchanges, click the Refund/Exchange button. The system redirects you to the cart, displaying the specific order.
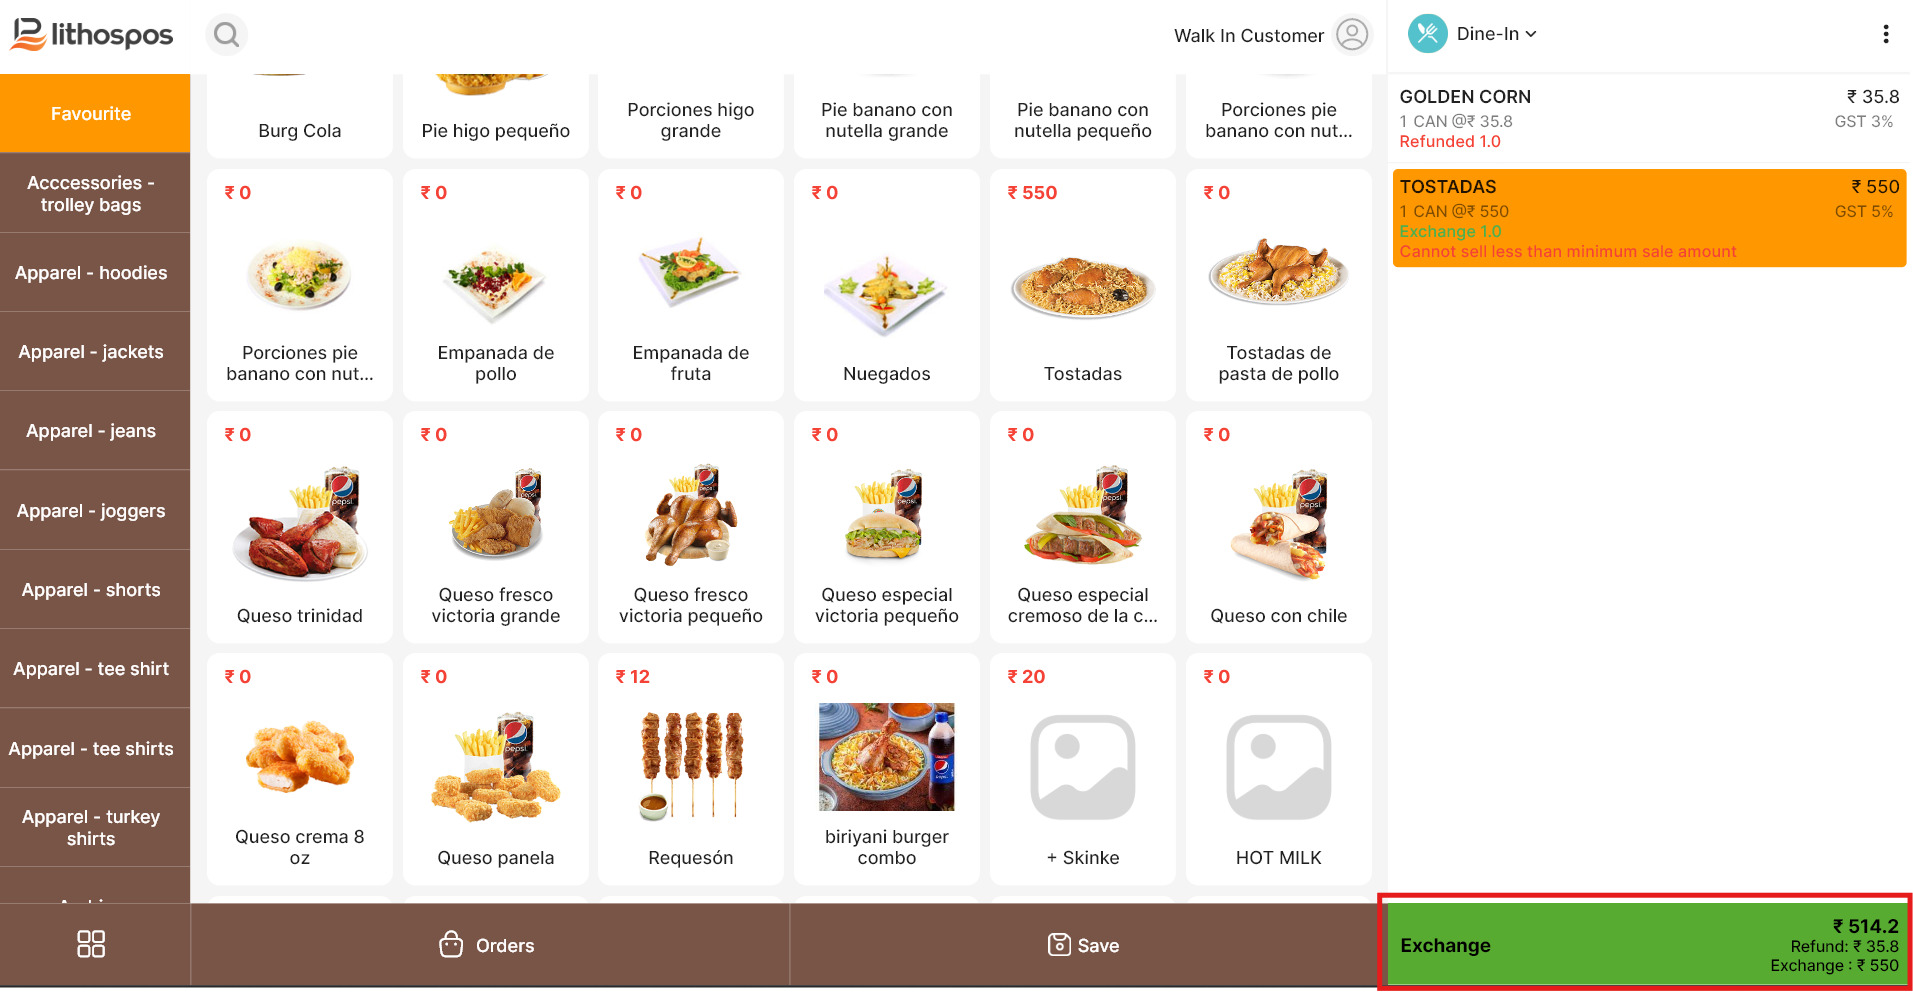
- Click on the refund or Exchange button at the top of the window. It will take you to the billing screen.
- Swipe the item you want to exchange to the right. The total exchange amount will be displayed in the Total section below.
- Proceed by adding the new items you want to receive in exchange to the cart.
- Once all items are added, click Refund below.
- It will take you to the payment window.
- If the total is less than the returned amount, you can refund the balance to the customer.
-
Customers
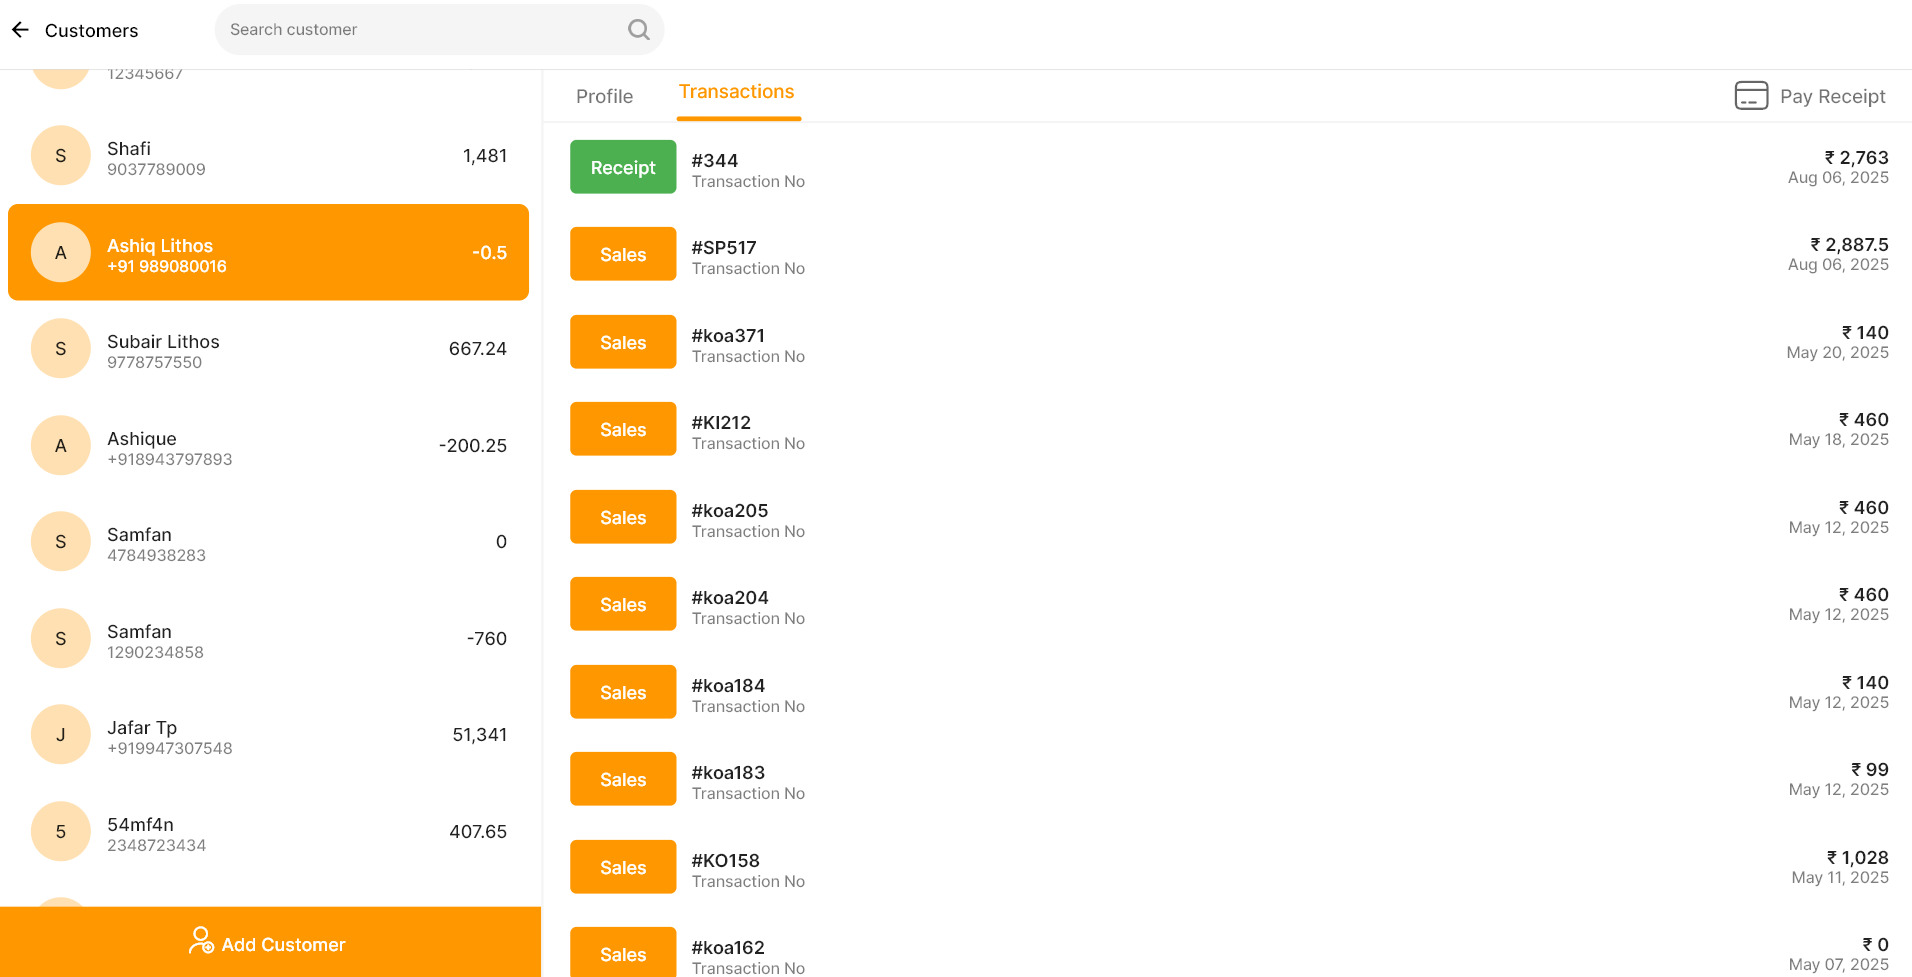
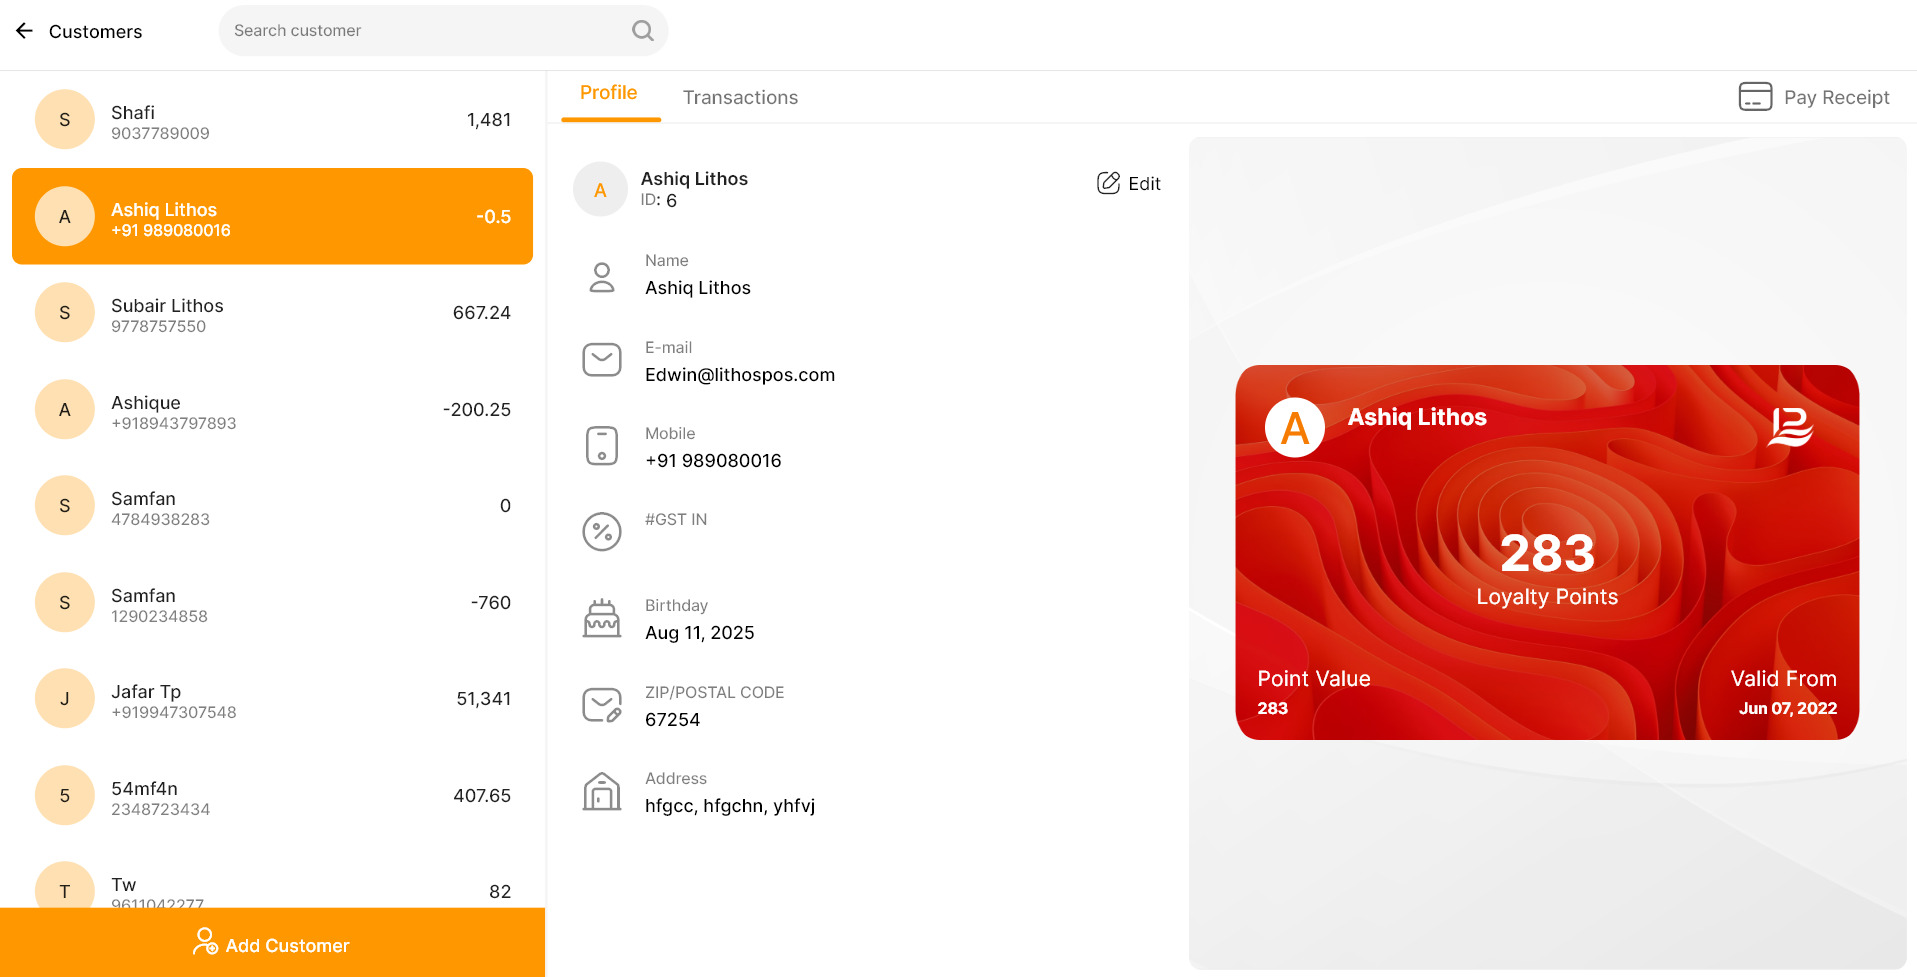
- This is where you can manage customer contact details and their transaction history, it’s all in one place.
- If you choose an existing customer, their details will automatically populate, including the outstanding amount they owe. You’ll also see their address, mobile number, loyalty points, and the value of those points. And if you want to dig deeper, you can check out their transaction history.
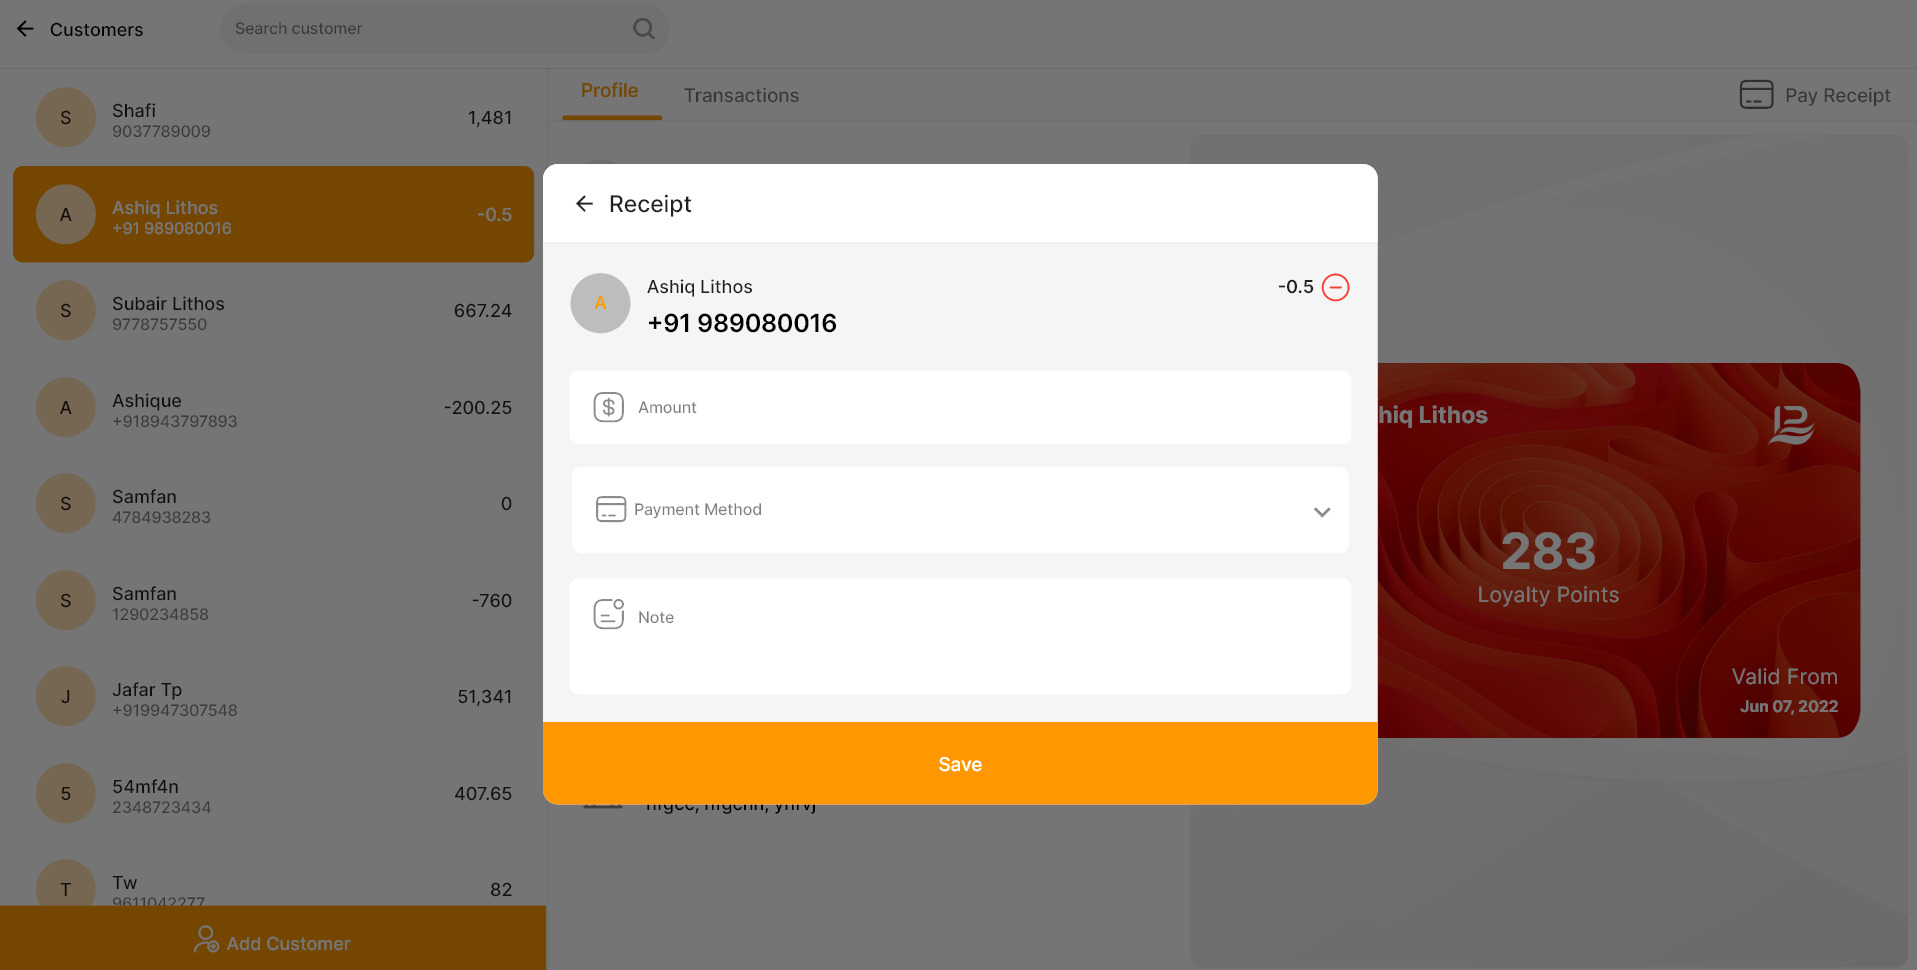
- Settling Customer Outstanding Amount: If the customer has any outstanding balance, you’ll notice a ‘Pay’ button in the top-right corner of the screen. Clicking this button allows you to settle their dues directly from this interface.
-
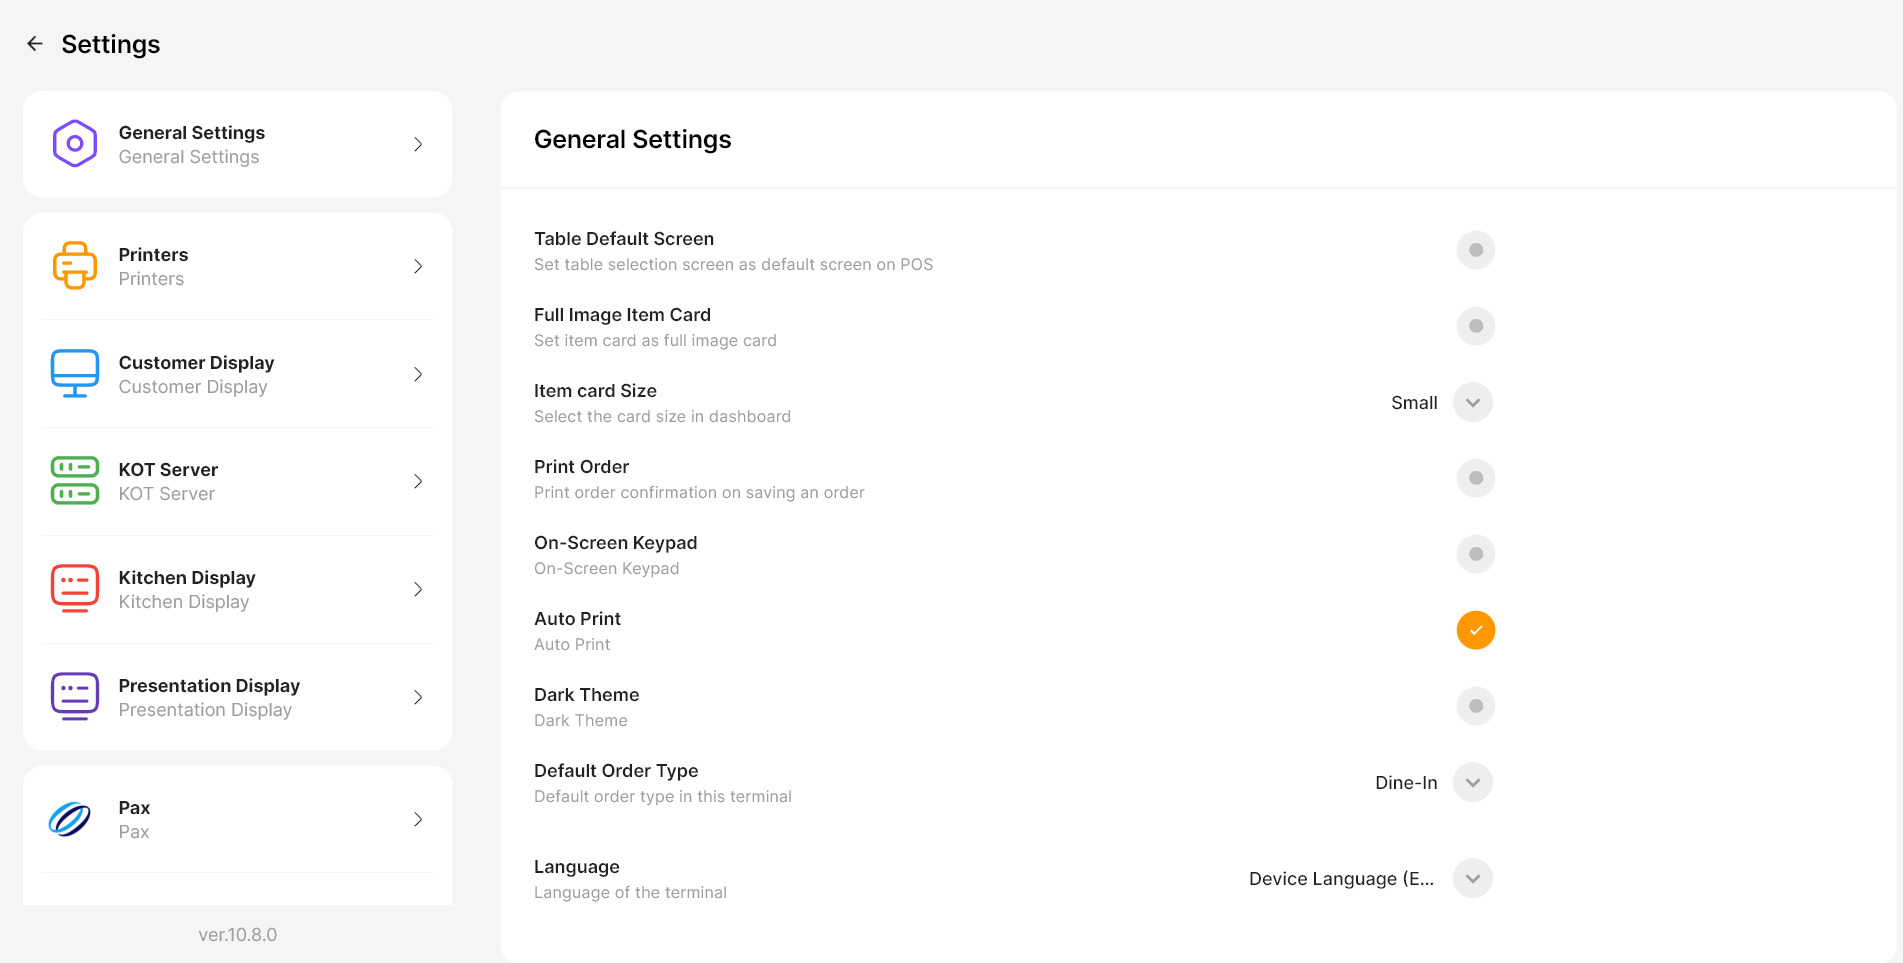
General Settings
-
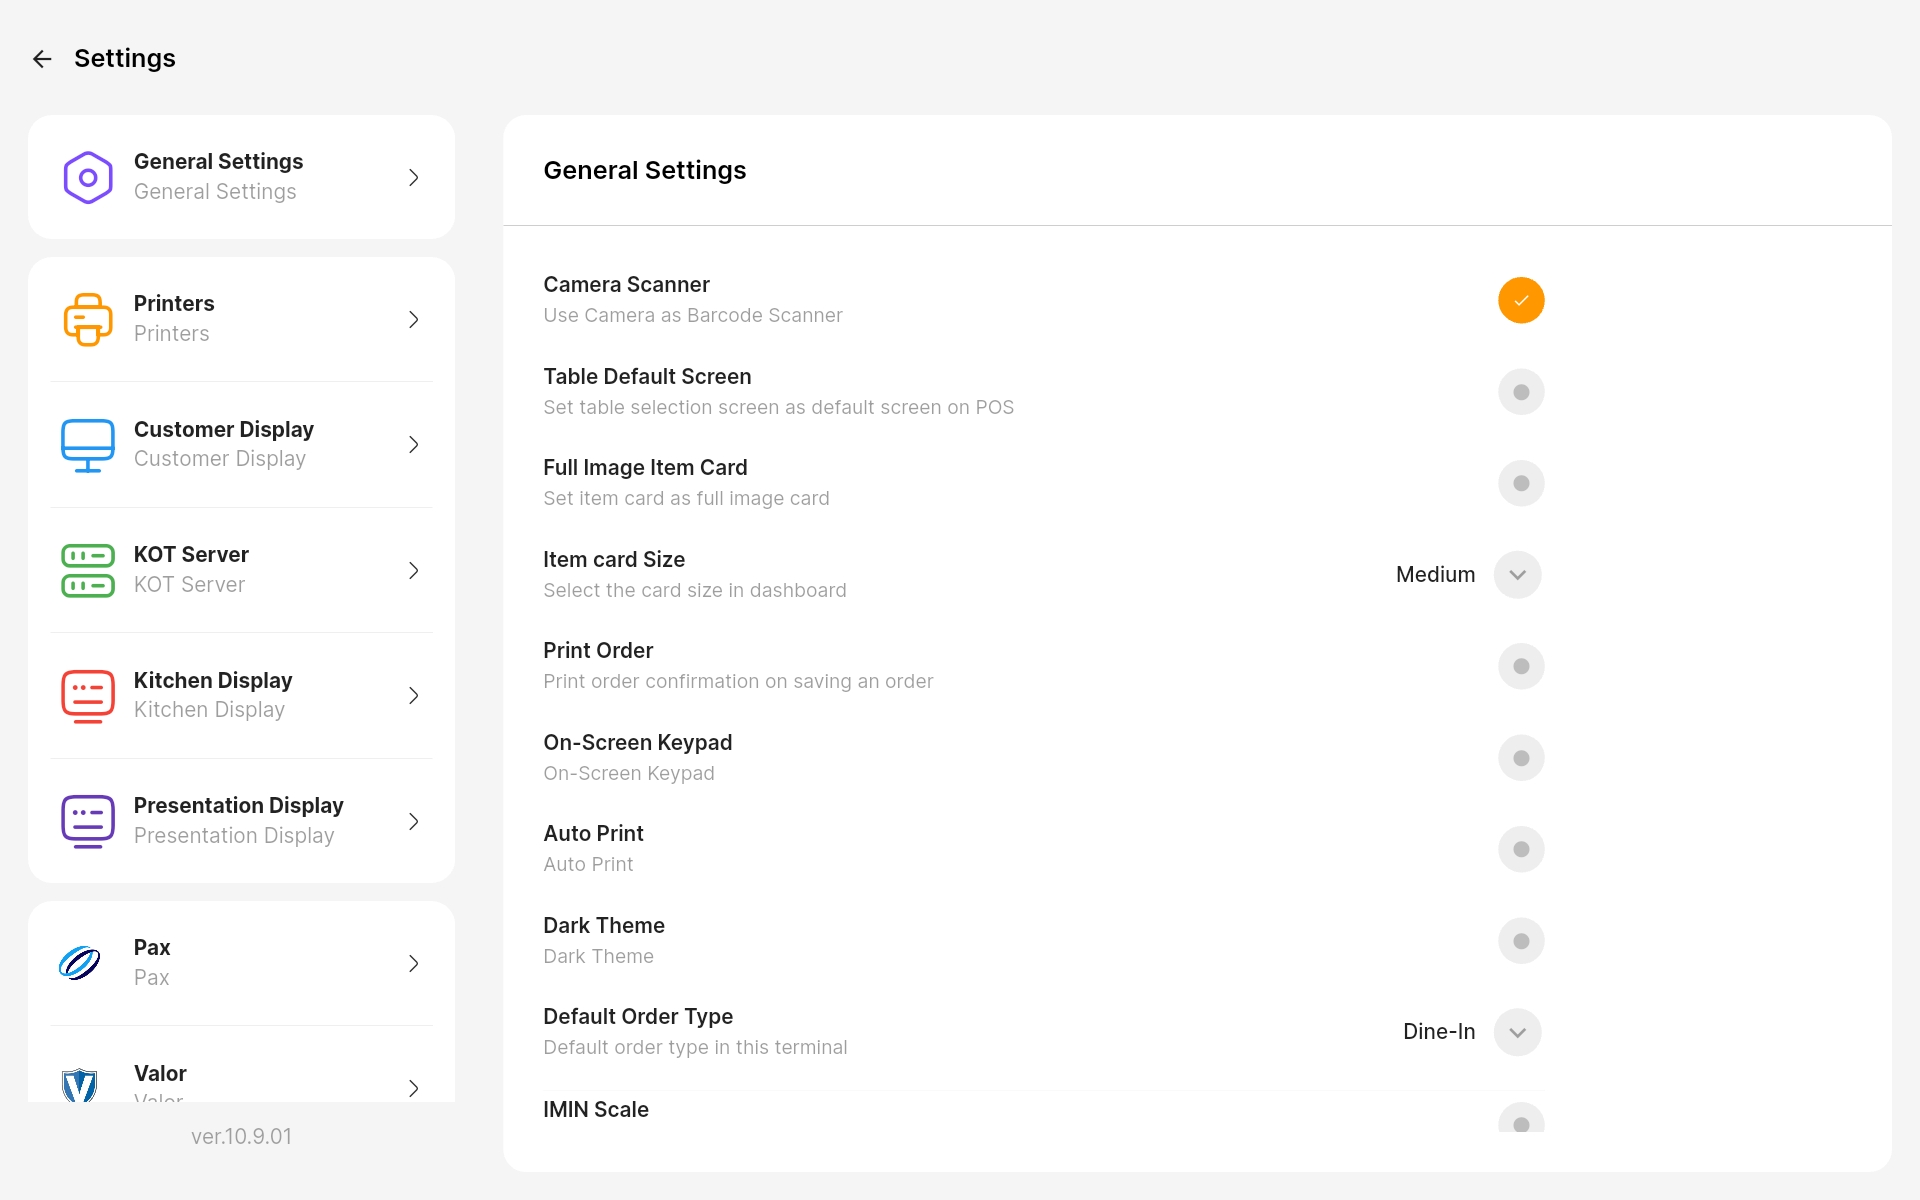
Camera Scanner:
This allows you to scan the barcode using the device’s camera. [Not available in windows] -
Item Card Size:
Choose the image size for items from Small, Medium, or Large to control how items are displayed. -
Print Orders:
When activated, a pop-up will appear when you save an order, asking whether you want to print the order or not. -
On-Screen Keypad:
Enabling the on-screen keyboard on the billing screen. -
Auto Print:
When enabled, the invoice will automatically print to the assigned printer upon completing a sales transaction. After adding items to the cart and selecting a payment method the invoice will be printed automatically. -
Dark Theme:
Switch to a dark interface if you prefer a low-light screen. -
Default Order Type:
Configure the default order type (e.g., Dine-In, Takeaway) to match your service flow. -
Language:
Adjust the device's language to suit your needs. -
Online Order Notification:
Enable alerts to notify staff of new online orders. -
Auto Decimal Point:
Simplify cash input—typing "5555" automatically formats to "55.55." -
SKU Search:
Enable searching by SKU for quick item retrieval. -
Table Default Screen:
Set table selection as the default screen. [only in restaurants] -
Item Secondary Language:
Display a secondary language for item descriptions. [Available only for accounts with multi-language settings enabled] - From the main menu, click on the Printers option.
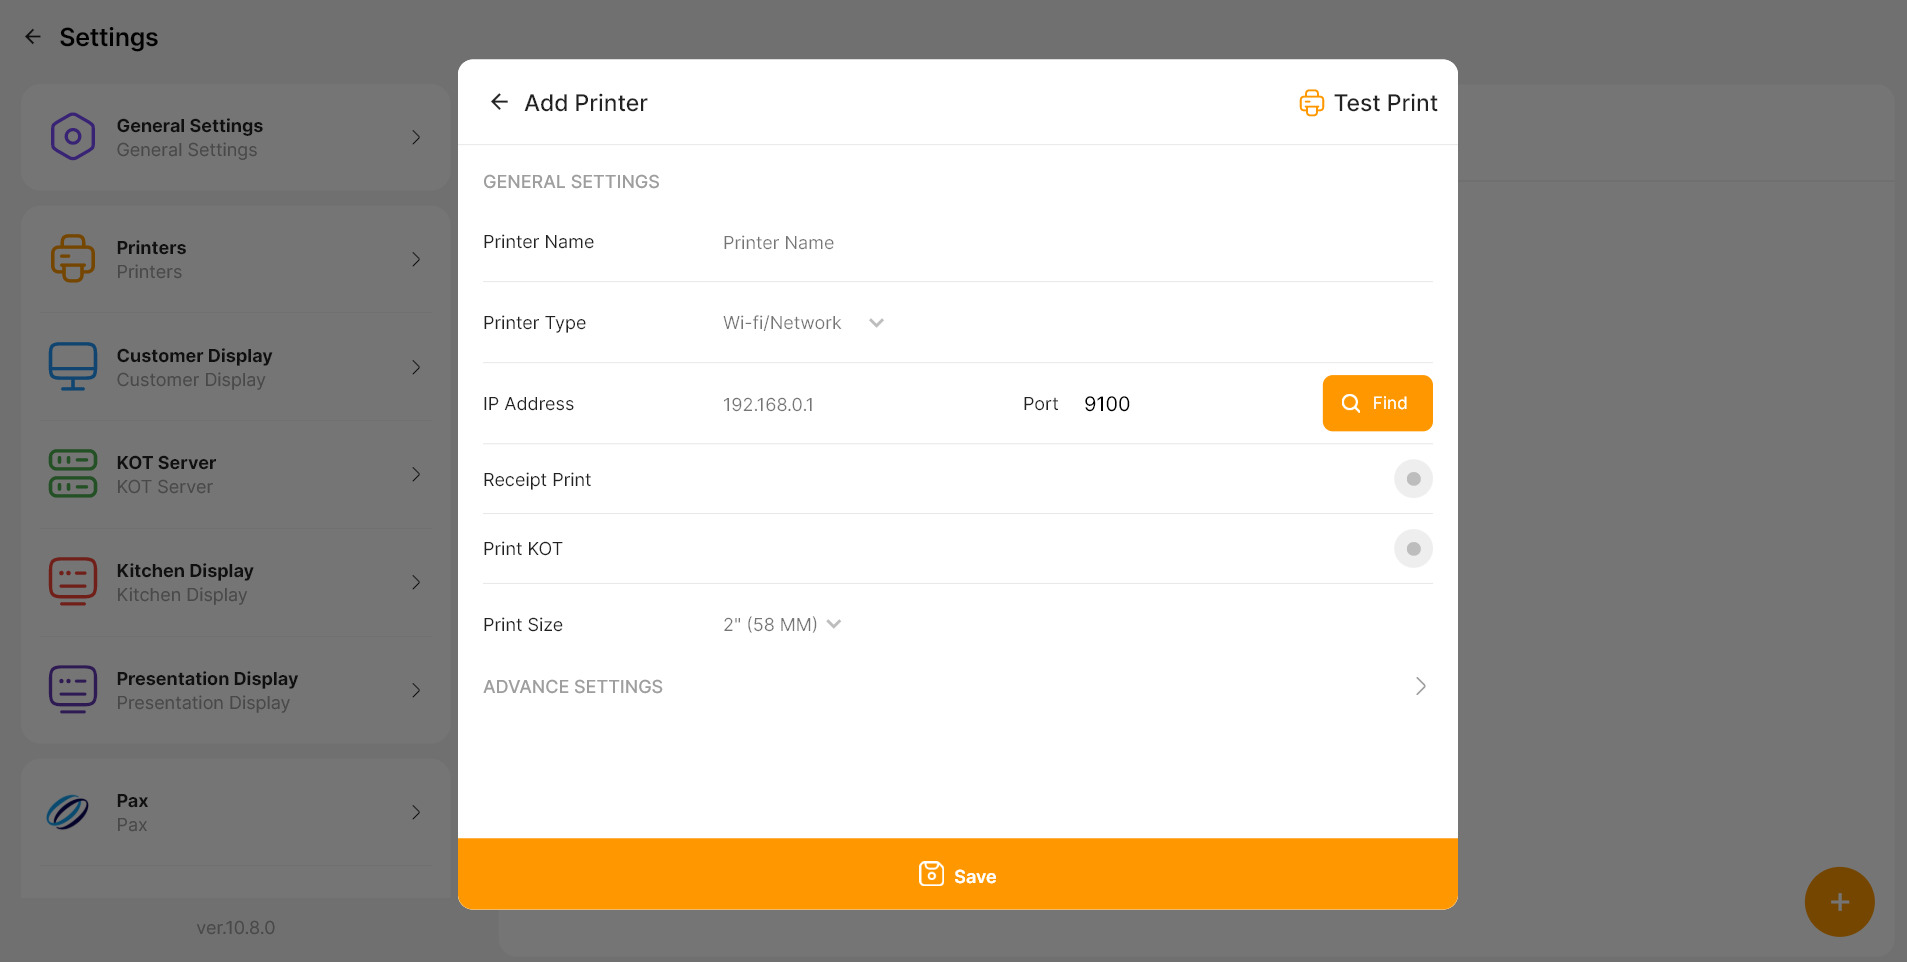
- You will see a ‘+’ button to add a new printer. Click the + button to open a pop-up window.
- In the pop-up, enter the necessary details such as Printer Name, Printer Type, and IP Address (for network printers).
- You can also enable Receipt Print and KOT (Kitchen Order Ticket) depending on your needs.
- After entering the required data, click Test Print to verify if the printer is functioning correctly.
- Once the test print is successful, click Save to finalize the printer configuration.
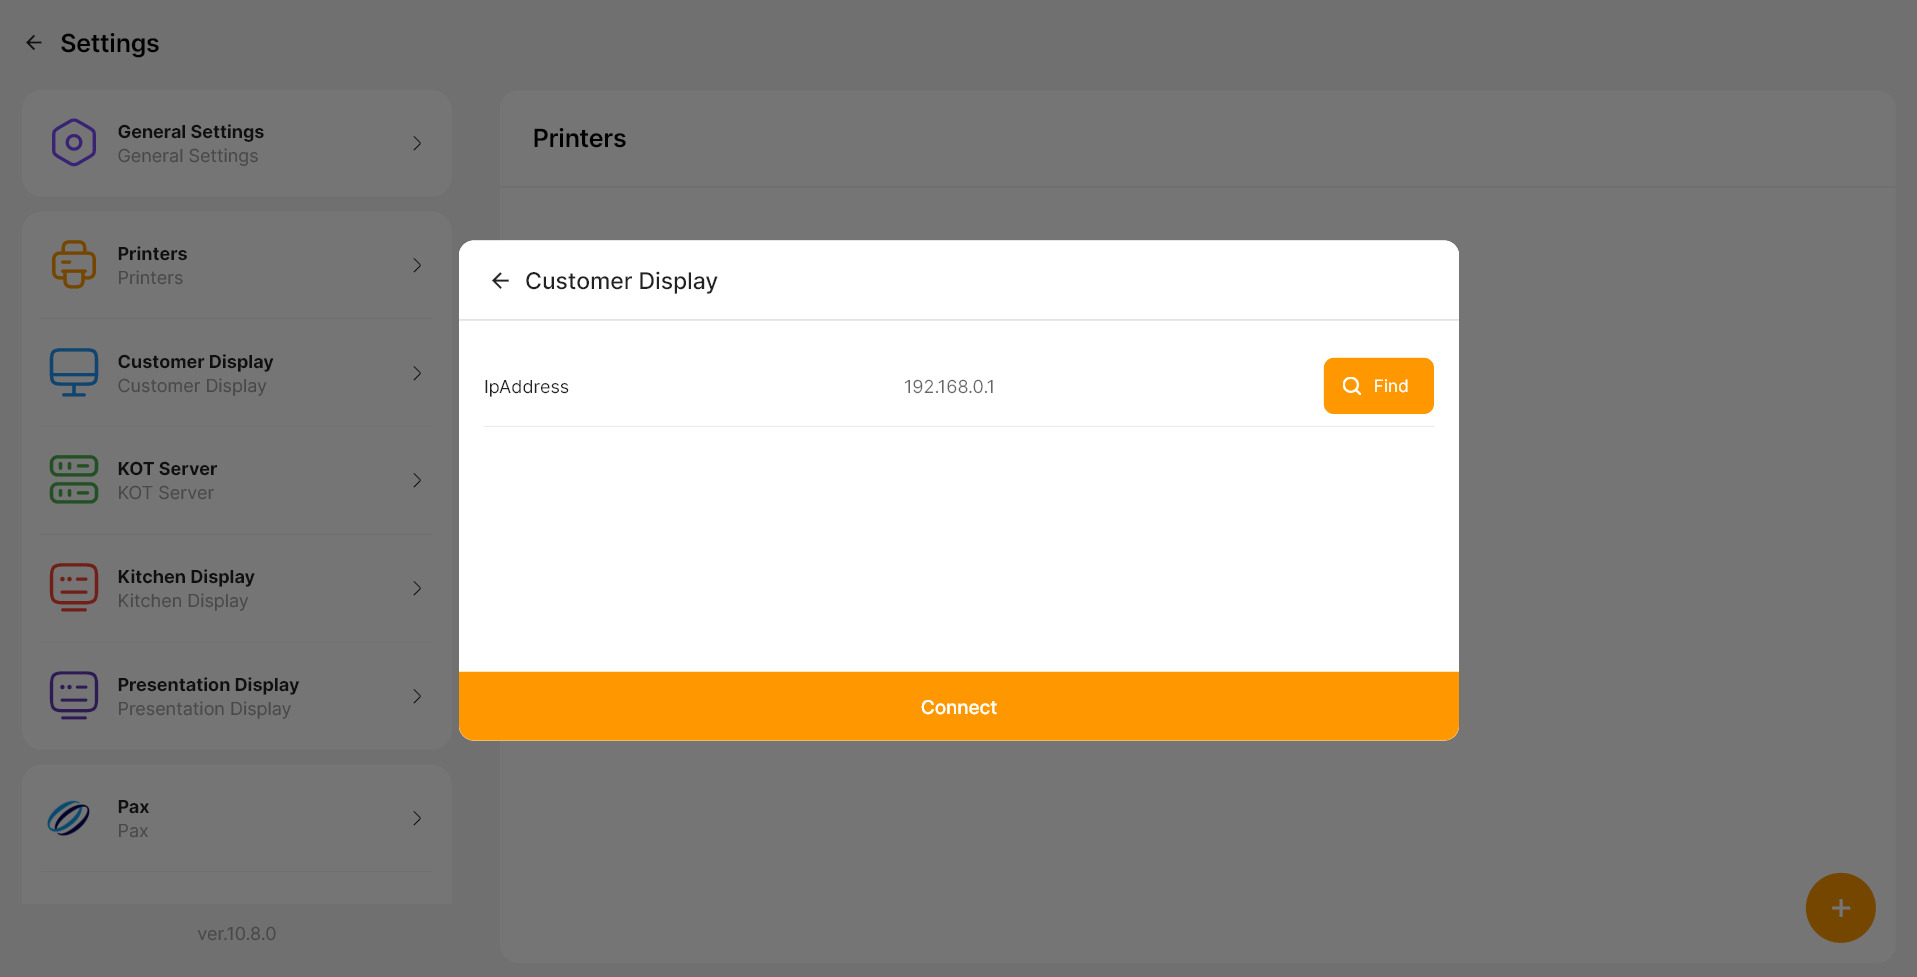
- In the POS app go to settings and select the menu ‘Customer Display’.
- Input the IP address of the LithosPOS CDS application
- Then Click on the ‘Connect’ to connect CDS with POS.
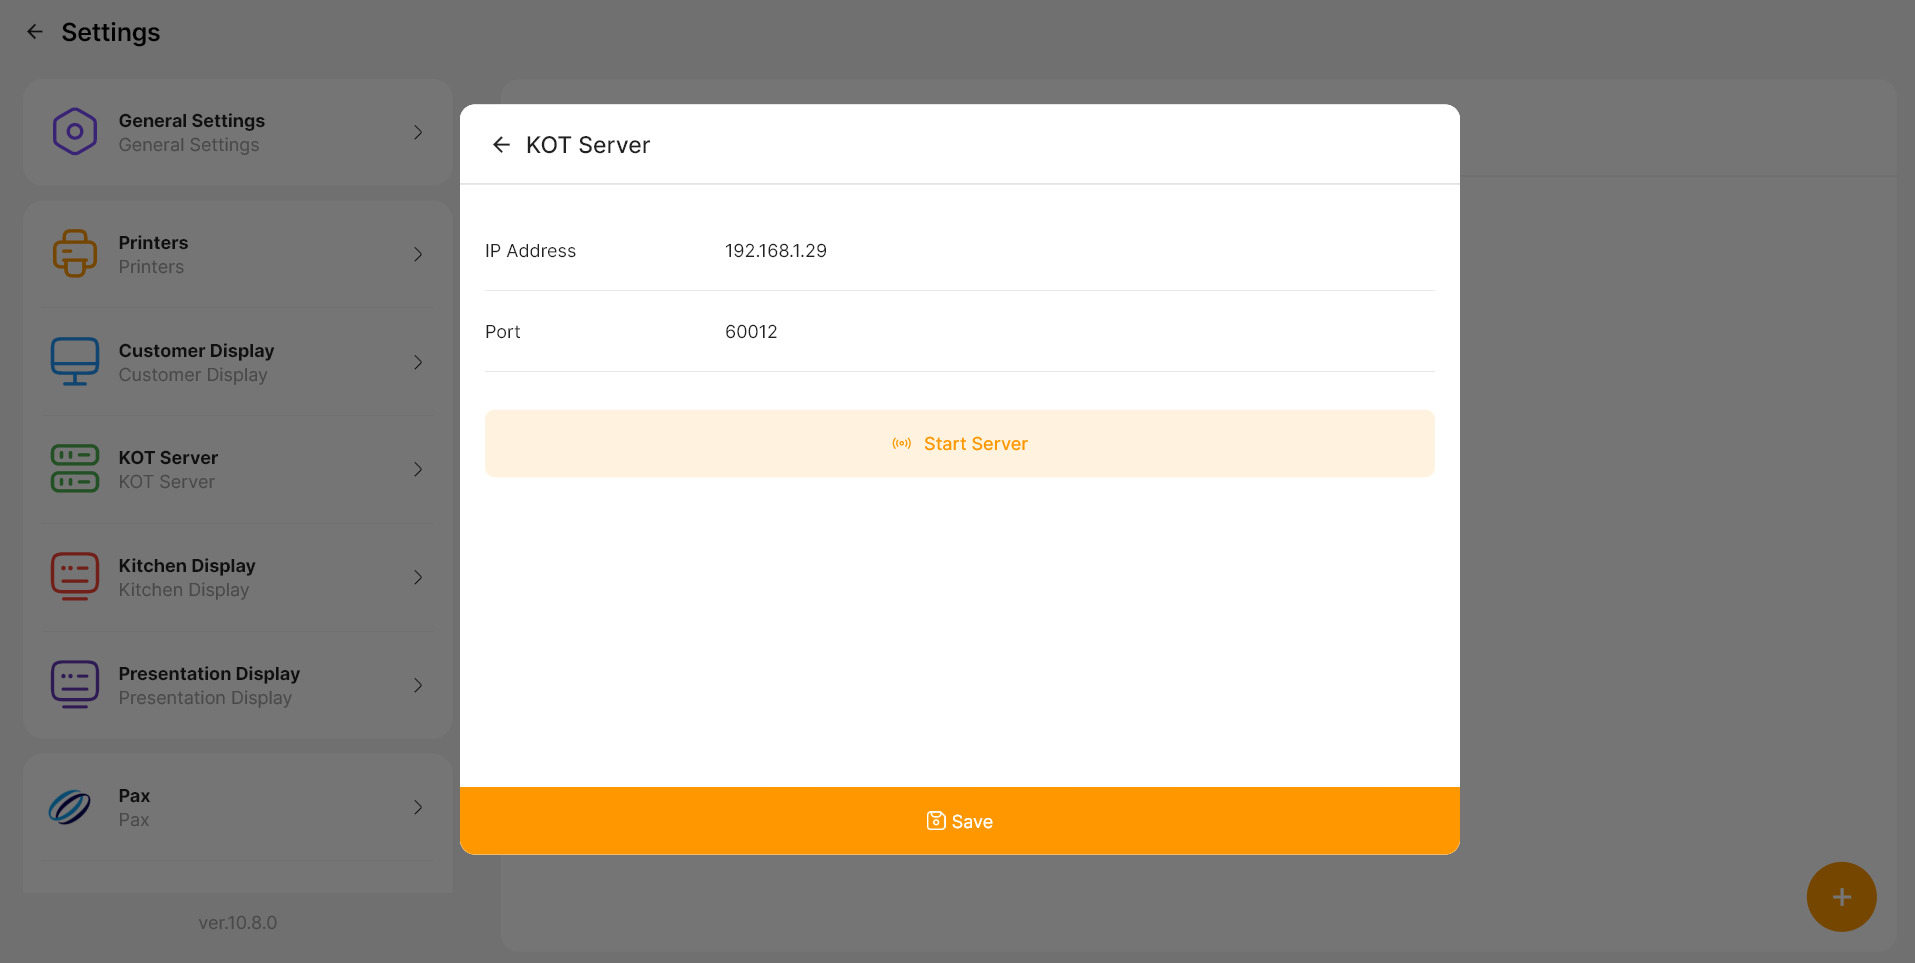
- In the POS app go to settings and select the menu ‘KOT Server’.
- Input the IP address of the POS terminal and click on ‘Start Server’
- Once the server is started from the Waiter App enter the POS IP address and send a connection request to the POS device.
- In the POS app, go to Settings and select the ‘Kitchen Display’ menu.
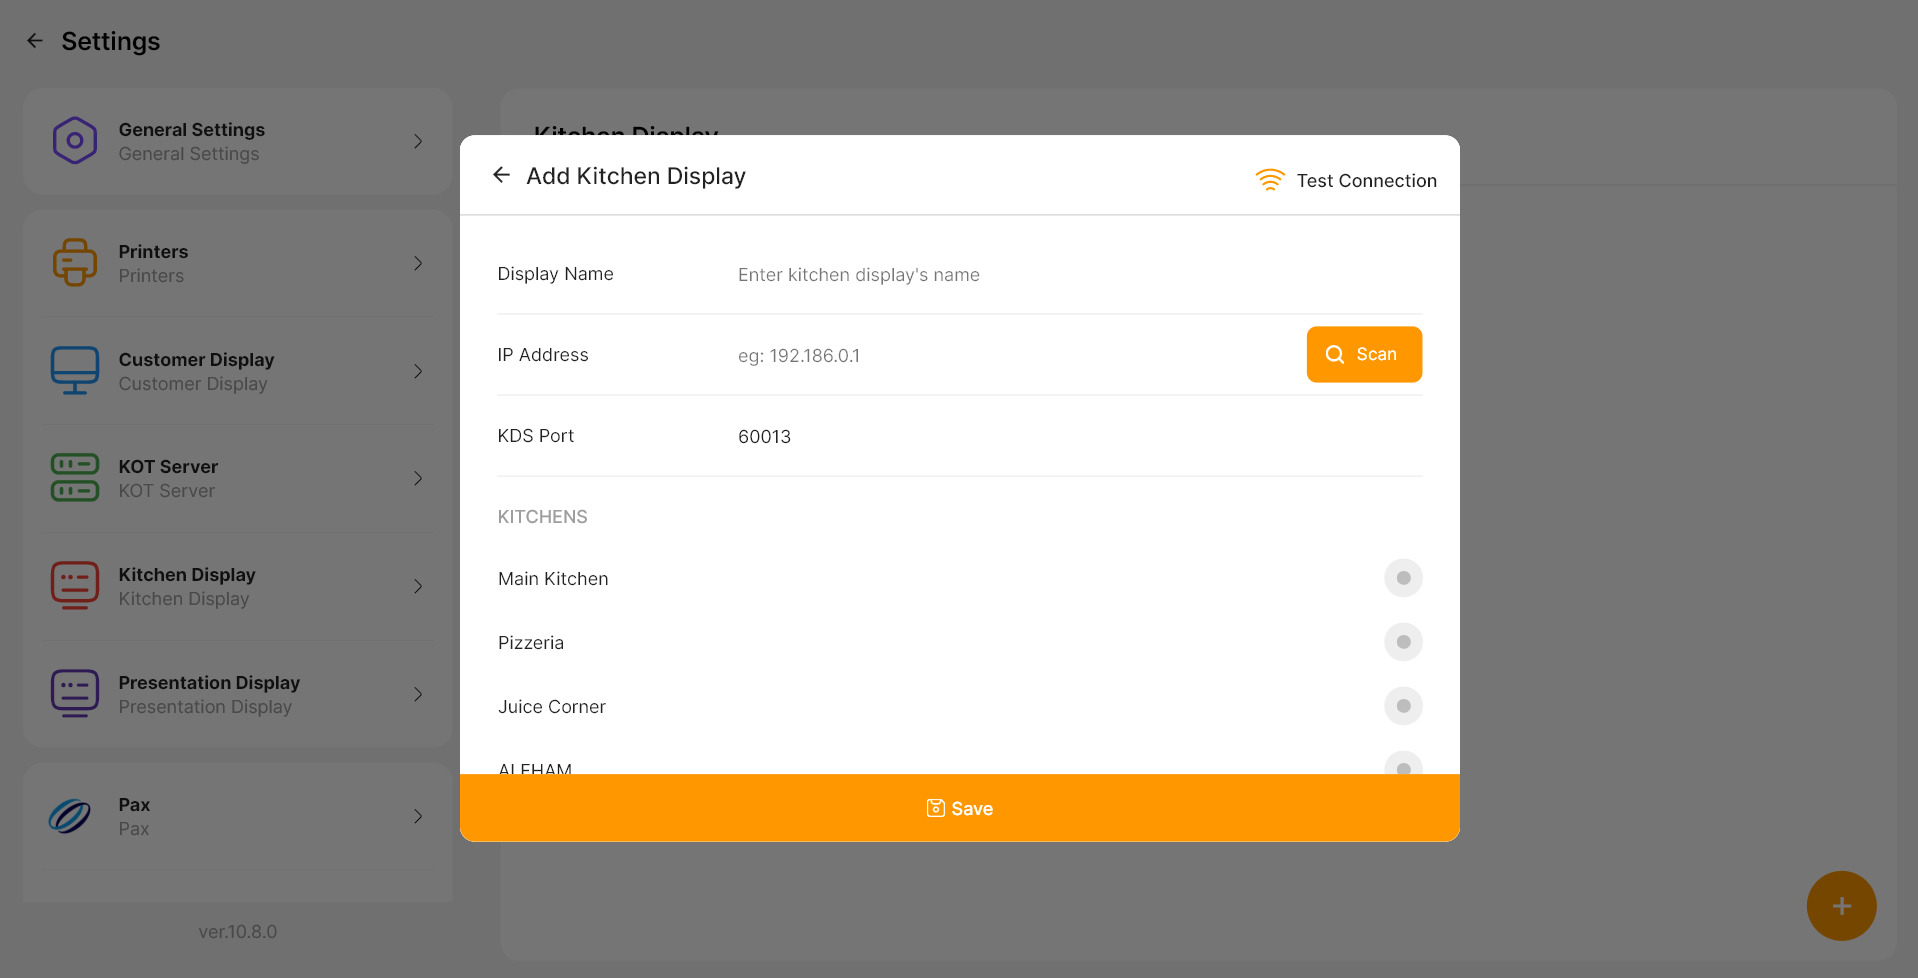
- Click on the ‘+’ button to add a new Kitchen Display.
- Enter a unique Kitchen Display Name for easy identification.
- Input the IP address displayed in the KDS application. You can also find the ready connect devices by clicking on the search icon and choose
- Click on ‘TEST’ to establish a connection between the KDS and POS.
- If multiple kitchens are configured in the back office, they will be displayed in this setting.
- Enable the kitchens you want the KDS to be associated with.
-
Device Settings:
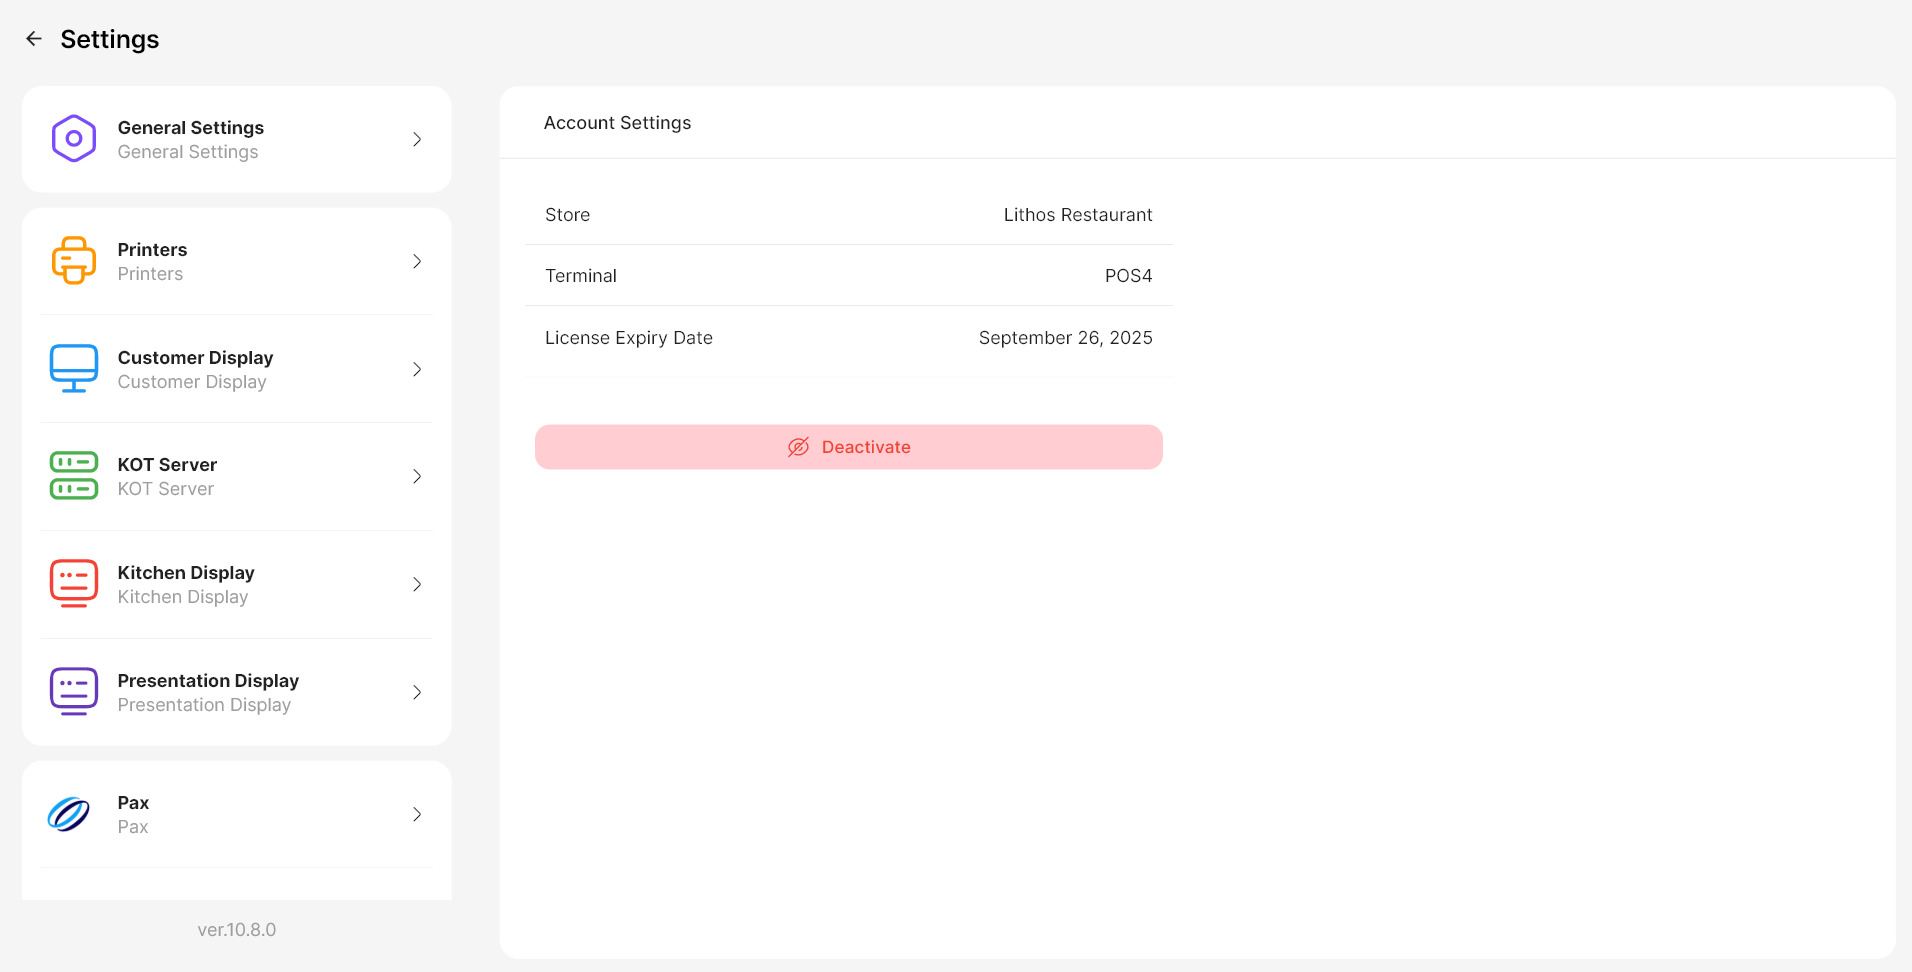
Here, you can view the store name, terminal name, and license expiration date. -
Deactivate The Device:
To deactivate this device, click the Deactivate button. Before doing so, ensure that all data is synced to avoid any data loss. -
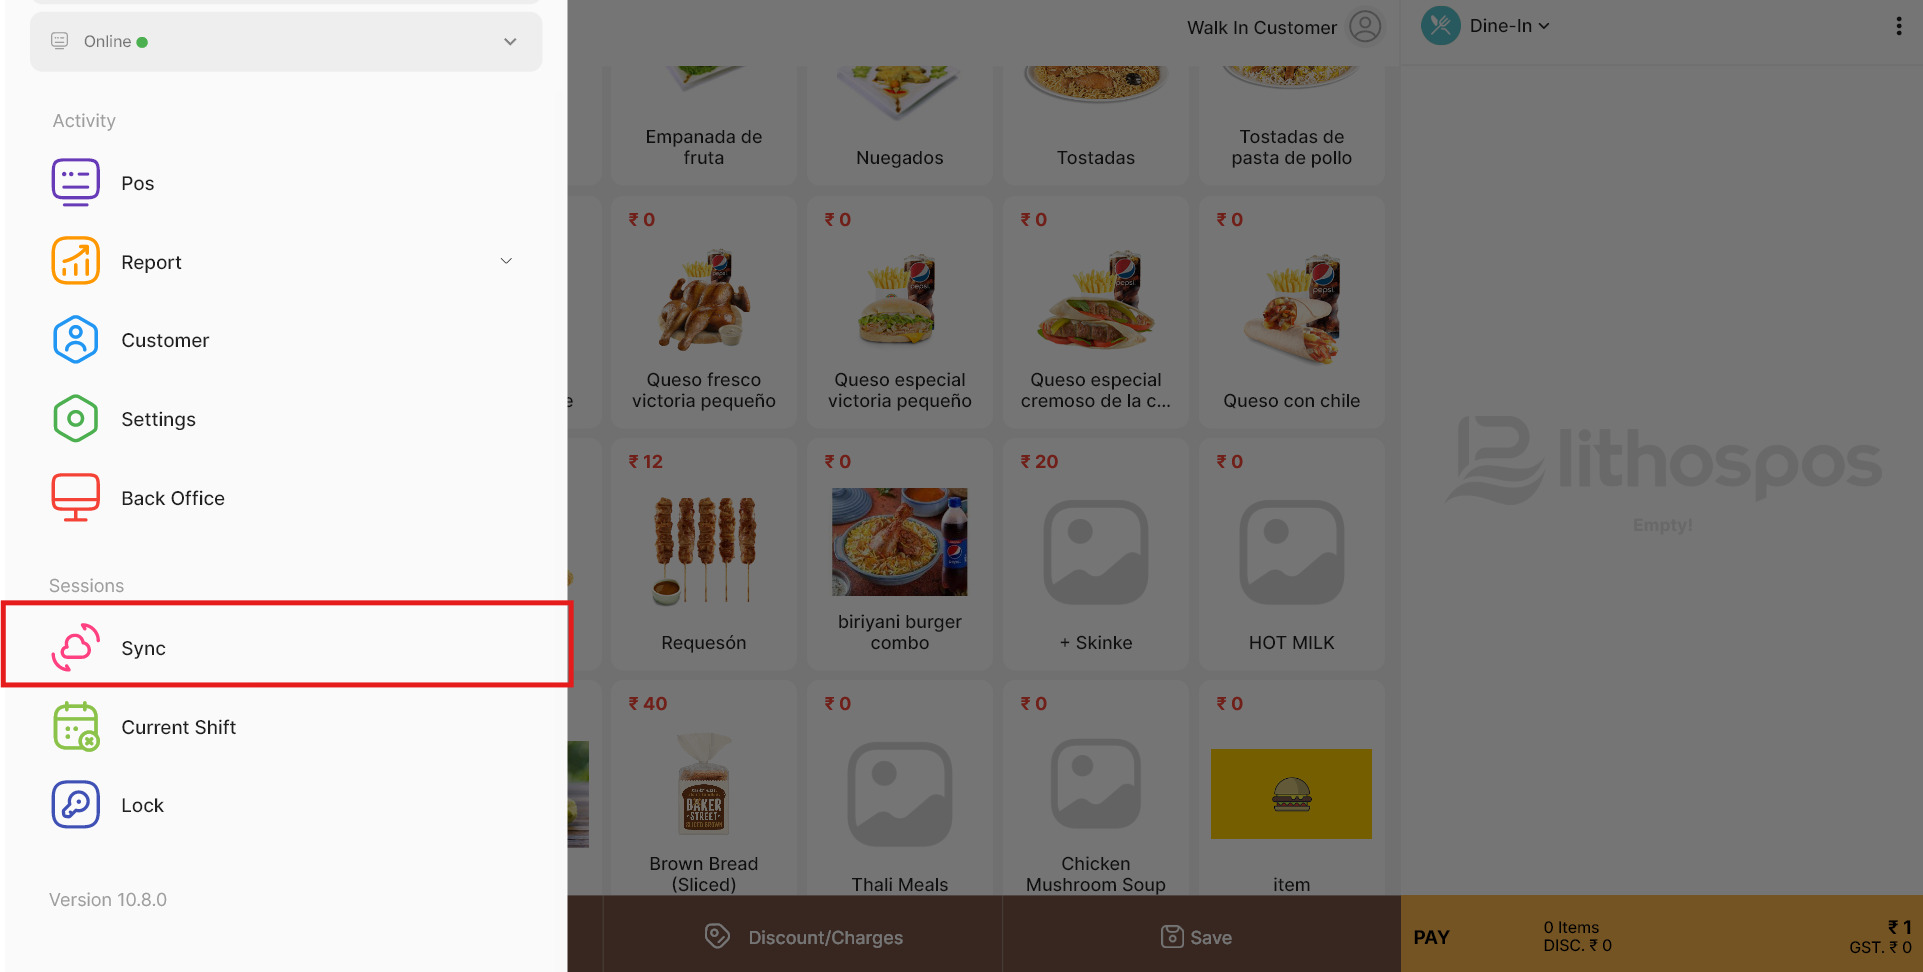
Synch:
Click on the Sync option to synchronize all POS transactions with your account, ensuring that back-office operations are updated and reflected in the POS system. -
Day Close:
To perform a day close (close the register), click the Day Close button. Enter the closing amount and any necessary notes. In the closing window, you can verify the total sales, returns, refunds, and other details. You can also print the report if needed. -
Cash Out:
This option allows you to record any cash spent or withdrawn from your store. Click on cash out then enter the amount you spend and add notes if required. -
Income:
This option allows you to record any cash added to the register from external sources. Click on Income, enter the amount added, and add any notes if required. -
Close Shift:
Click on Close Shift and count the cash balance in the drawer. Enter the amount here and add any notes if necessary. Once done, click OK and enter your PIN to complete the shift closure. -
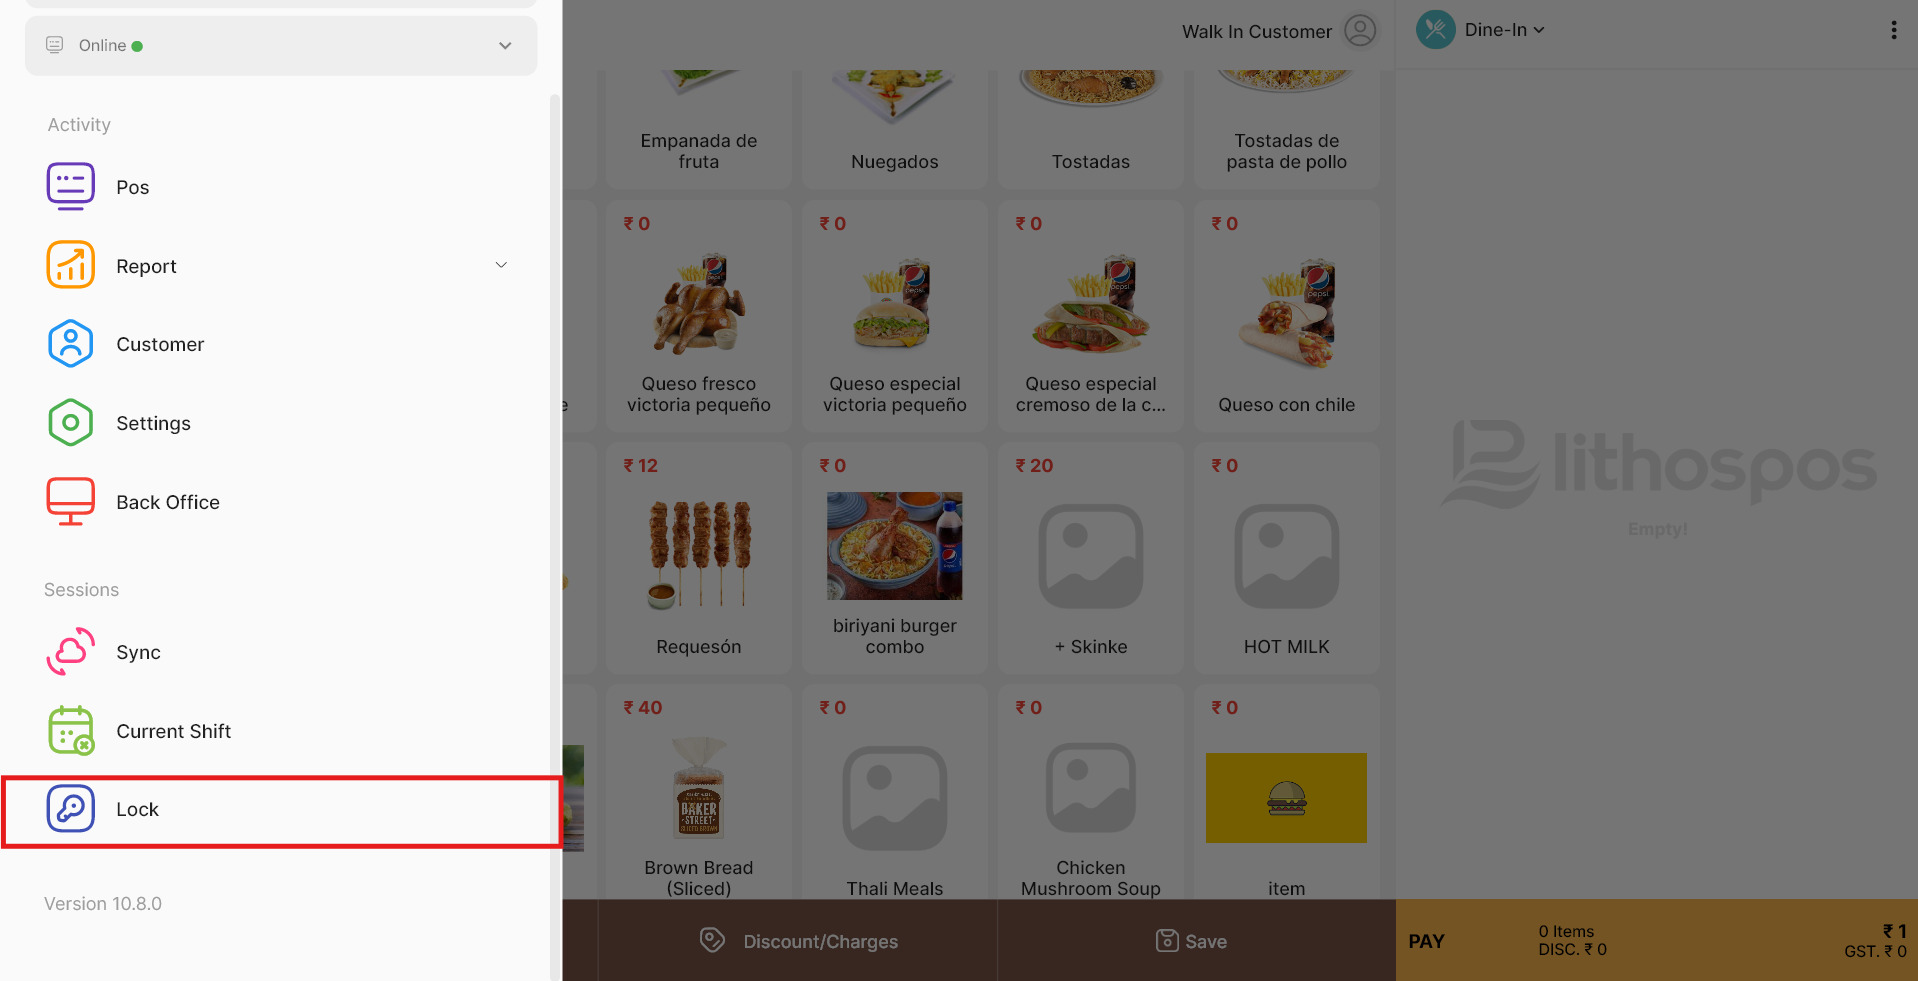
Lock POS:
The last option in POS allows you to lock the system when inactive. Simply click on it, and the system will close, prompting you to enter a 4-digit PIN to login.
POS Settings
On the left side of the screen, you’ll find the main settings menu, organized into the following categories
Printer Settings
Configure and manage printers for order and invoice printing. LithosPOS supports a variety of printer connections including Bluetooth, USB, and Wi-Fi/Network printers. Choose the connection type based on your printer type.
Accessing Printer Settings
Customer Display Configuration
LithosPOS CDS (Customer Display Screen) showcases banners, orders, QR codes for payments, and invoice details on a secondary screen connected to the POS. It also displays promotional offers and banners, even when the POS is inactive, ensuring an engaging customer experience.
KOT Server
The KOT server is used to connect the Waiter app with the LithosPOS app, allowing waiters to place orders using their smartphones. These three powerful applications work seamlessly together to enhance your service flow. Note: To access this feature, you must have a restaurant account enabled for the KOT feature.
Kitchen Display Configuration
LithosPOS KDS App is seamlessly integrated with POS. KDS (Kitchen Display System) displays orders on tablets or Android TVs in the kitchen and efficiently manages incoming orders. Note: To access this feature, you must have a Pro restaurant account.
Account Settings
Shift Settings
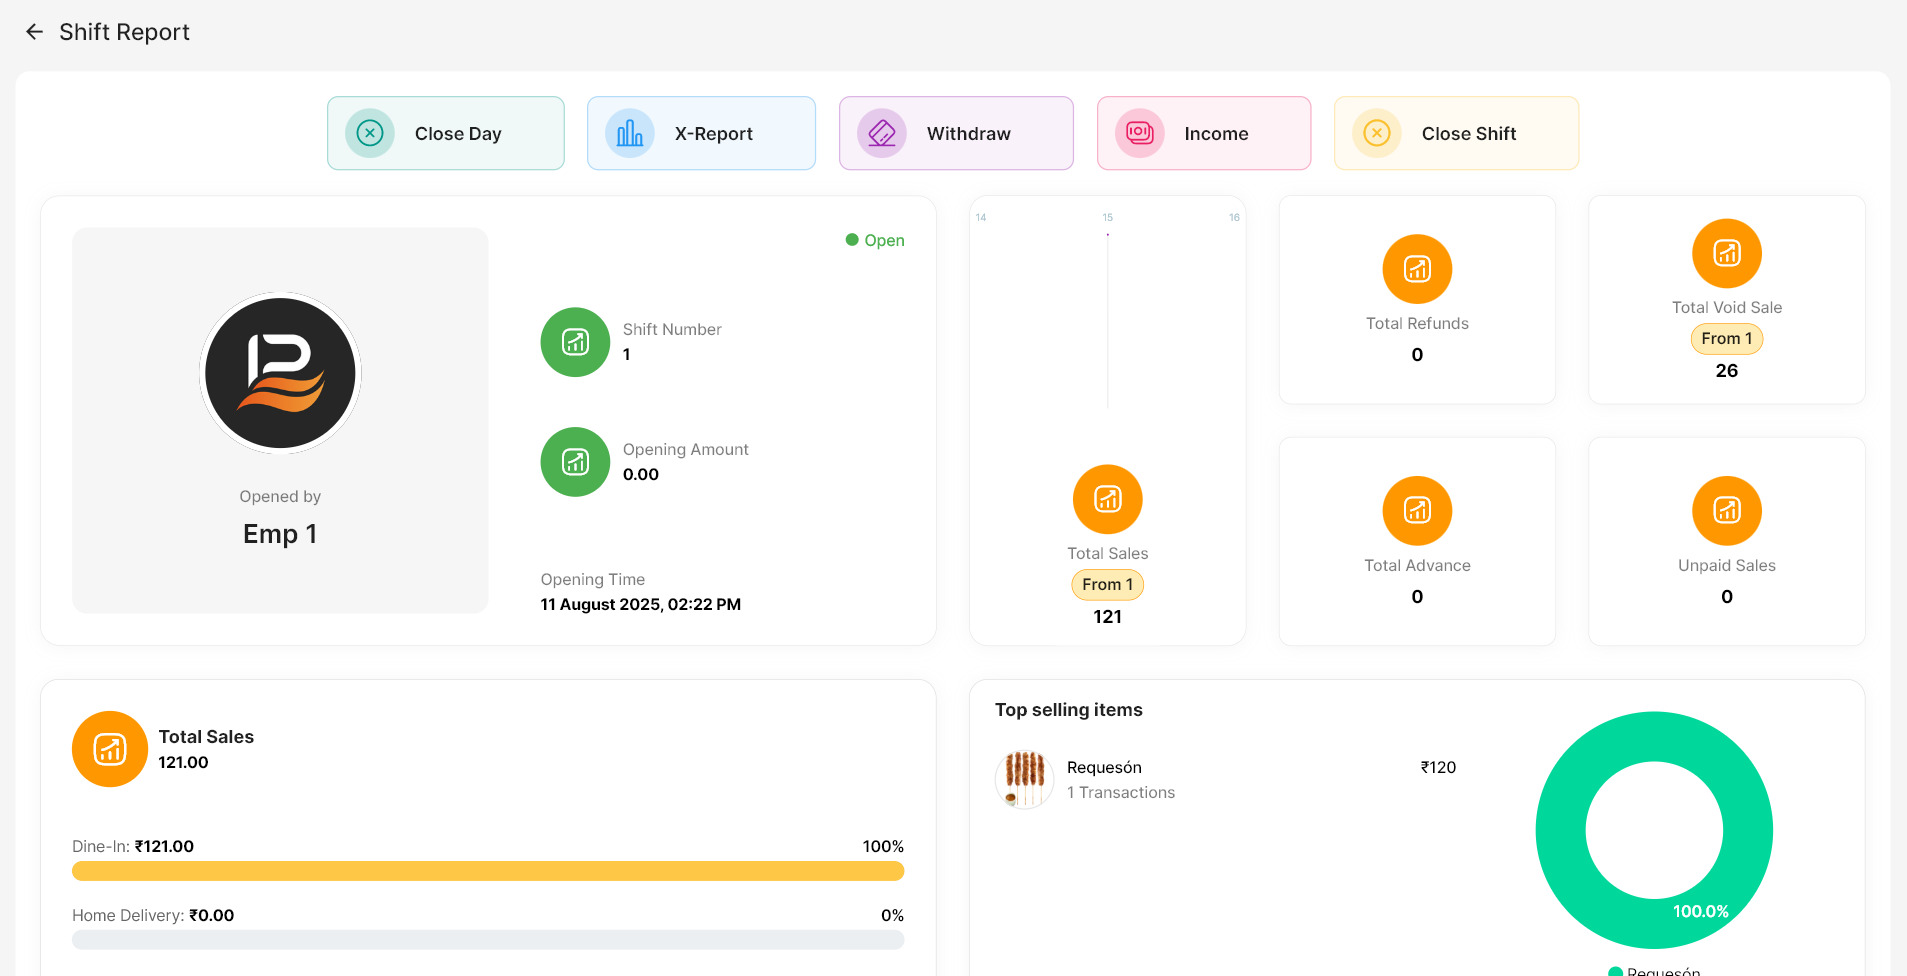
This is a mini dashboard where you can view total sales, shift and time details, sales by payment method, top-selling items, sales by category, and more.
Connect with us to know more
To learn more about it feel free to book a meeting with our team


 LithosPOS