Importing Standard Item
LithosPOS simplifies the process of adding multiple items to your inventory by allowing you to import them in bulk using a CSV file. This feature is especially useful when setting up your inventory for the first time or when you need to make bulk updates to your existing items. Iyt saves your time. Here’s how you can do it.
Importing Standard Items
-
Navigate to the Items
- Begin by navigating to the Item section in the LithosPOS side menu.
- Click on Items to access your item list.
-
Access the Import Option
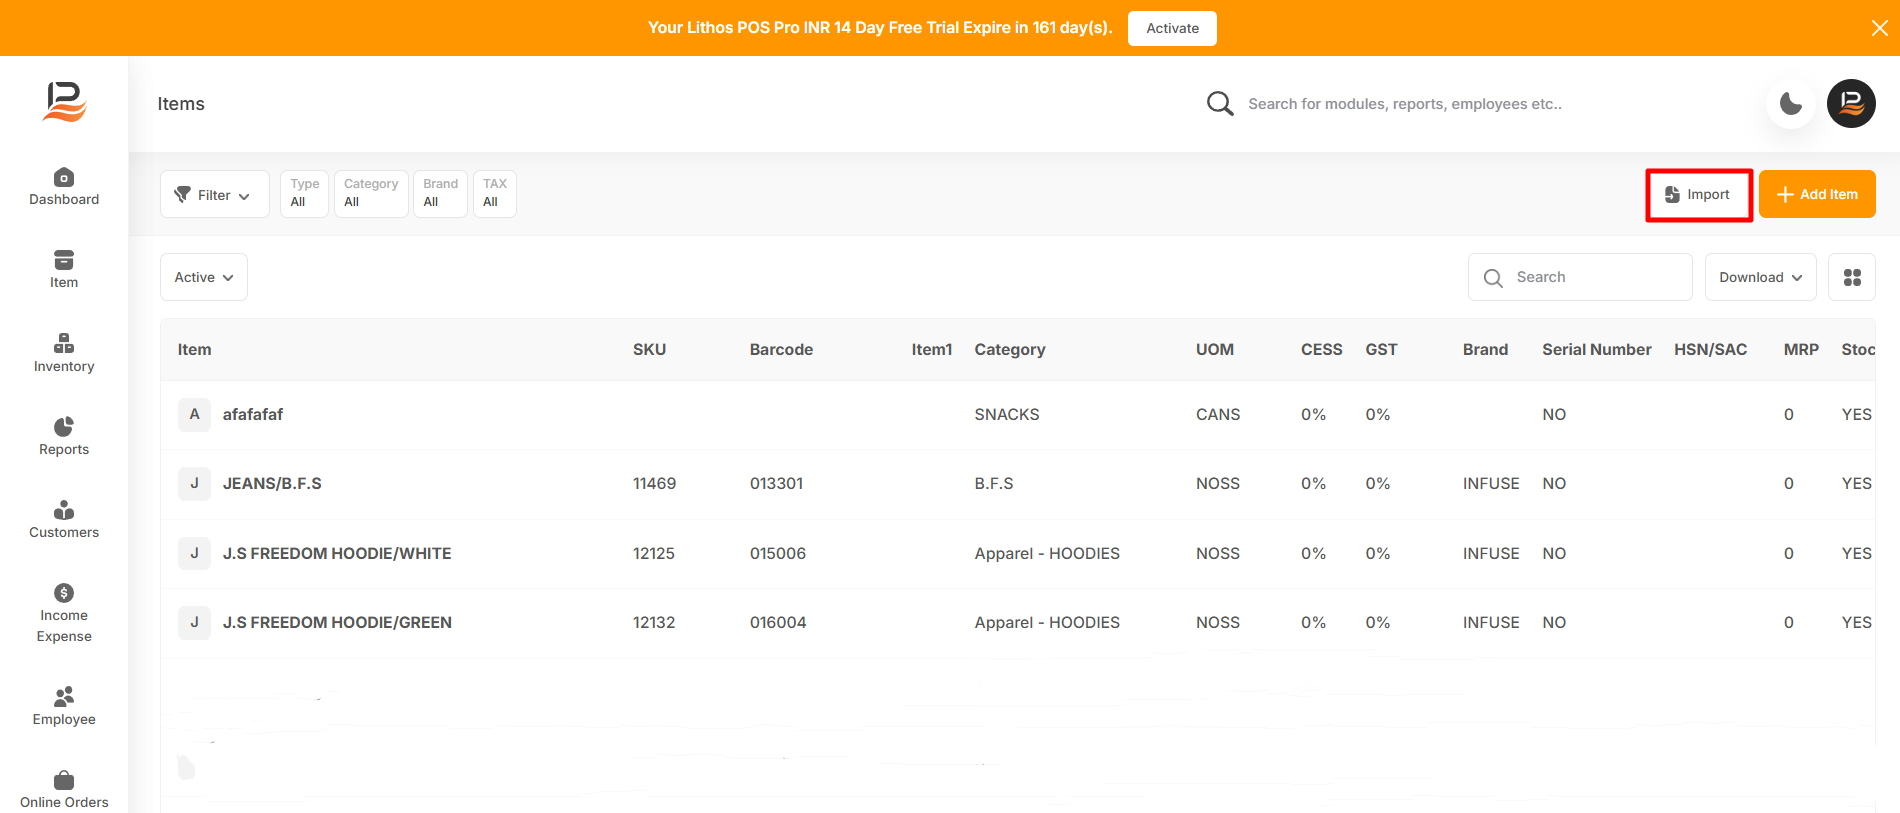
- Once you're in the item list, locate and click on the ‘Import’ button near the ‘+Add Item’ button at the top right side of the screen.
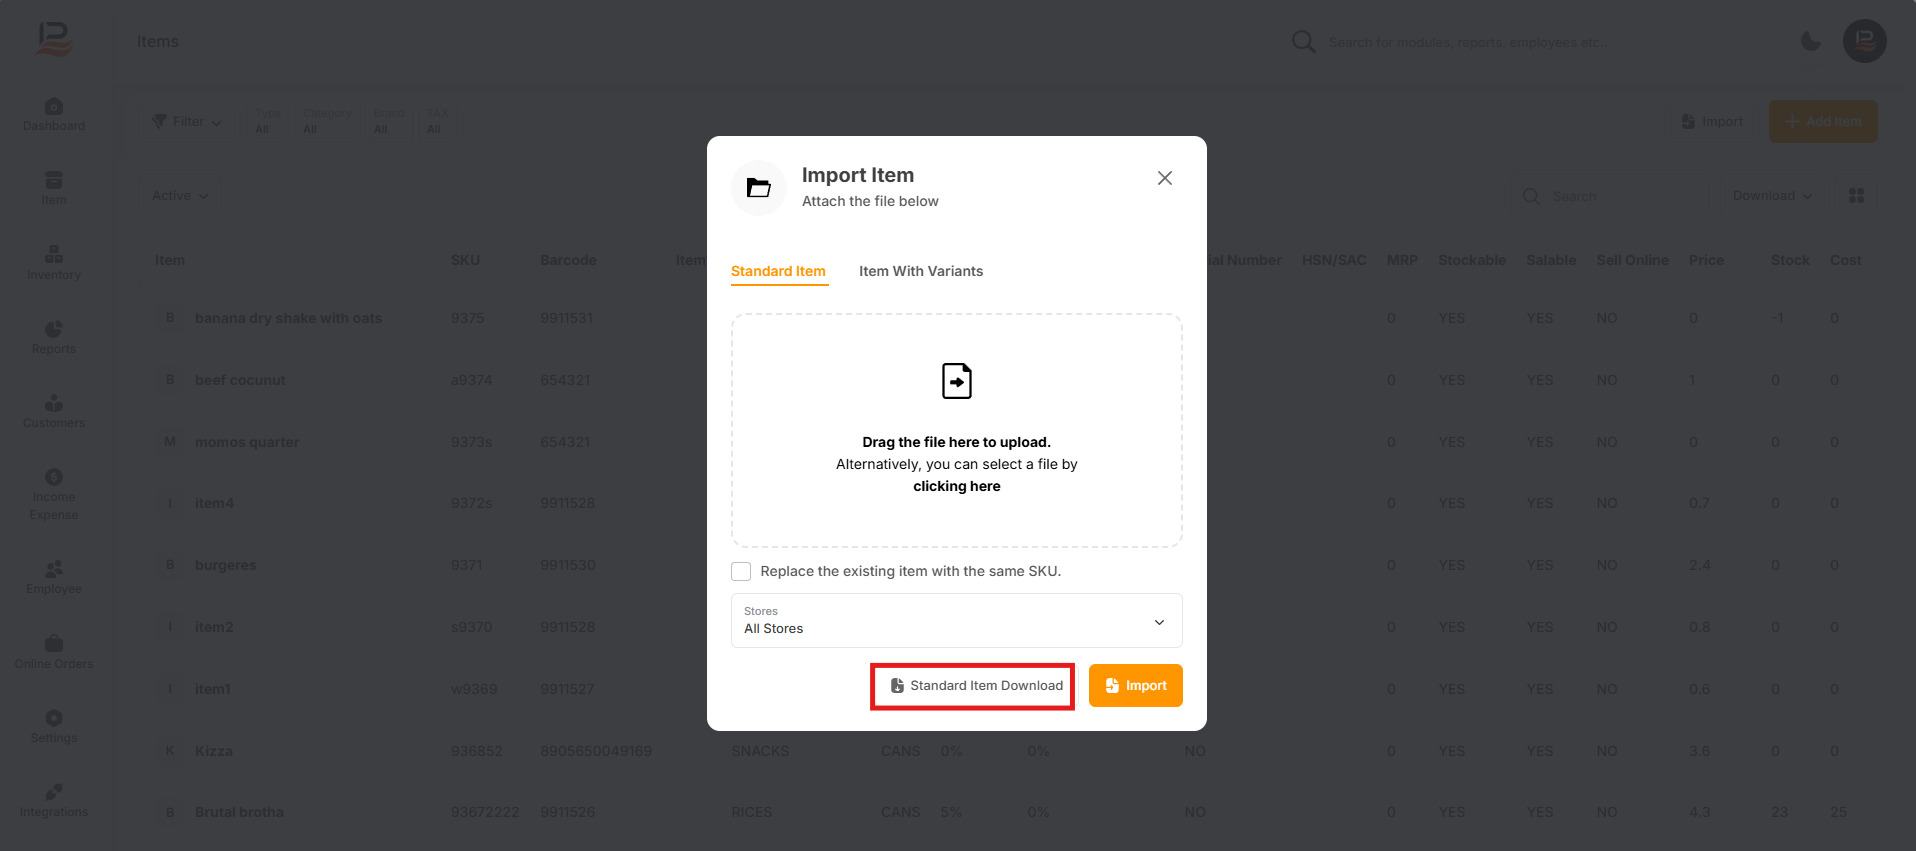
- A pop-up window will appear, giving you various item import options.
-
Download the Standard Item Import Option
- In the pop-up window, select Standard Item.
- Click on the Standard Item Download button, a CSV file template will be downloaded with sample data. Find out the file in downloads and open it.
-
Prepare the CSV File
- Open the downloaded file, which contains a template with sample data.
- Clear the existing data, except for the first row, which contains the column headers.
- Start entering your data into the template:
Barcode: Enter the barcode for each item.Item Name: Enter the name of the item (mandatory).Note:
If you don’t enter a barcode, the system will automatically generate one if the automatic barcode generation is enabled in your account.
Group Name: Specify the group or category to which the item belongs (mandatory).
Unit of Measurement (UoM): Define the unit of measurement for the item (mandatory).
Sale Rate: Enter the sale price of the item.Note:
Item name, Group, and UoM are mandatory entries.
Brand: Mention the brand of the item (optional).
Stockable: If you want to track the stock of the item, enter YES in this column.
Salable: Indicate whether the item is salable or not.
Supply Price: Enter the cost price of the item.
Tax: Mention the applicable tax if required.
-
Save and Close the CSV File
Once you’ve entered all the necessary data, save the file in CSV format and close it. -
Upload the CSV File
- Return to the item list in LithosPOS.
- Click on the ‘Import’ button near ‘+Add Items button’ again, and select Standard Item.
- Drag the CSV file into the box or click on the box to upload your saved it from the device.
- Check the box below the dotted box to replace the existing item with the same barcode in your CSV file.
- Finally, click the Import button to complete the importing process.
Note:
If you have multiple stores, select the stores where you want to add these items. If you have a single store, the store selection column will not be visible. Remember, the Opening inventory must be entered for each store individually, not across multiple stores.
-
Verify the Import
- If any items fail to import, an Excel sheet with reasons for skipped items will be automatically downloaded.
- Review the errors, correct the data, and re-upload the skipped items if necessary.
Connect with us to know more
To learn more about it feel free to book a meeting with our team


 LithosPOS
