
 LithosPOS
Store Settings
In the store settings you can see a default store based on the details you provided during the initial setup. You can open it and edit the details or configure various options to complete the store set up.
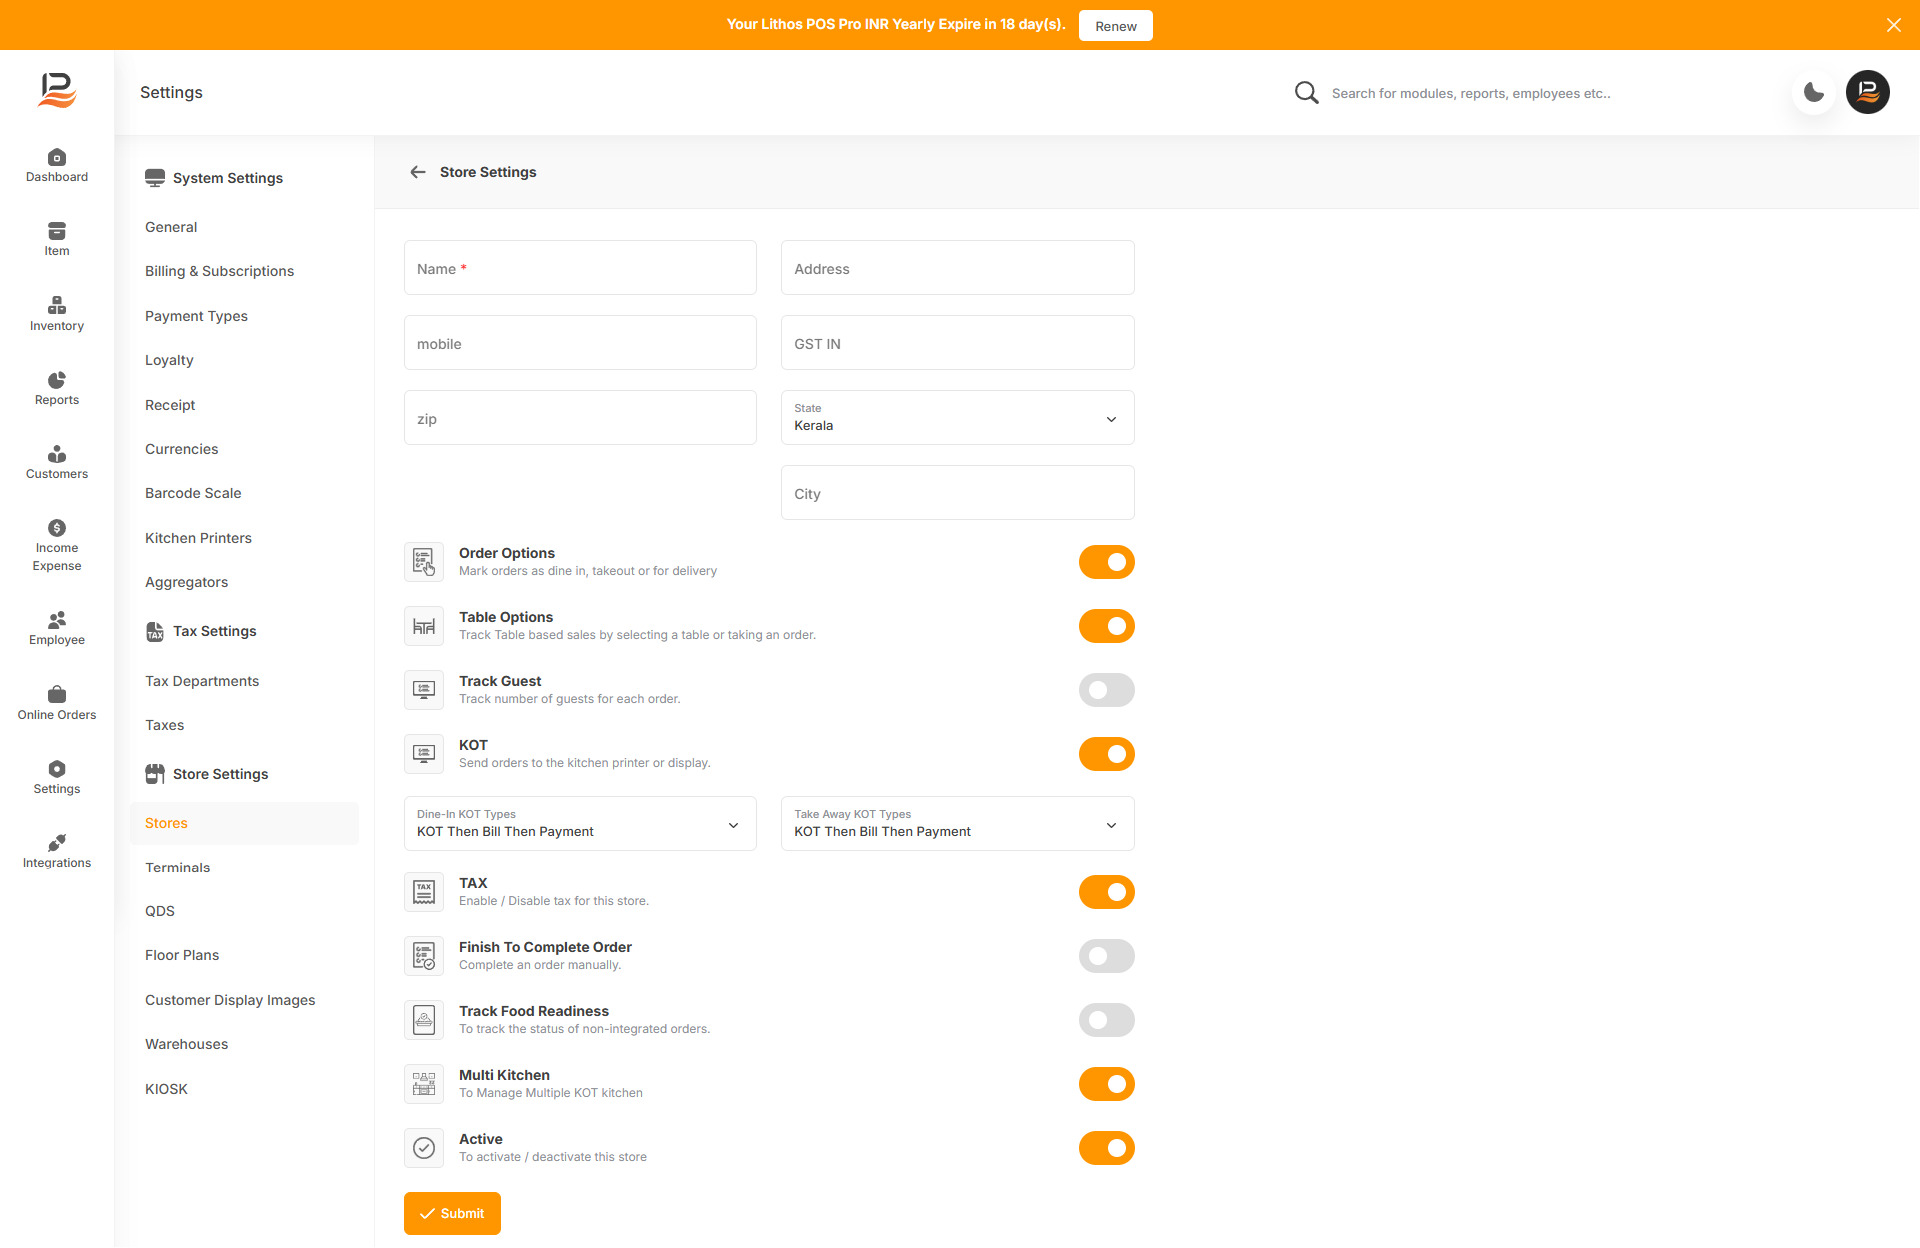
Go to settings, click 'Stores’, then
Fill in the following details
-
Store Name
Enter your store name. which will be printed on your receipt. -
Mobile Number
Enter your store’s mobile number. -
zip
Fill in the zip code. -
Address
Type your store’s address. -
TRN
Fill in the Tax Identification Number. -
State
Select the state frpm the dropdown menu. -
City
Enter your city name. -
Order option
Enable this to select different types of orders in the POS, such as Dine-in, Takeaway, and Home delivery, and to generate sales reports based on order type. -
Table options
Enable this to select different tables in the POS and to assign orders to specific tables, tracking orders table-wise. -
Track Guests
Activate this to track the number of guests dining at each table. -
KOT
"Enable this to send orders to kitchen printers. After activating KOT, configure Dine-in KOT and Take Away KOT separately. Click on the KOT type column and select the desired type.
You can configure the KOT generation in two ways:-
1. KOT Bill & Payment: KOT is generated first, then the payment window is enabled.
2. KOT After Payment: KOT is generated after making the payment.
Similarly configure the Take Away KOT as well. -
TAX
Enable or disable tax for your store -
Finish To Complete Order
Enable this to manually complete the order. -
Track Food Readiness
Enable this to track the status of your non-integrated orders -
Multi Kitchen
Enable the multi-kitchen feature in your store to route different items from a single order to specific kitchen printers. [Note: It's available only in a Pro license]- To activate Multi-Kitchen, first install it from Back Office. Go to Back Office > Integrations > Features > Multi Kitchen. Click on 'install Now'. Once installed, the Multi kitchen will be available in your account.
-
Active
Use this to activate/deactivate your store.
Then configure the toggle buttons
Finally, click submit to save your settings
Adding new stores
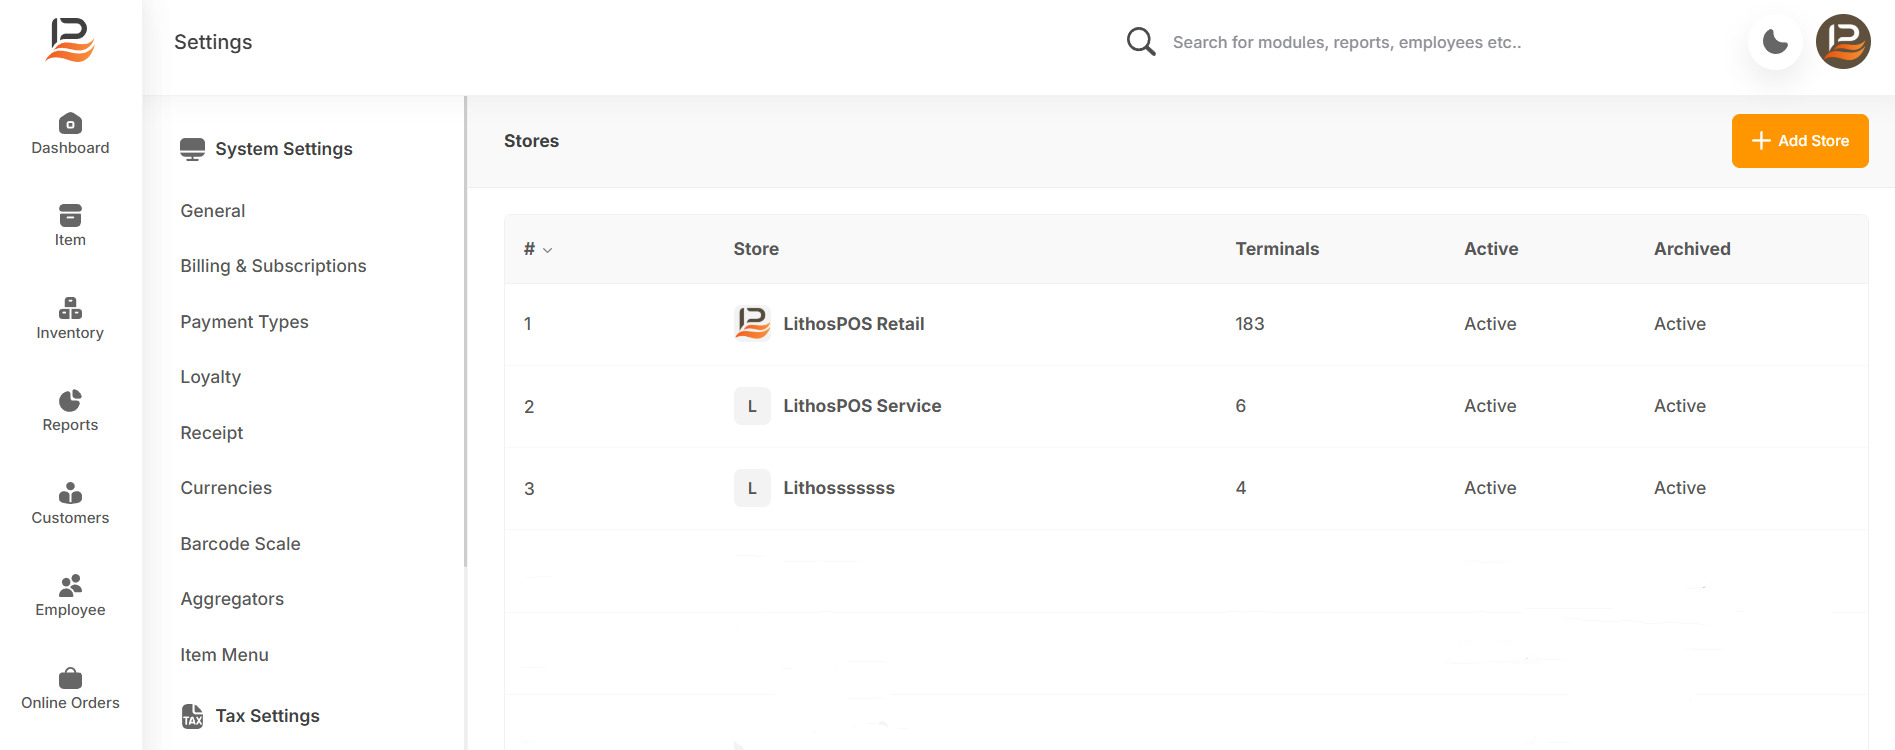
To add a new store to your account, navigate to the store settings and click the "+ Add New Store" button in the top right corner. Then, complete the setup process using the same steps as you did for your initial store.
Note:
A LithosPOS account includes one store by default. To add additional stores, you must enable the ‘Multiple Stores’ in your account. You can purchase additional stores from the billing and subscription section of settings. If it is a trial account contact our support team to add additional stores to your trial account
Connect with us to know more
To learn more about it feel free to book a meeting with our team