
Roles
To learn more about it feel free to book a meeting with our team
Updated
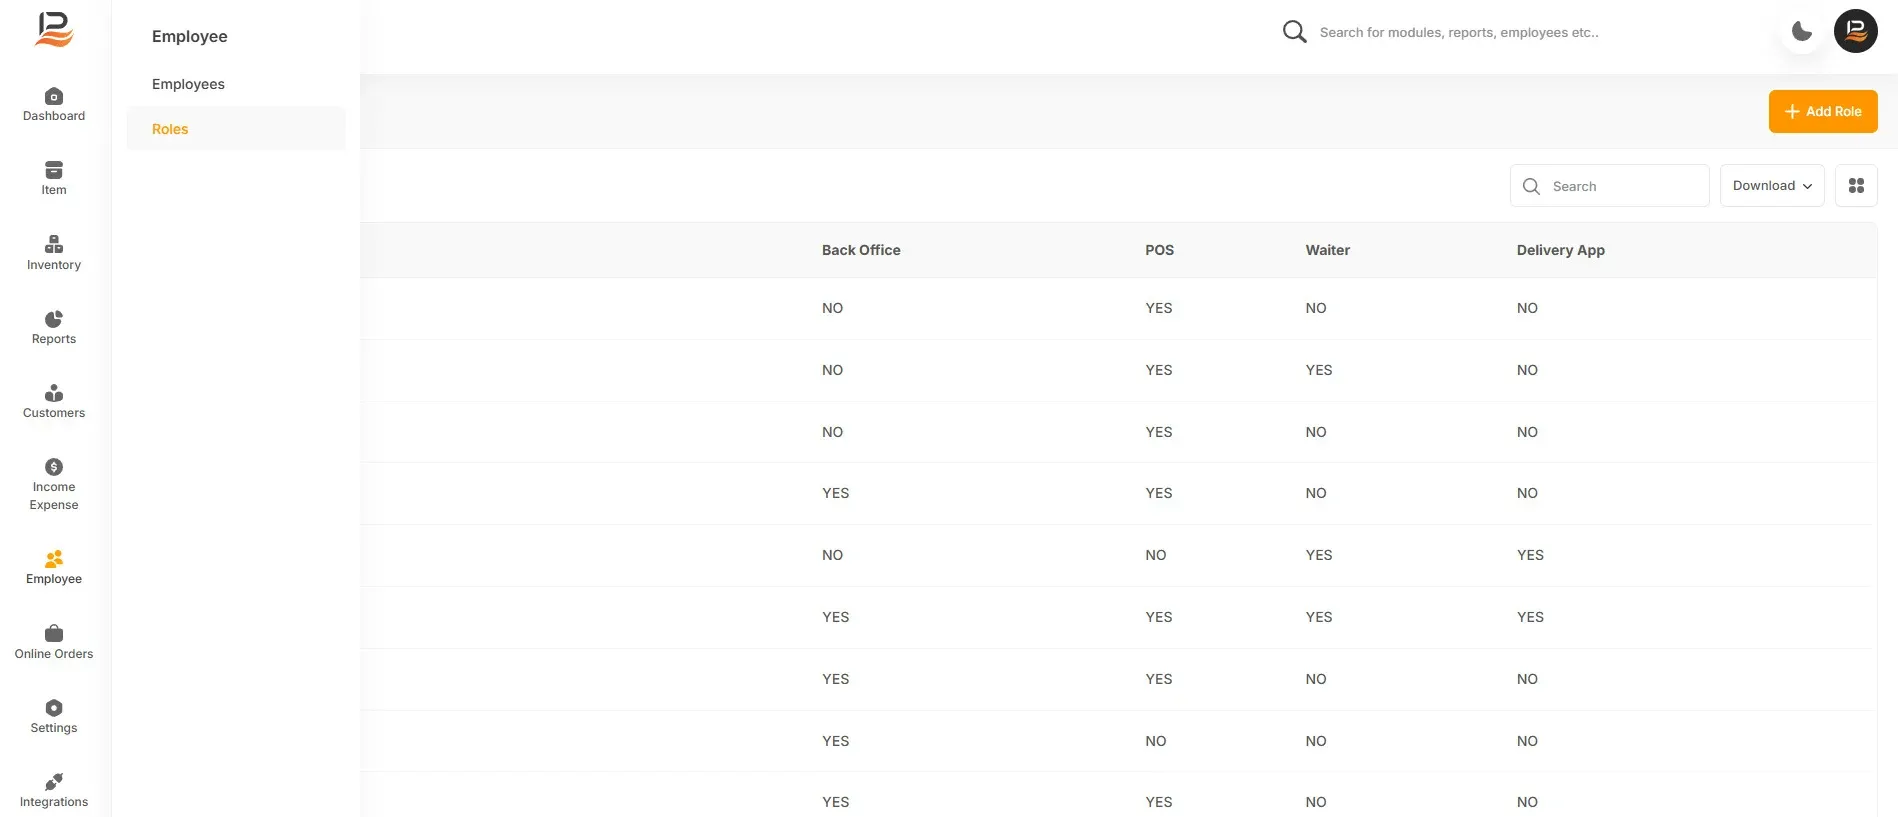
- Navigate to Roles: In the side menu, click on Employees and click "Roles."
- Add a New Role: Click the "Add Role" button.
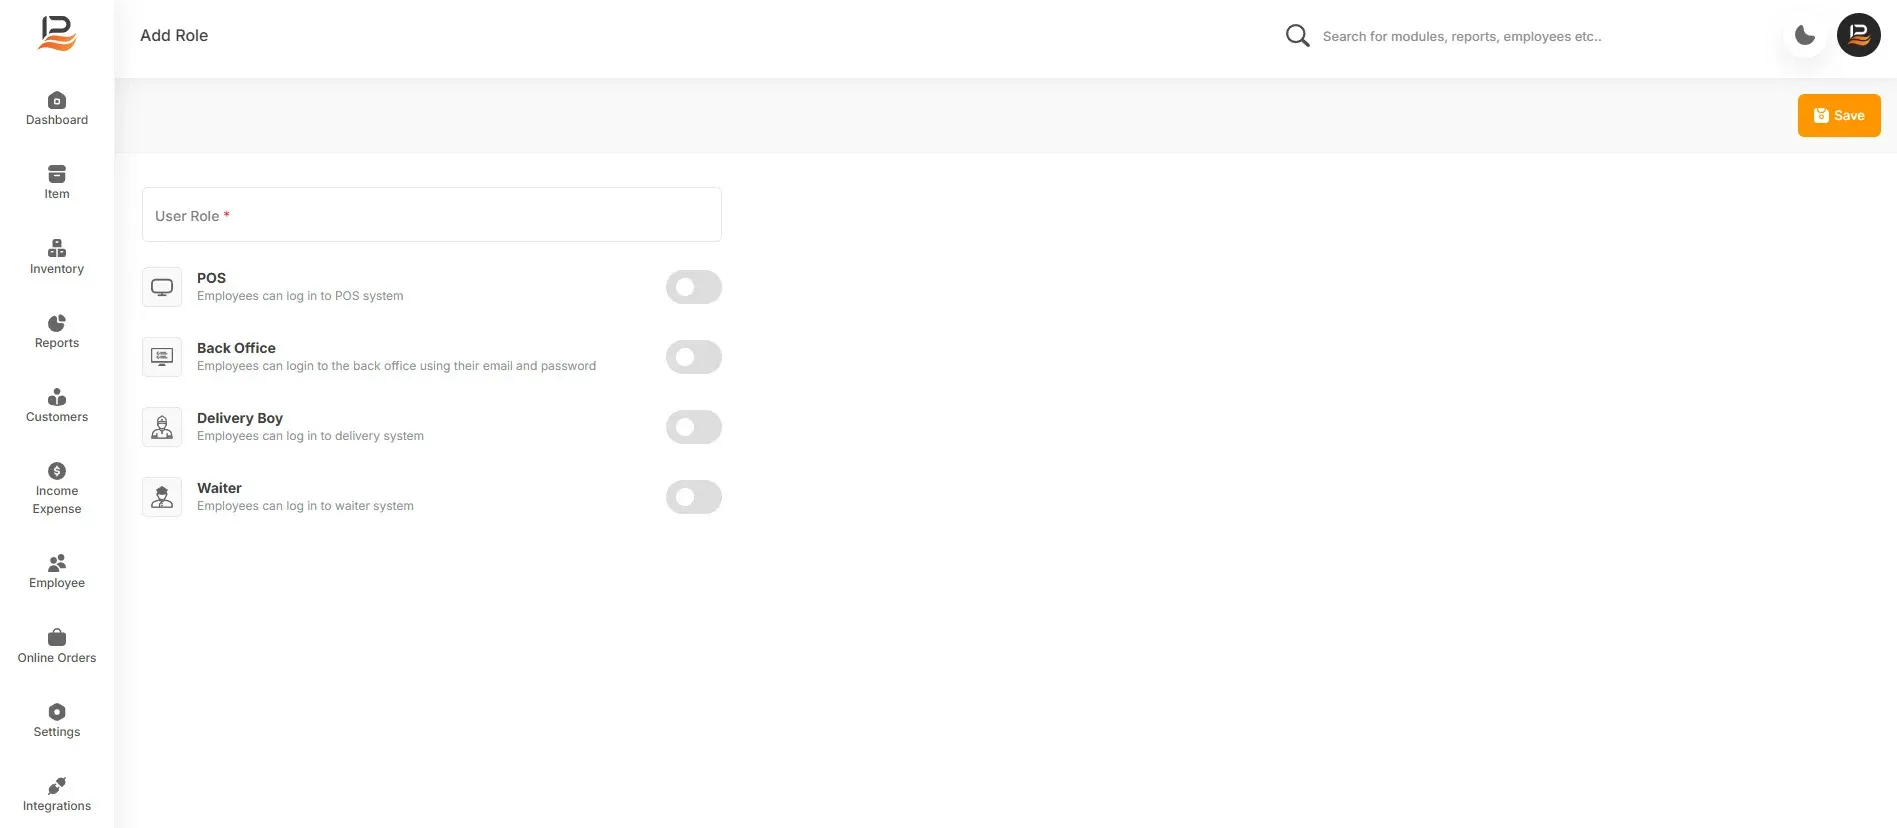
- Name the Role: Give the role a descriptive name (e.g., "Waiter," "Cashier," "Manager").
Set Permissions
-
POS Access: Determine which features the role can access within the POS
system (e.g., sales, refunds, payments).
-
Back Office Access: Define the level of access to back-office functions
(e.g., inventory management, reports).
-
Delivery App Access: Enable access to the delivery app if applicable.
- Waiter App Access: Enable access to the waiter app with specific permissions.
- Save: Click "Save" to create the new role.
Assigning Roles to Employees
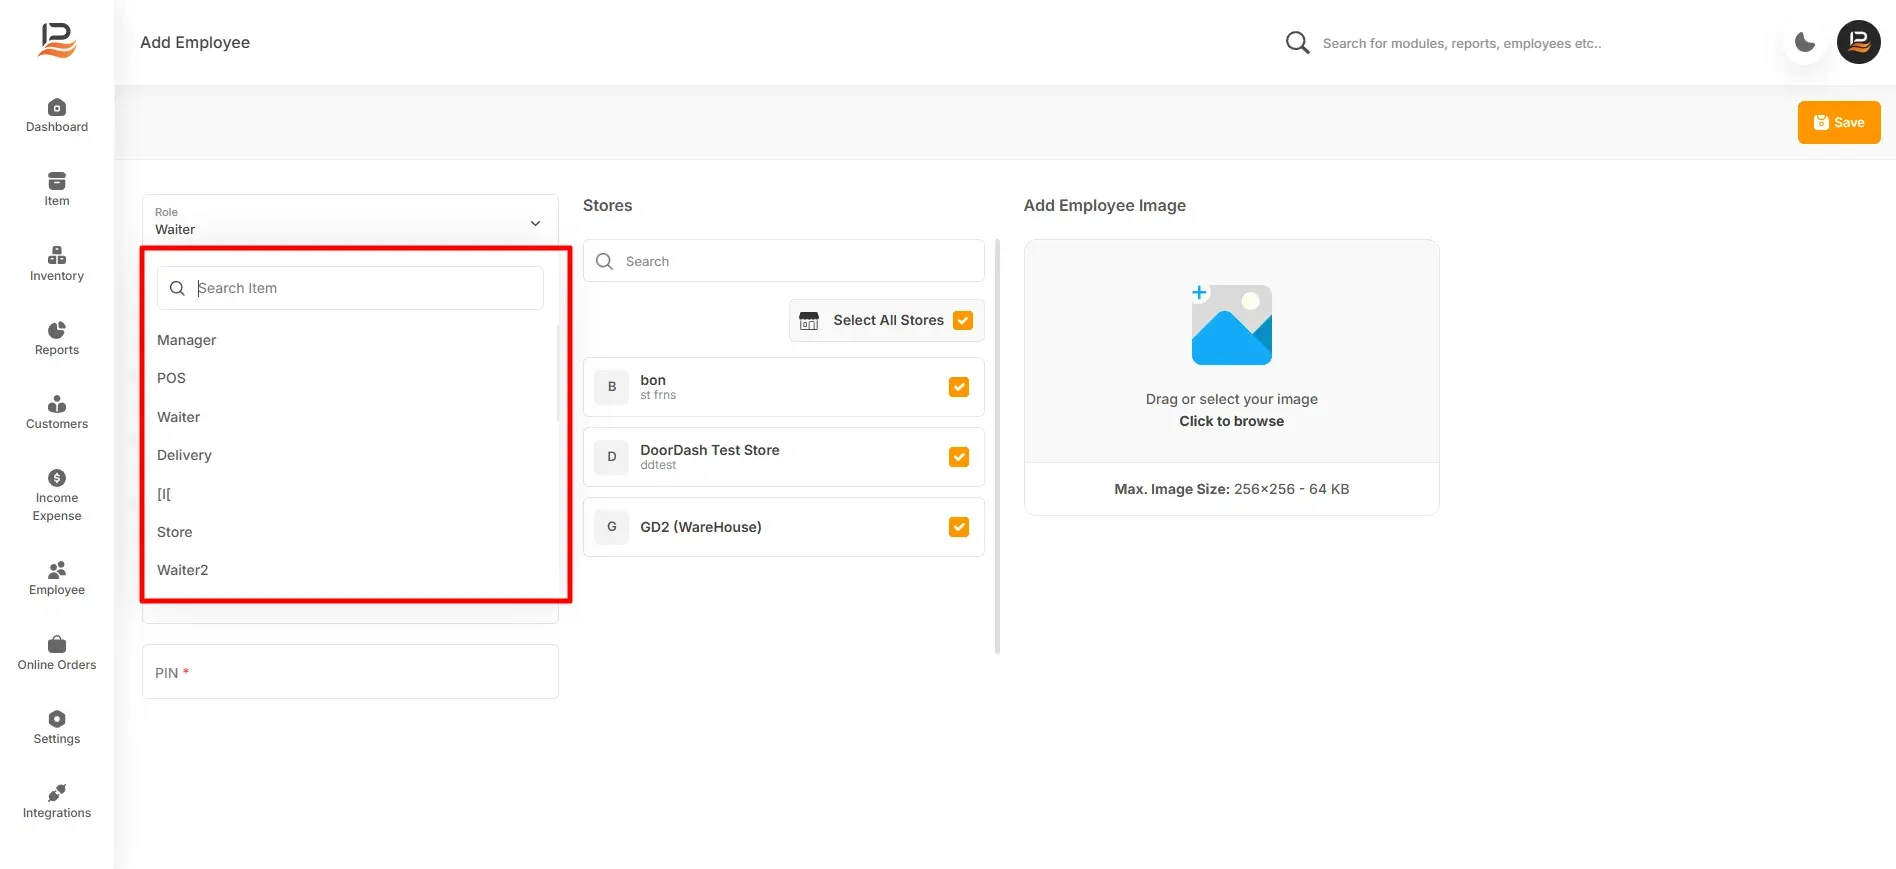
- Navigate to Employees: In the side menu, click on "Employees."
- Select an Employee: Click on the employee's name.
- Assign Role: Choose the appropriate role from the dropdown list.
- Save: Click "Save" to assign the role.
Managing Employee Access
- Modify Roles: To change the permissions for a role, edit the role and adjust its settings.
- Deactivate Employees: If an employee is no longer active, you can deactivate their account.
- Reset Passwords: If an employee forgets their password, you can reset it.
Connect with us to know more
To learn more about it feel free to book a meeting with our team
Was this article helpful?