
Stores and Terminals
STORES
Here, you can see a default store based on the details you provided during the initial setup. You can open it and edit the details or configure various options.
Adding a new store:-
Note:
To add a new store in the back office, you must enable the ‘Multiple Stores’ in your account. You can purchase additional stores from the billing and subscription section of settings. If it is a trial account contact our support team to add additional stores to your trial account.
>Go to settings and click 'Stores’, then click ‘+Add New Store’ on the top right.
>Fill in the following details, which will be printed on your receipt.
Store Name: Enter your store name.
Mobile Number: Enter your store's mobile number.
ZIP: Fill in the ZIP code
Address: Type your store address.
TRN: Give your TAX Identification Number.
City: Enter your city name
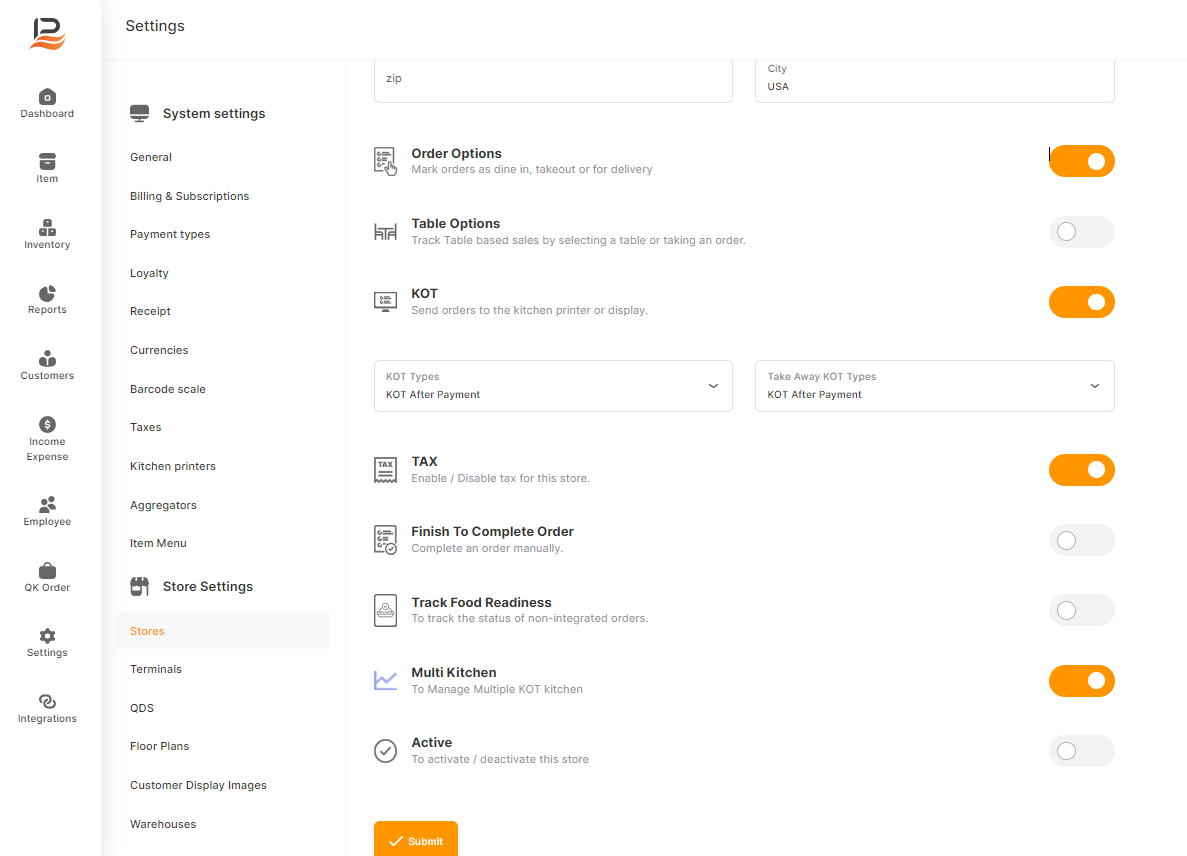
Then configure the toggle buttons:-
Order Option: Enable this to select different types of orders in the POS, such as Dine-in, Takeaway, and Home delivery, and to generate sales reports based on order type.
Table Options: Enable this to select different tables in the POS and to assign orders to specific tables, tracking orders table-wise.
Track Guests: Activate this to track the number of guests dining at each table.
KOT: Enable this to send orders to kitchen printers. After activating KOT, configure Dine-in KOT and Take Away KOT separately. Click on the KOT type column and select the desired type.
You can configure the generation of KOT in two ways:
KOT Bill & Payment: KOT is generated first, then the payment window is enabled.
KOT After Payment: KOT is generated after making the payment. Similarly configure the Take Away KOT as well.
Tax: Enable or disable tax for your store
Finish To Complete Order: Enable this to manually complete the order.
Track Food Readiness: Enable this to track the status of your non-integrated orders
Address: Type your store address.
Multi Kitchen: Enable the multi-kitchen feature in your store to route different items from a single order to specific kitchen printers. [Note: It's available only in a Pro license]
Active: Use this to activate/deactivate your store
Finally, click submit to save your settings
TERMINALS
>Go to settings and click on the Terminals
Here, you can see a default terminal based on the details you provided during the initial setup. You can open it and edit the details or configure various options.
Note:
To add a new store in the back office, you must enable the ‘Multiple Stores’ in your account. You can purchase additional stores from the billing and subscription section of settings. If it is a trial account contact our support team to add additional stores to your trial account.
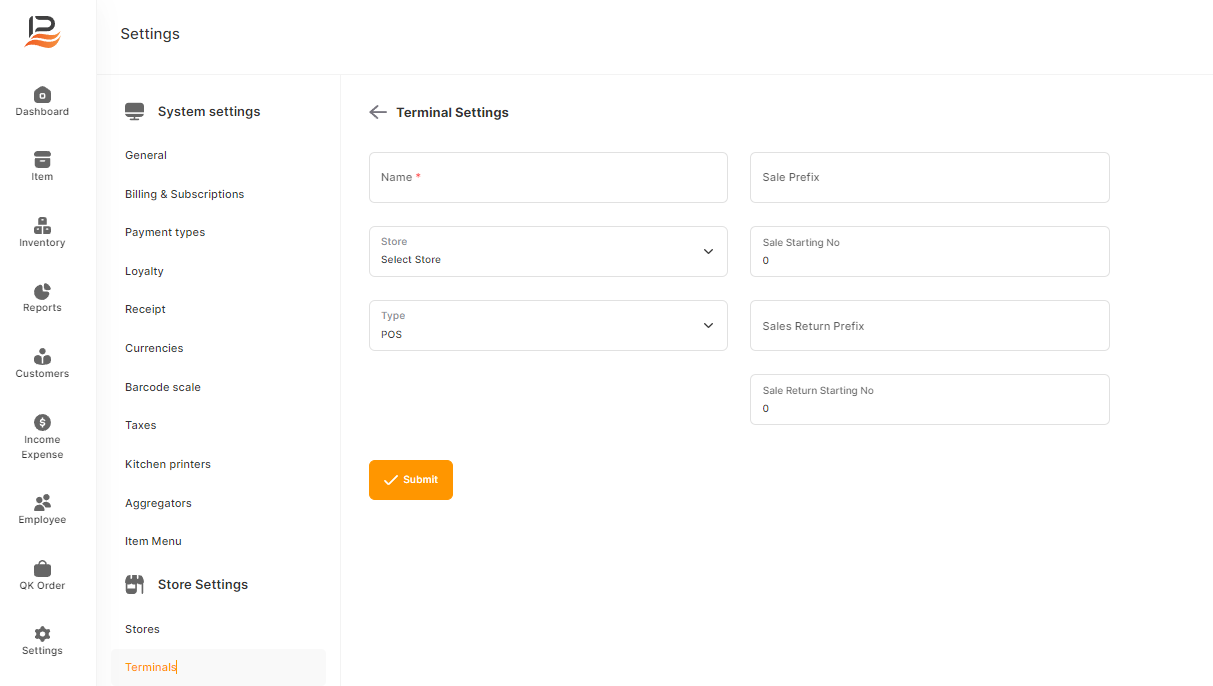
Adding a new Terminal:-
> Click on the ‘+Add terminal’ button and fill in the details.
> Give a terminal name.
> Select the store to which this terminal belongs
> Enter a Sales prefix letter. [Maximum 10 letters]
> Enter a starting number for the invoice. This will be the initial invoice number for your terminal.
> Similarly enter a starting number for the sales return.
> Finally, click the Submit to save the terminal.
QDS (Queue Display System)
QDS is one of our supporting apps to manage queues and streamline takeaway and delivery It displays incoming orders on a screen and tracks their progress through preparation to delivery.
To set up the QDS:
> Go to settings and navigate to QDS.
> Then click on the + Add QDS to add a new QDS with your POS.
> Enter a QDS name and select the store.
> Then choose the type of your QDS
There are two types of QDS:-
Master: The first type is 'Master'. It is kept at an order collection counter. Orders received in the Master can be managed, and delivered orders can be marked in this type.
Client: The second type is 'Client'. It is usually displayed on a large screen. It's solely for displaying orders placed and completed on a screen.
> Then enter a counter name or number.
> Finally, click submit to save the QDS.
Floor Plans
A floor plan in a restaurant is the arrangement of tables, seating, and area/floor
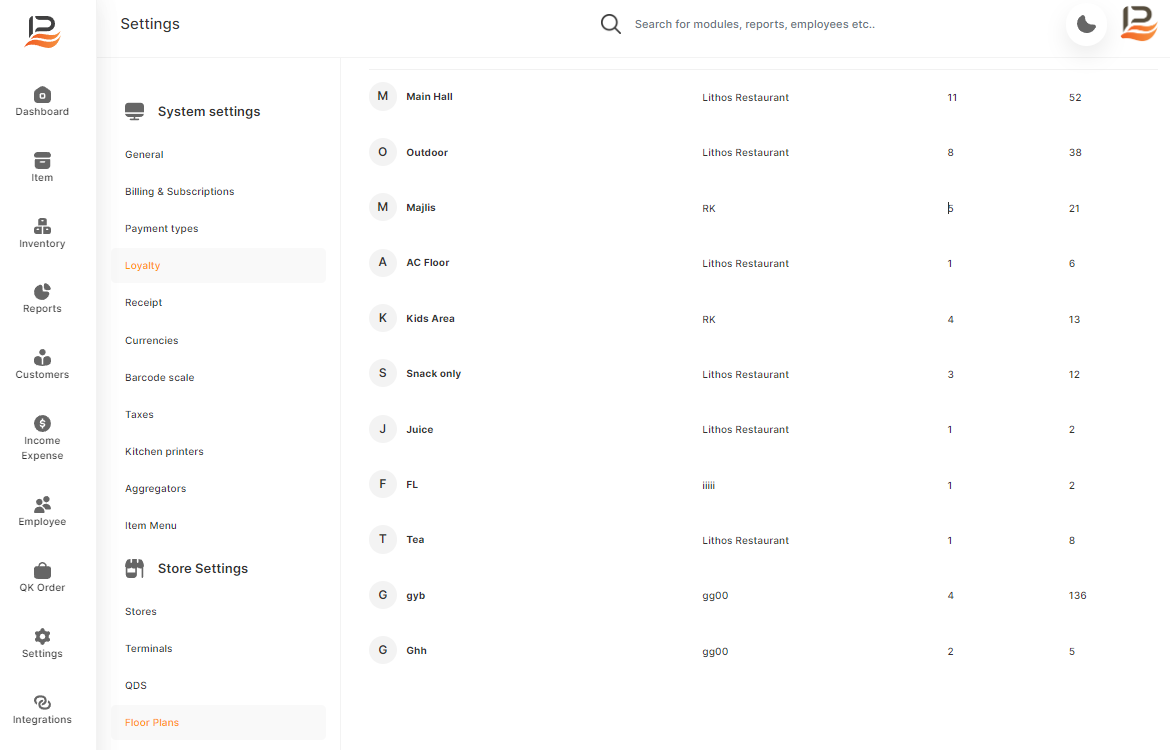
> Go to settings in the back office and navigate to the Floor Plans.
> Click on the ‘+Add Floor Plans’ then enter the Floor/Area/Hall name in the Sessions column.
> Select your store
> Just click outside any box to add the next table.
> Similarly, Add all the tables and click submit to save the Floor Plan.
Notes: You can open the saved floor plans and edit/deactivate any tables
Customer Display Image
Customize your customer-facing POS display by adding item images or featuring special offers.

> Go to settings and click on the ‘Customer Display Image’
>Choose the Store you want to display this image
> Then click on the Upload image button
> To upload an image, drag or select a file that does not exceed the size of 500 KB. [Image dimensions: 1920x1080]
> After uploading the image click submit.
>Note:- To delete an image you've added to your store, click on Settings, then navigate to 'Customer Display Image'. Select the store name to view the added images. Click on the close icon on the image, and then click 'OK' to confirm deletion.
Warehouse
Set up and manage your warehouse to streamline the purchase, inventory management, and efficient stock control

> Go to the back office settings and navigate to ‘Warehouse’.
>Click on the ‘+Add Warehouses’
> Enter a name
> Fill in the address
> Select the store to which this warehouse belongs
>Finally, Click submit